You can use Zapier to automatically update an existing lead in Boxly or create a new one if the lead doesn’t already exist. This keeps your conversations clean, avoids duplicates, and ensures your leads stay up to date with the latest information.
This is especially helpful when you use calendar tools like Calendly for bookings. Instead of creating a new lead for every appointment, you can update the existing conversation in Boxly with the booking details.
When a lead books a consultation:
Boxly will search for a match using their email or phone number.
If the lead is found, their existing record will be updated
If no match is found, a new lead will be created using the information you’ve mapped

You receive a new lead through your website. Boxly sends them a thank you message with a Calendly link to book a consultation.
When the customer books:
The Zap finds the lead using their email or phone number
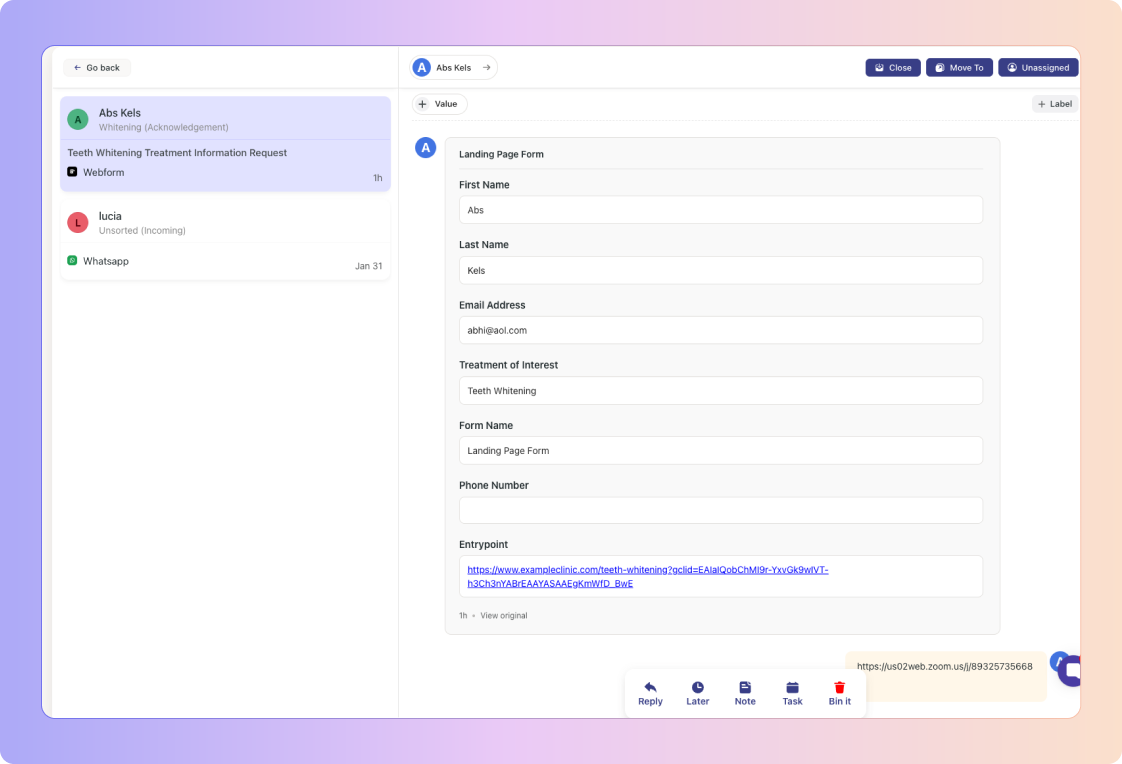
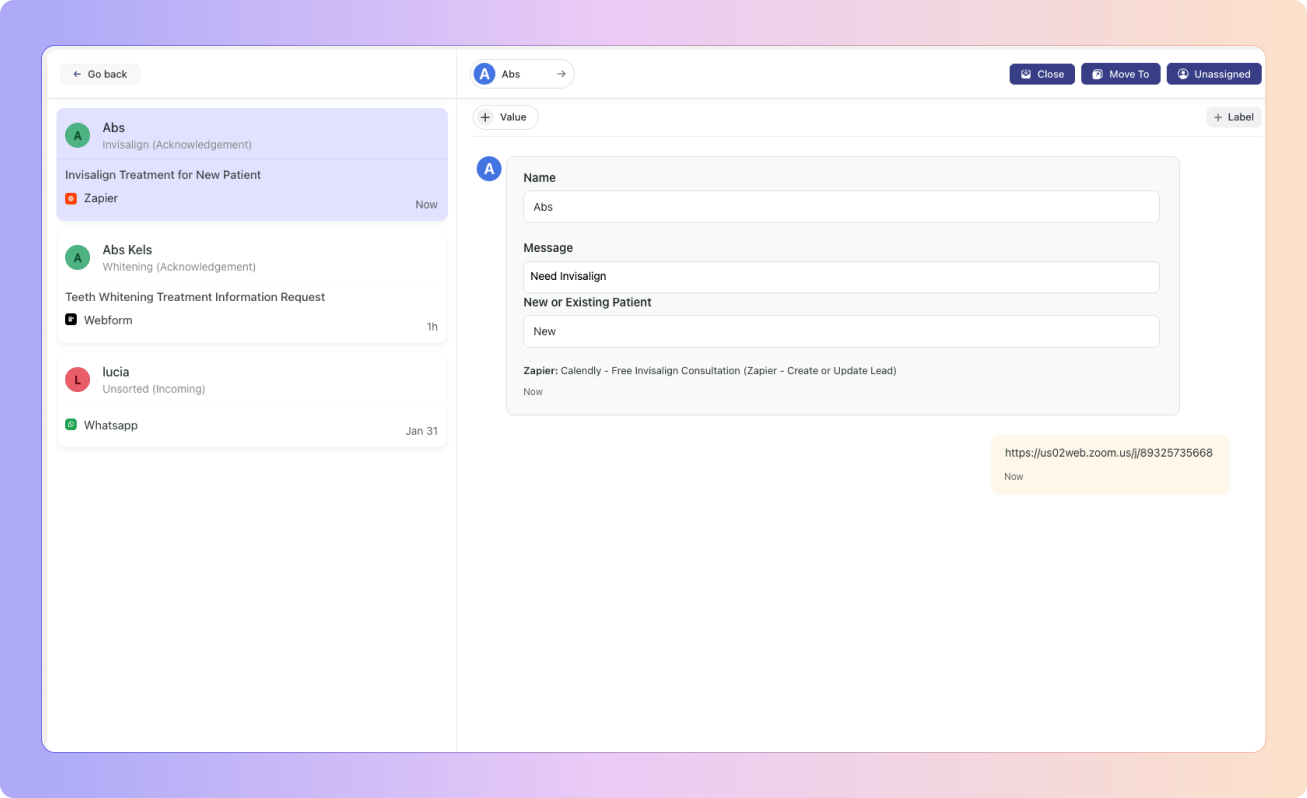
Their booking time and message are added to their original lead card in Boxly
Optionally, the lead is moved to a new stage (e.g. “Consultation Booked”)
We’ll use Calendly as the example, but these steps work with any app that’s available in Zapier.
Log in to your Zapier account and click “Create Zap”.
In the Trigger section, search for and select Calendly.
Choose the trigger event “Invitee Created”.
Connect your Calendly account if you haven’t already.
Select the calendar you want to use (e.g. “Invisalign Free Consultation”).
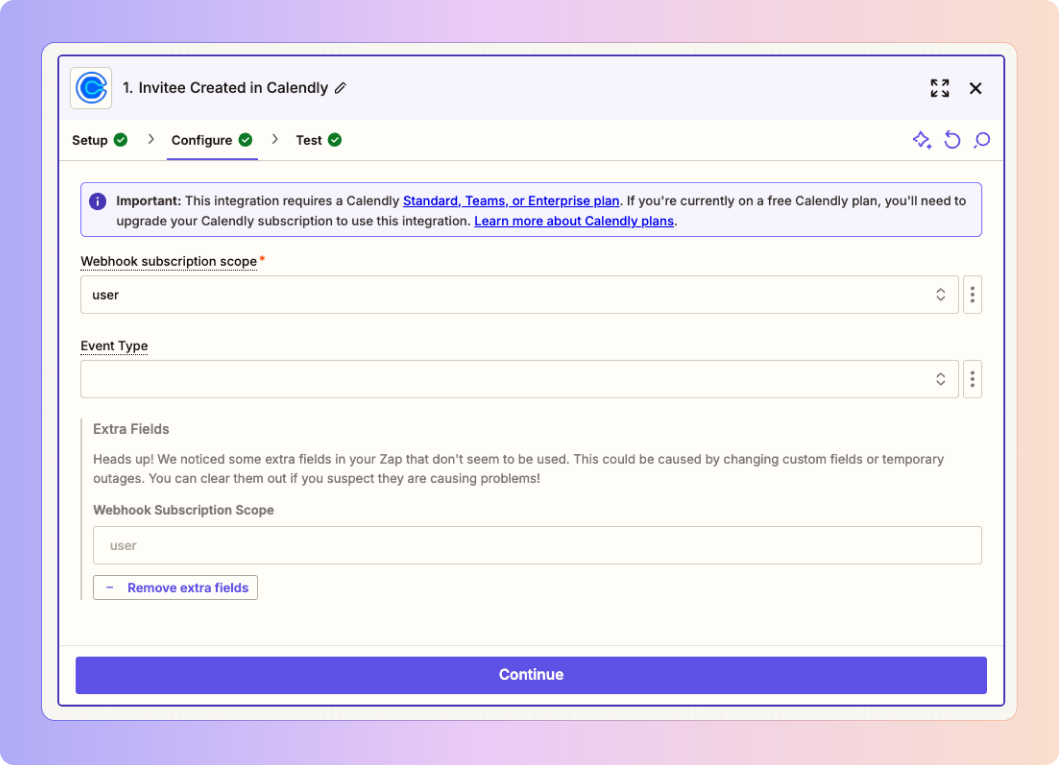
Click Test Trigger to fetch a recent booking. This test data will help you map fields in the next step.
For the Action, search for EnquiryBox (Boxly).
Choose the action “Create or Update Lead”.
Connect your Boxly account (email must be in all lowercase letters).
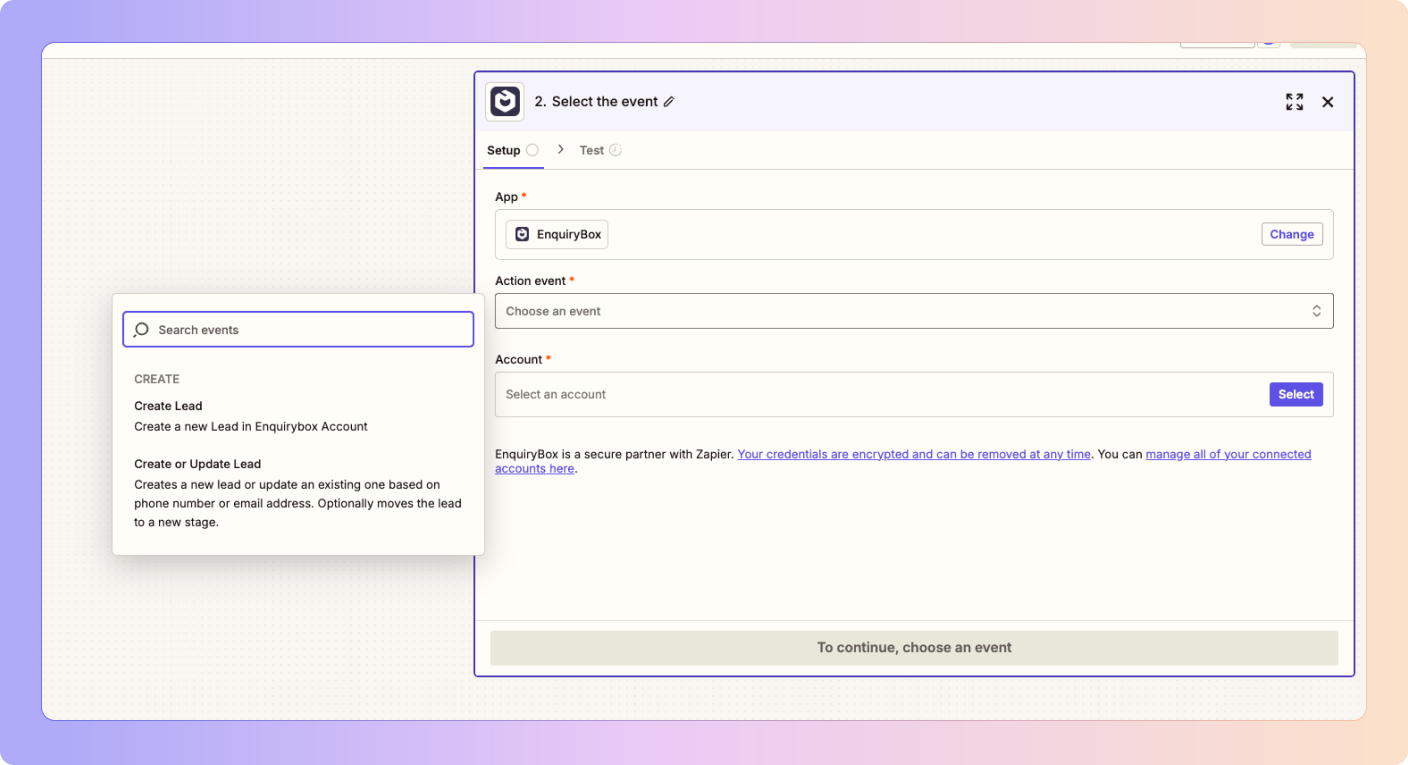
Once connected, you’ll see the full configuration screen, where you set up everything in one place:
Fill in the Following:
Zap Name
Choose a name like “Calendly – Free Invisalign Consultation”. This name will appear in the lead’s timeline in Boxly so you can see where the update came from.
Search Lead by Email or Phone Number
Use the customer’s email or phone number from Calendly to search for the existing lead.
Message
This text appears as a message in the conversation. You can map a Calendly question like “What would you like to discuss?” into this field.
Notes
Add anything else here, such as the calendar link, time, or location of the appointment.
Custom Fields
You will also see custom question fields you’ve added in Boxly (e.g. Gender, Date of Birth, NHS or Private Patient). You can fill these with any relevant data.
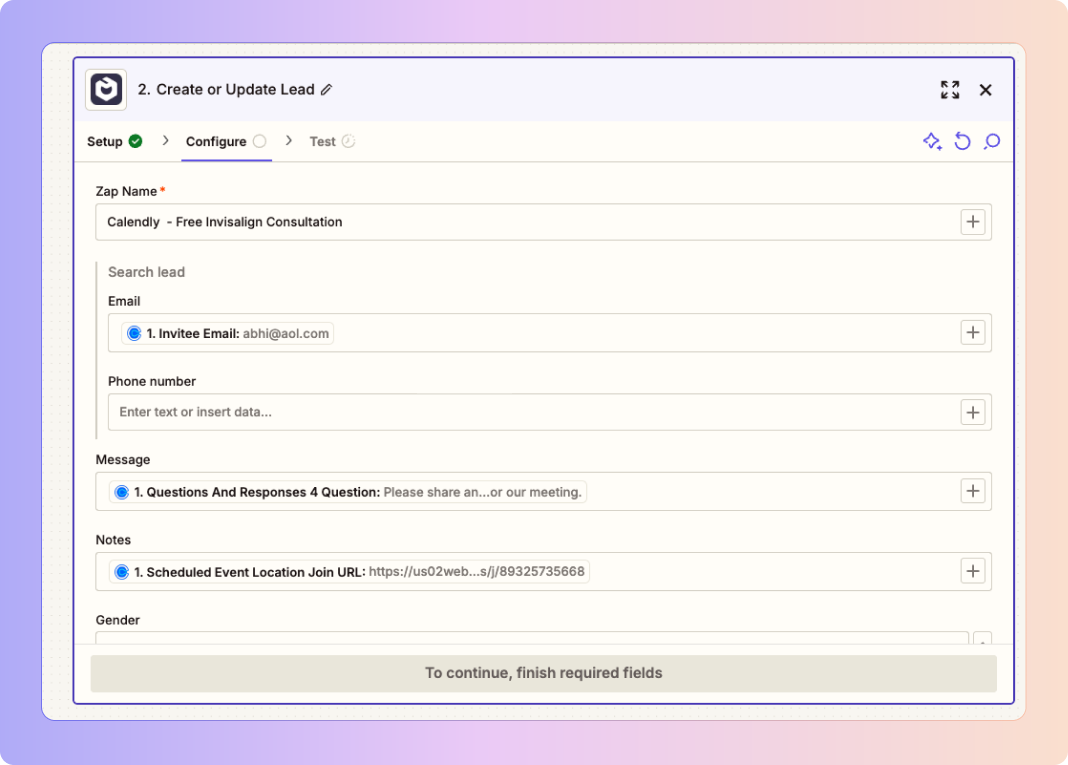
Click Continue when you're finished mapping everything.
If you know which Box and Stage the lead belongs in, you can set that too.
For example:
If the Calendly booking is for a free Invisalign consultation
You can set the Box to Invisalign
And the Stage to Consultation Booked
This automatically moves the lead to the correct place in your pipeline.
Their information will be updated
The new message or note will be added to the conversation
You can optionally move them to a new stage or box
A new lead will be created automatically
The details will be pulled from:
The fields you've filled in under "Create Lead"
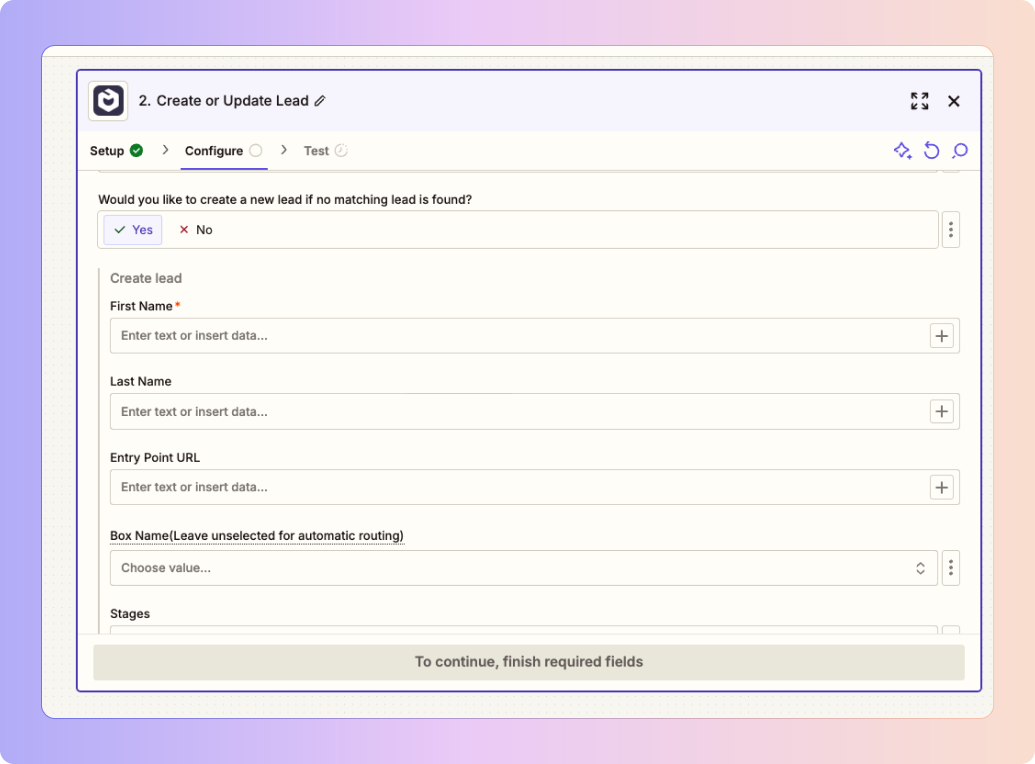
And the same fields you've mapped earlier, such as email, message, notes, and custom fields
This is mostly used for webform submissions, but it can be helpful for bookings too.
Paste the URL of the page where the booking was made. For example:
A landing page
An ad
Your website’s contact page
Boxly will use this to help identify if the lead came from a paid ad, your site, or another source.
If you leave the Box and Stage empty:
Boxly’s AI will read the Message field
It will automatically assign the lead to the right box and stage based on the content
Once everything is set:
Click Continue
Test the Zap to make sure it works
Click Turn on Zap
You’re done!
Leads will be updated automatically when a booking comes in
Messages and notes appear in the conversation thread
You'll see the Zap name in the lead’s History so you know where the update came from
New leads will be created only if no match is found