Boxly integrates easily with your existing Gravity Forms on your WordPress website; there’s no need to replace anything. Using webform forwarding, you can automatically send every form submission directly into Boxly, where it gets tracked, organised, and followed up with.
Webform forwarding lets Boxly receive form submissions (like enquiries or bookings) via a special forwarding email address, unique to your account, so when someone fills out a form on your site, their details are automatically passed to Boxly.
How does this help you?
✅ A lead is instantly created in your Box
✅ Automatic tagging and tracking
✅ Instant follow-up using your automations (like email or WhatsApp)
What You’ll Need
A live Gravity Form embedded on your website
Access to your WordPress dashboard
Your unique Boxly forwarding email address (we’ll provide this)
This email forwarding address is how Gravity Forms knows where to send form submissions to.
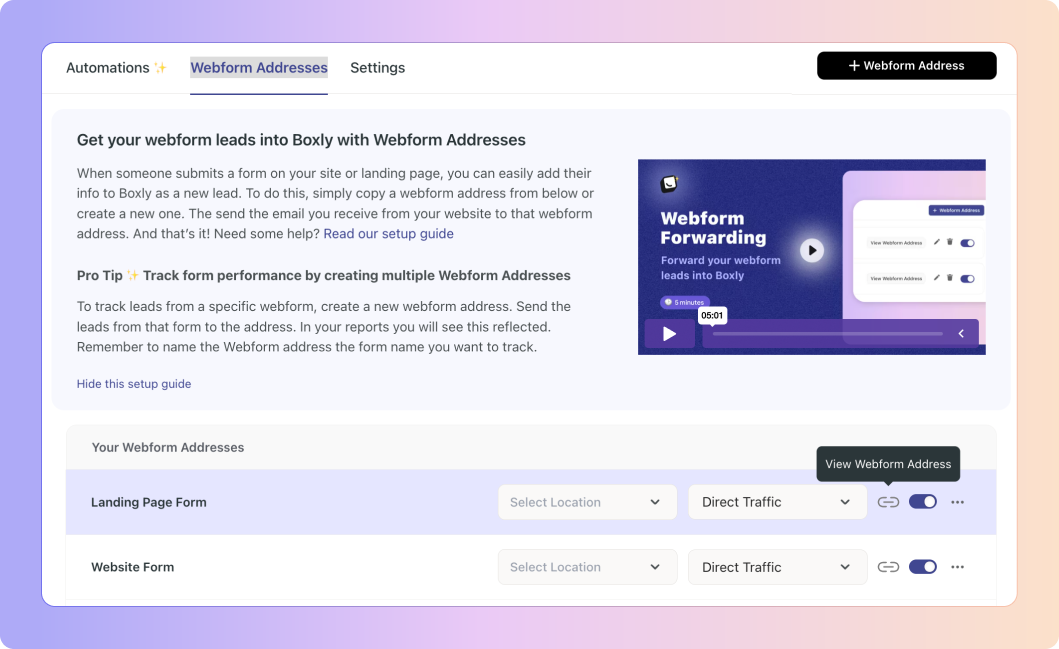
✅ Go to your Channels > Webforms > Webform Addresses to find your webform forwarding addresses.
✅ Select on the webform you want to to forward directly into Boxly and click on the “View Webform Address” icon like below (Next to the toggle button).
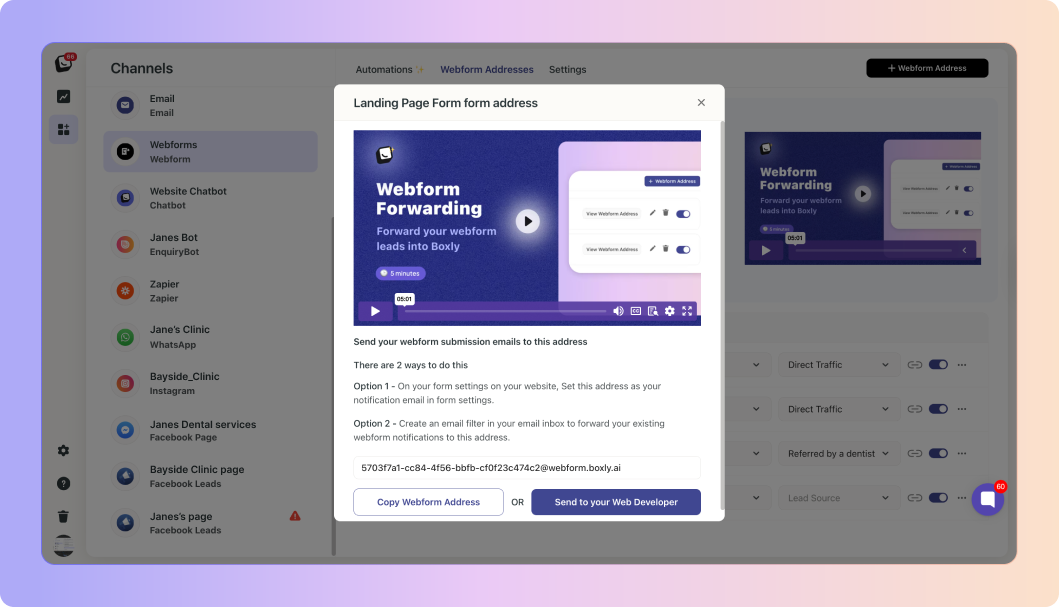
✅ Click, “Copy Webform Address”, if you have IT support, then click “Send to your web developer”.
✅ Go to your Gravity Forms dashboard
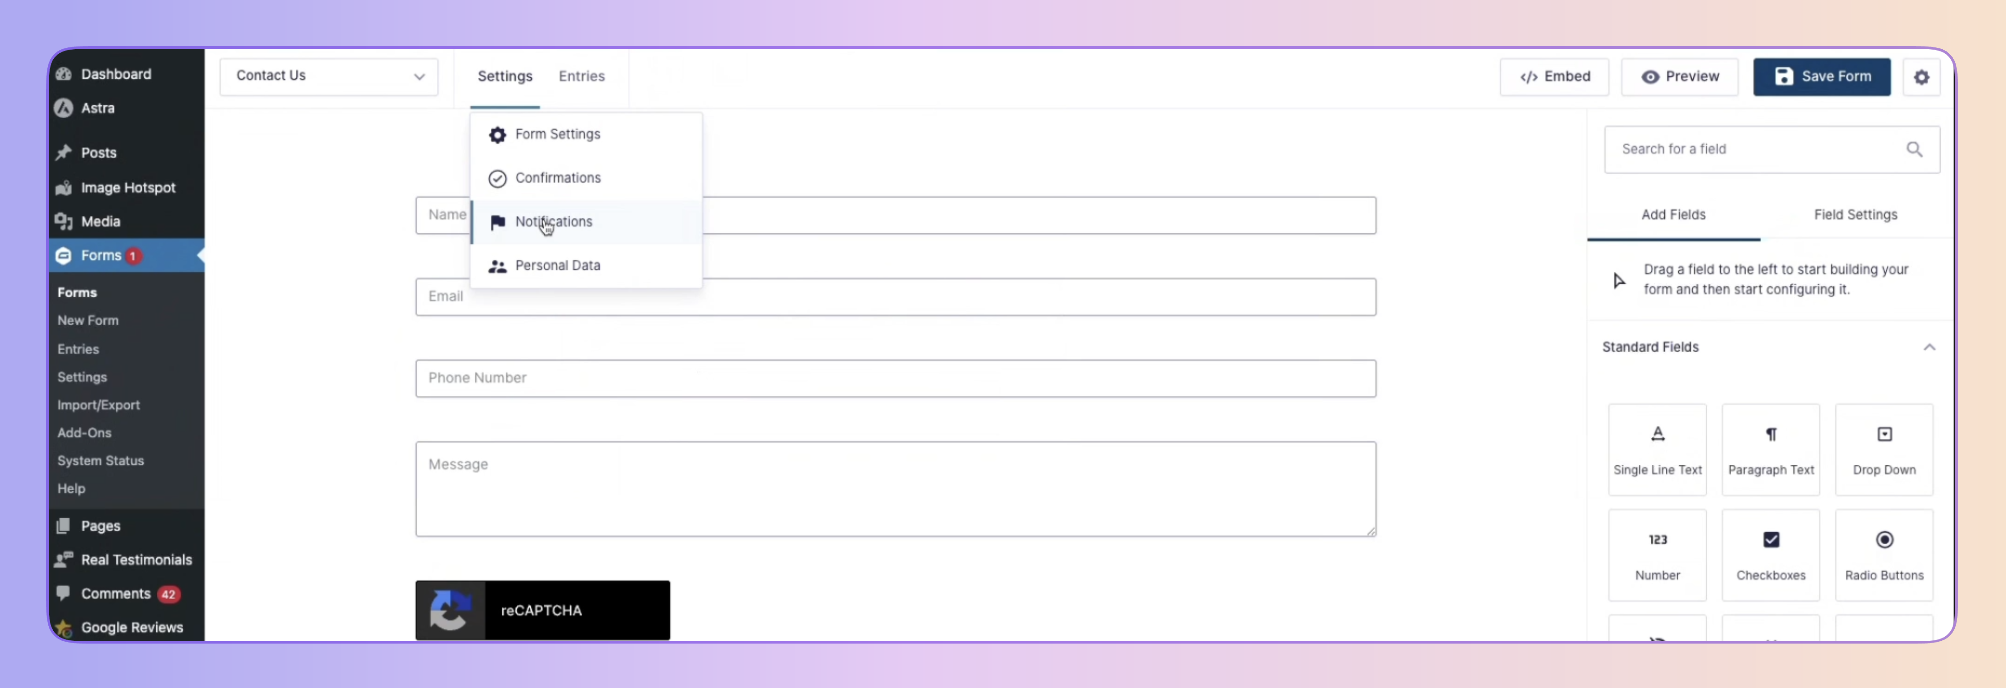
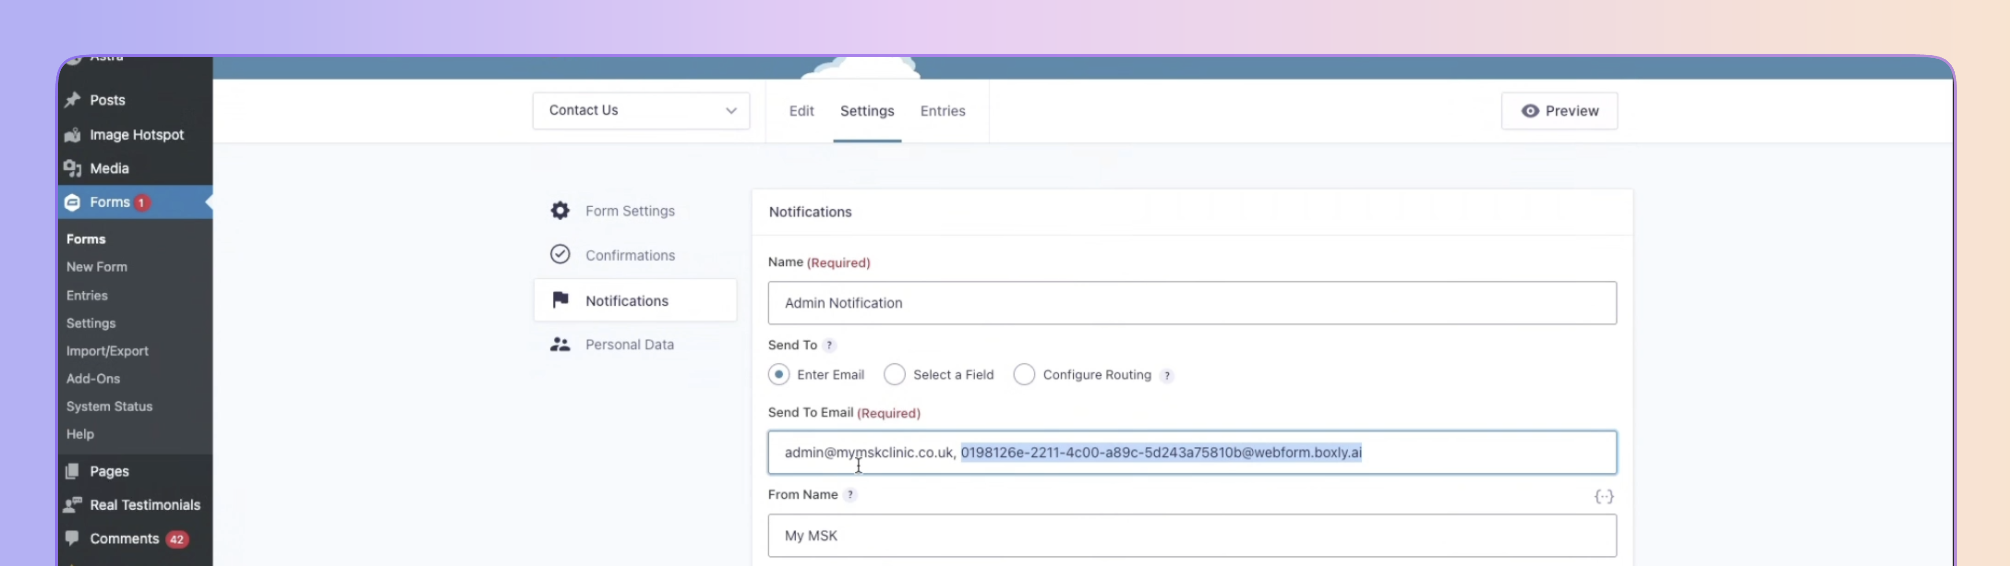
✅ Navigate to Forms → Settings → Notifications for the form you want to forward
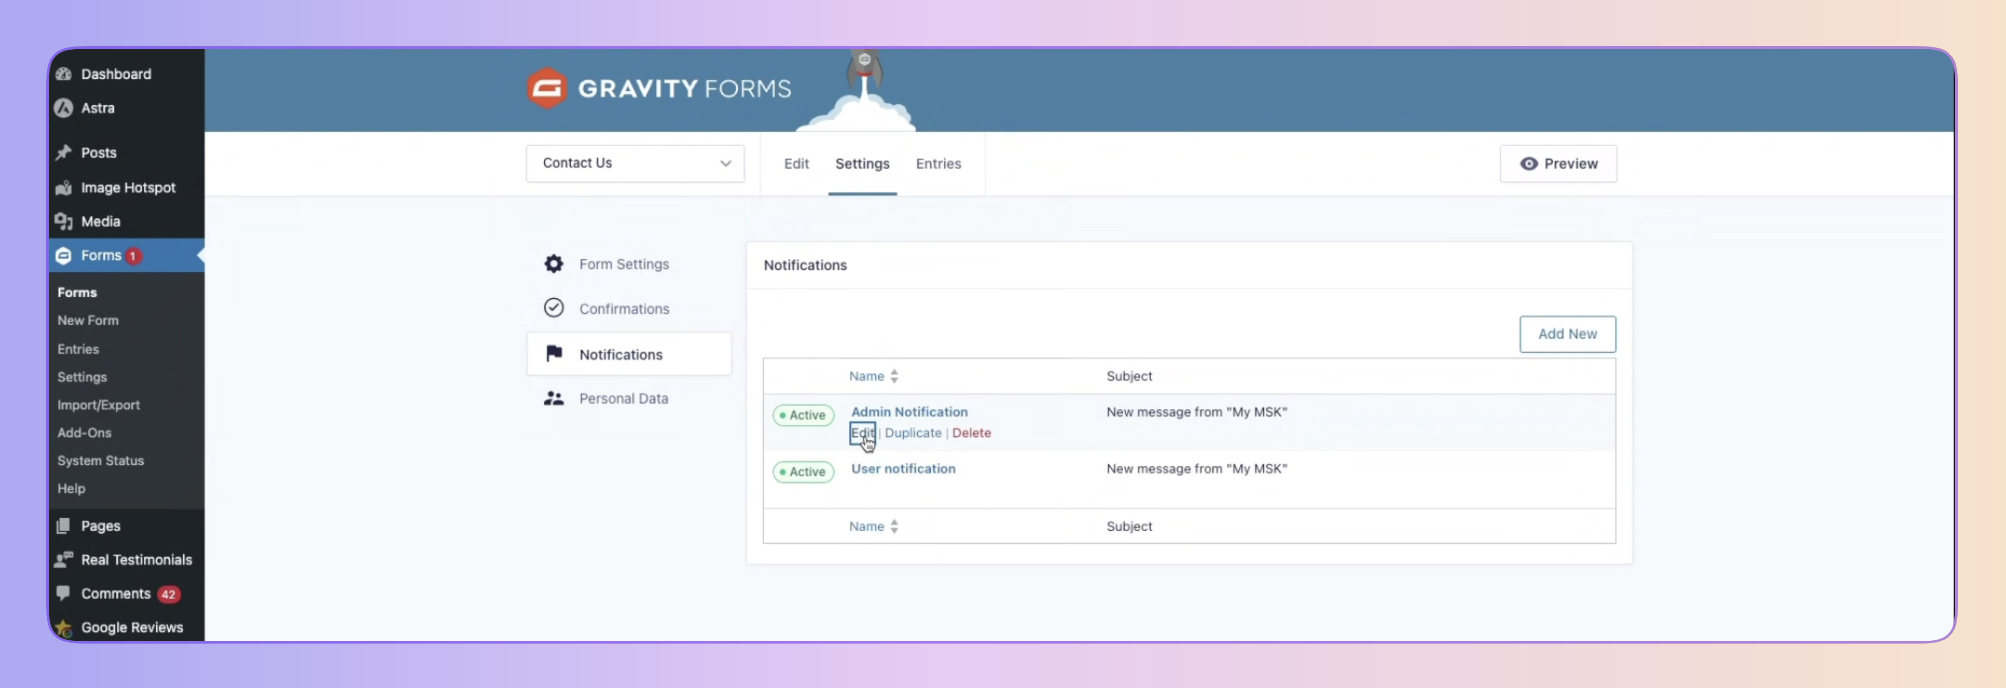
✅ Click edit on the existing notification (or Add New if you have created your form yet).
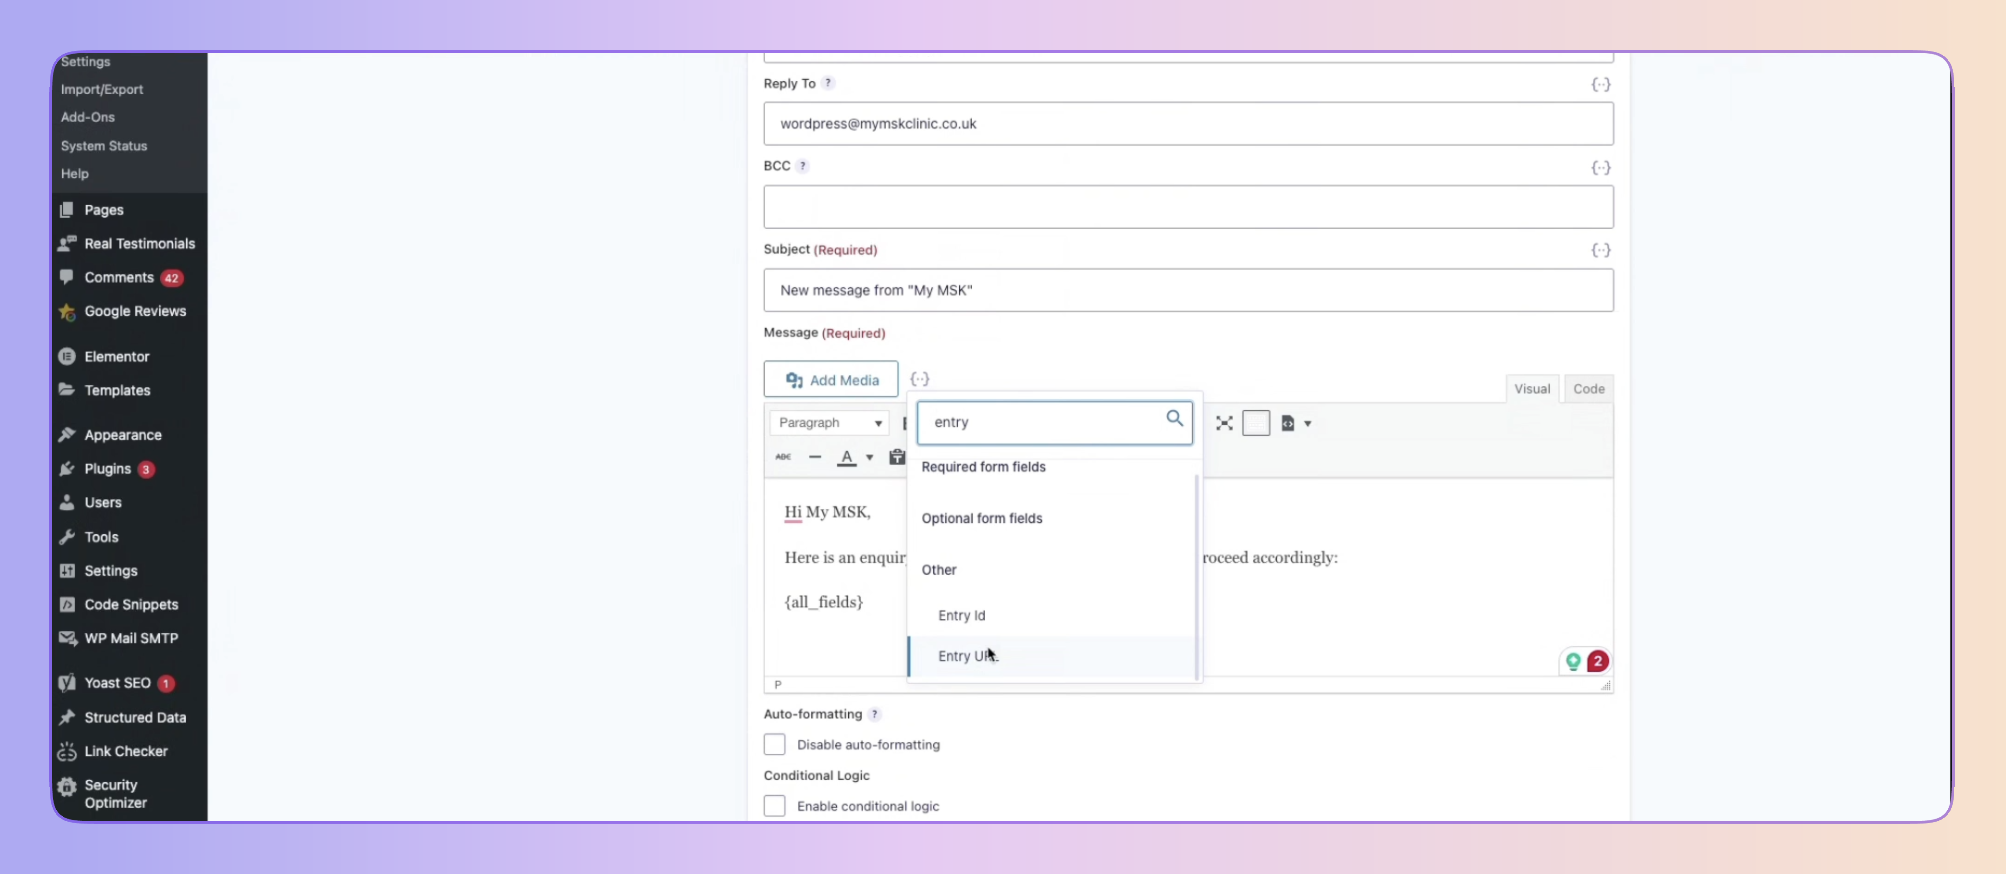
✅ Edit/Add the following in your notification fields:
Send to Email → Paste your Boxly forwarding email
In the Message box, include the form field: Entry url

✅ Save your notification settings
✅ Submit a test entry on your live form
✅ Check Boxly in, the lead should appear in your chosen Box, tagged by channel (e.g. "Webform")
✨ Things to Keep in Mind
You can create one Boxly forwarding address per form if needed
The clearer your field labels (like Name, Email, Phone), the better Boxly’s AI can sort them
Boxly reads the message body, not the attachments, so make sure details are included clearly in the message body (like the entry url).
✨ You’re Done!
Your Gravity Forms are now working hand-in-hand with Boxly, no double entry, no leads falling through the cracks. Just smooth, smart automation.
Still not sure?
We’re here for you. If your test doesn’t show up or something looks off, just ask Boxly’s support team at [email protected].