Uploading leads allows you to import multiple leads at once directly from a CSV file. This is useful when you're migrating from another system, importing a list from an external source, or adding batch leads to your account.
Lead uploading is a feature that lets you add multiple leads to Boxly simultaneously using a CSV file. When you upload a CSV, Boxly reads the file, maps your columns to Boxly fields, and creates all the leads in your account.
Using this feature, you can:
Import hundreds of leads in minutes at one go.
Map your CSV columns to Boxly fields (box, stage, location, labels, and more)
See upload history and status
Download failed lead lists to troubleshoot issues
Track how many leads were successfully created
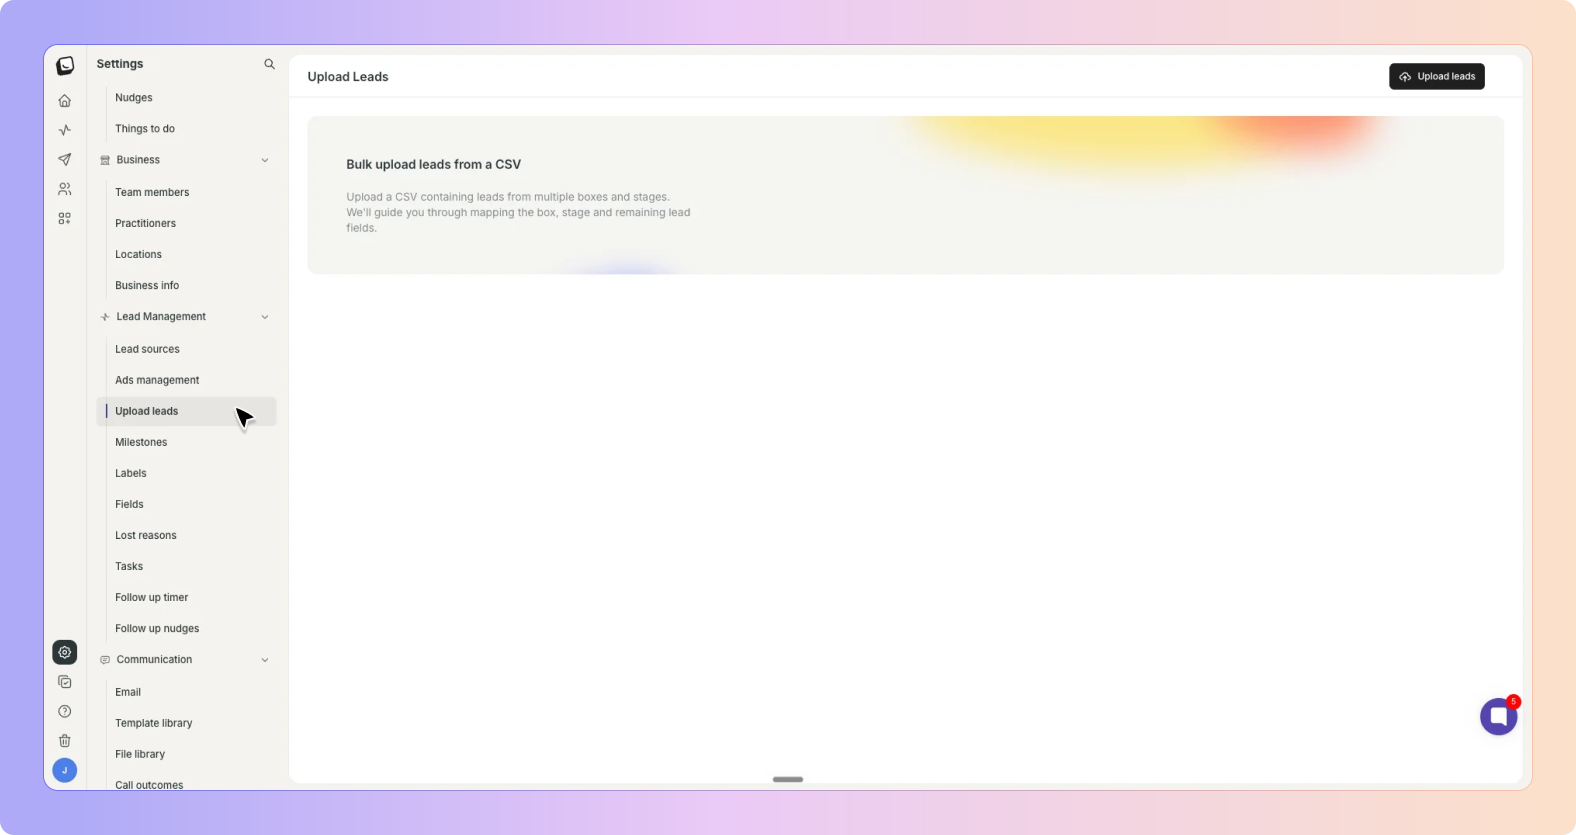
📝 Before You Upload: Prepare Your Spreadsheet
Want a head start? Download our Lead Upload Template and fill it in.
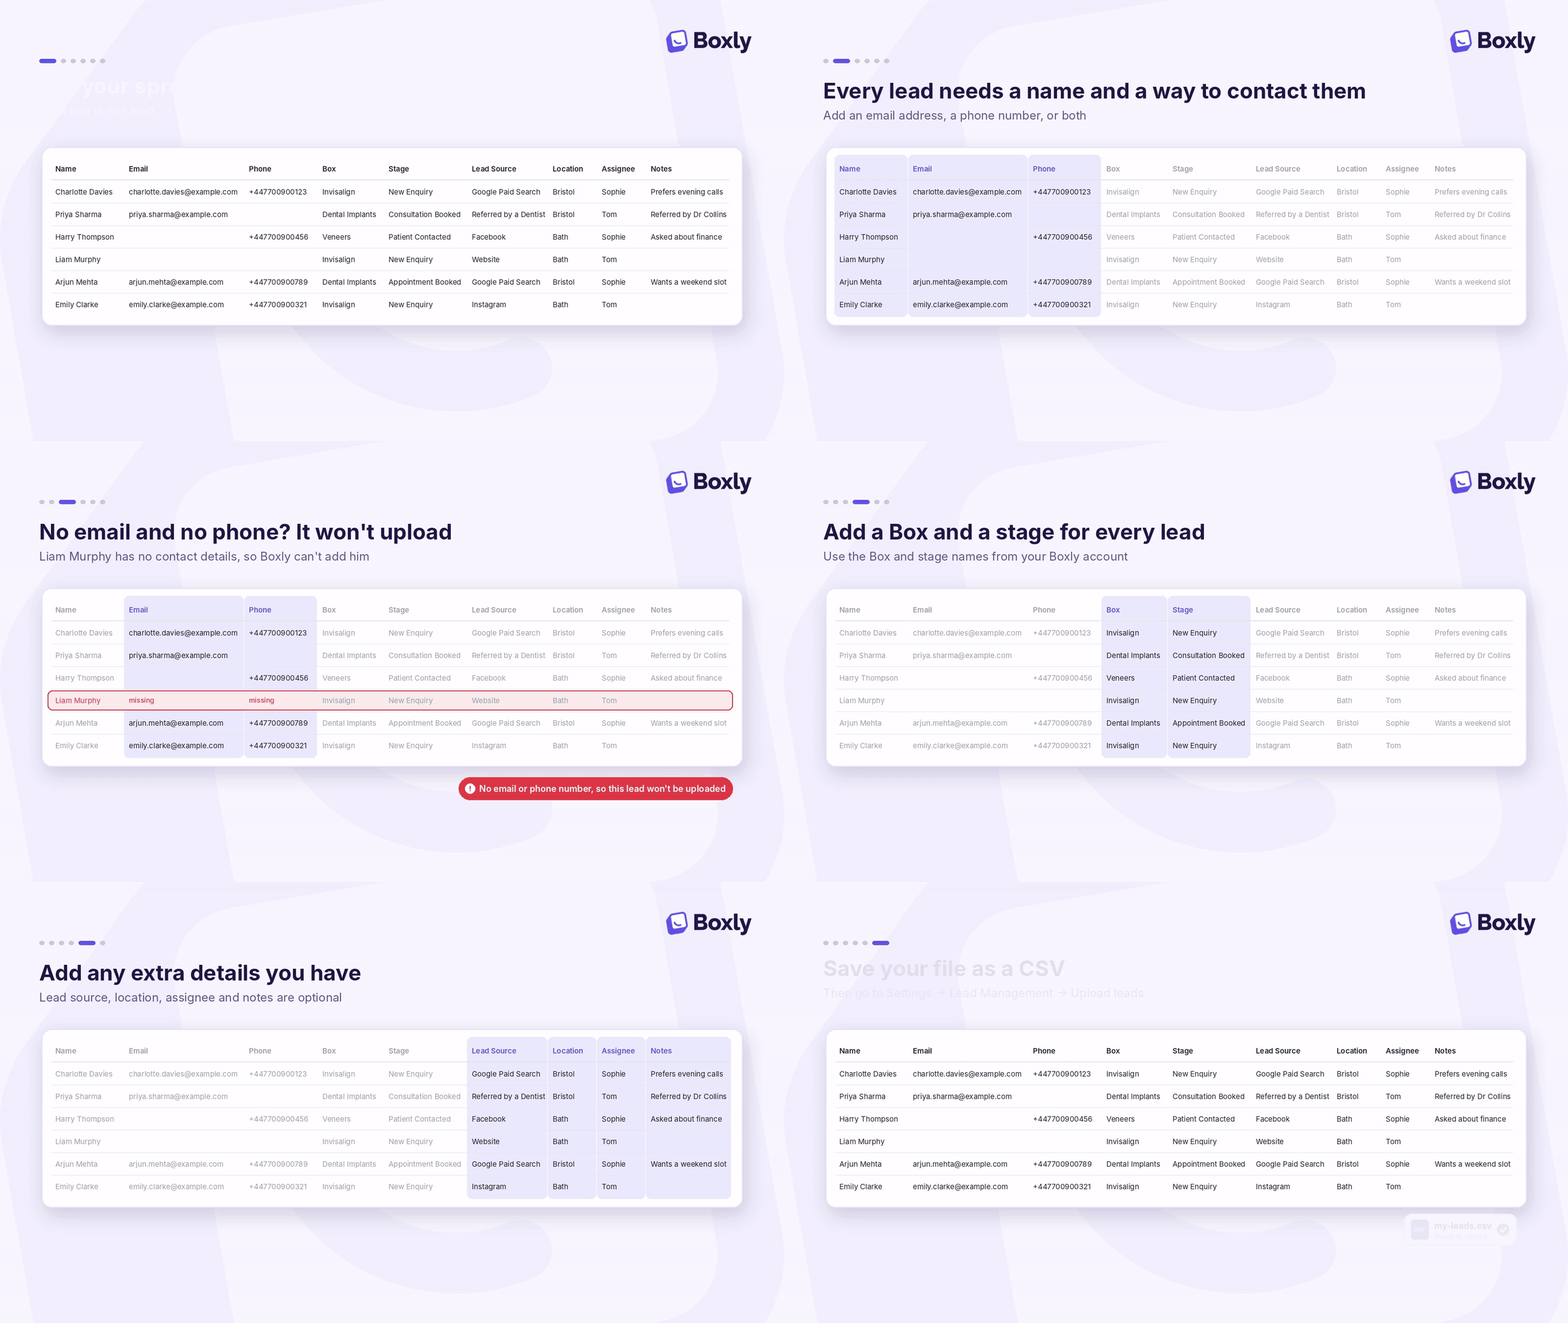


To start uploading leads:
✅ Click Settings from the left sidebar
✅ Select Lead Management
✅ Click Upload Leads
On the right-hand side, click Upload leads, then drag and drop your CSV or click to select it.
After you upload your file, you'll see a mapping screen. This is where you tell Boxly which CSV columns match which Boxly fields.
On the left, you'll see all the CSV columns from your file. On the right, you'll see Boxly fields available in your account.
Map the CSV column that contains your box name to the Boxly box field. Do the same for stage names.
Boxly then lists every Box in your file. Choose the Boxly Box each one should go to, then match the stages under it. For example, a “Consult booked” stage → Appointment Booked.
✅ Click Next to continue
Boxly will now show optional fields you can map:
Location – Only appears if your account has multiple locations. This is optional; map only if your CSV contains location data
Labels – Select which CSV column contains labels, if you have them.
Lead Source – Map the column containing lead sources.
Practitioner – Map the column if you've assigned specific practitioners to leads.
Assignee – Map this column to assign each lead to the right team member as soon as they're uploaded. No need to go back and assign them one by one.
At the end of this screen, you'll see a complete list of all your CSV columns alongside Boxly fields.
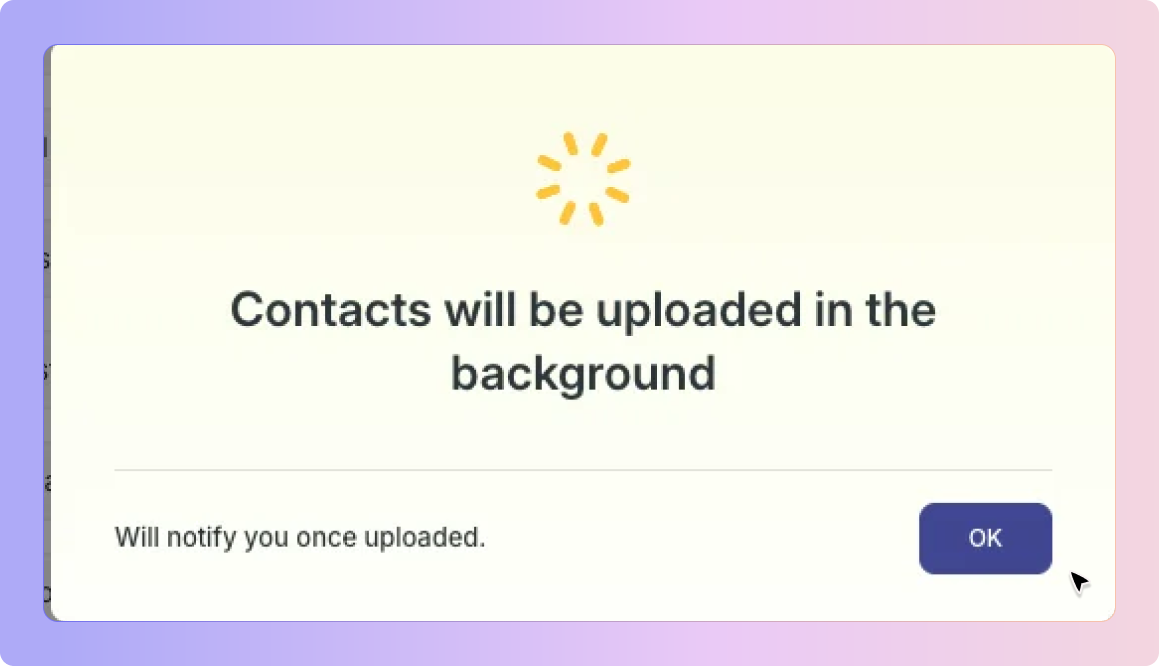
✅ Click Next. Your leads upload in the background and Boxly will notify you once they’re uploaded. Click OK to close the message.
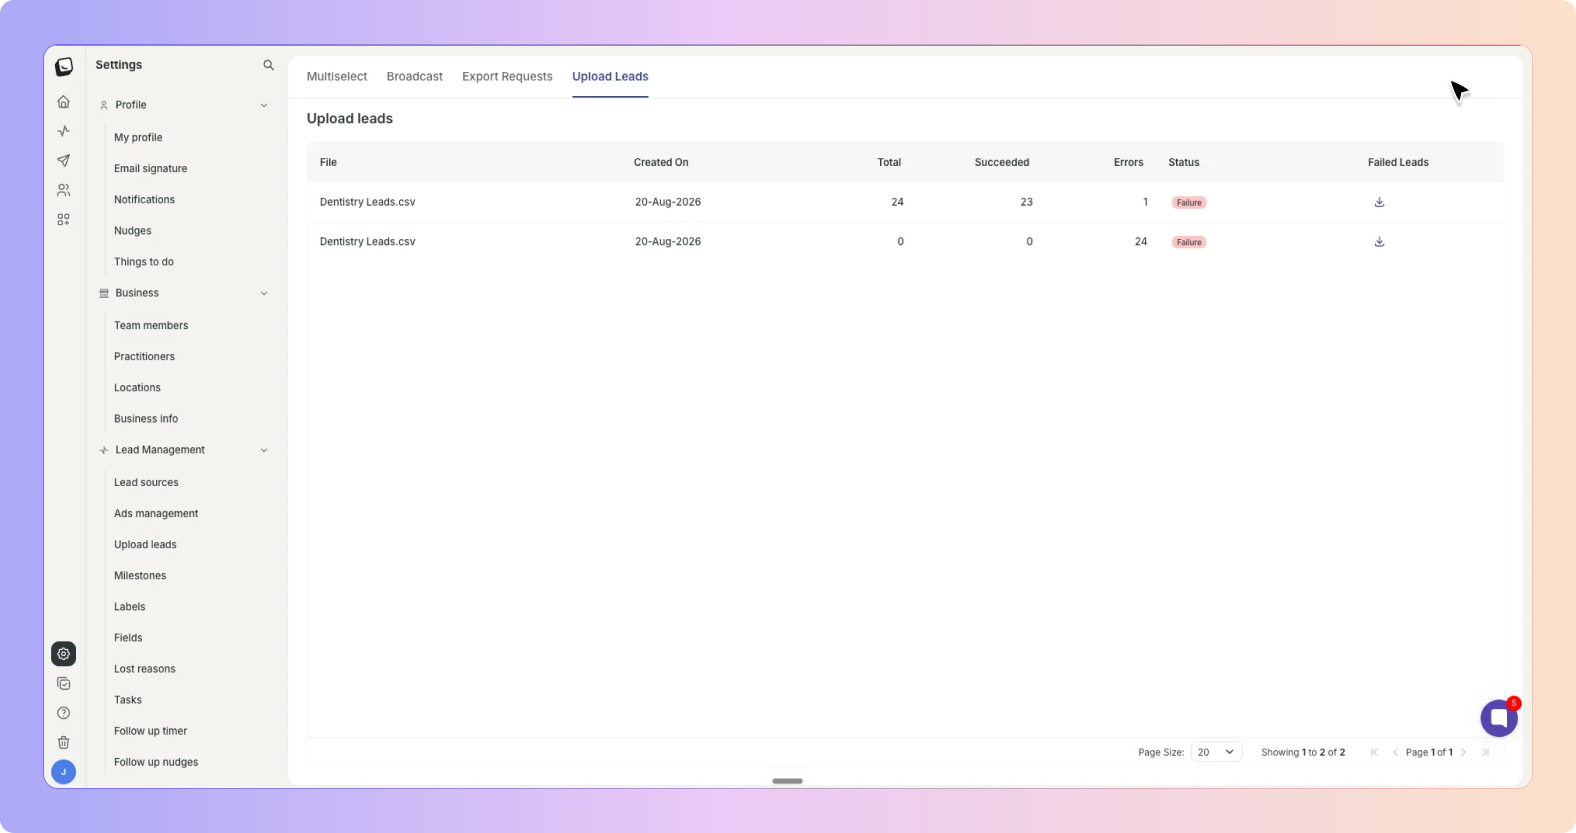
After your upload, you'll be taken to the Upload Leads section. Here you can see your recent uploads at a glance.
The upload history shows:
File – the name of the CSV you uploaded
Created On – when it was uploaded
Uploaded By – who uploaded it
Total / Succeeded / Errors – how many leads were in the file, how many uploaded, and how many didn’t
Status – the current status of your upload
Failed Leads – download the leads that didn’t upload
Understanding upload statuses
Pending – Your leads are currently being uploaded
Success – All leads have been uploaded successfully
Failed – One or more leads didn’t upload
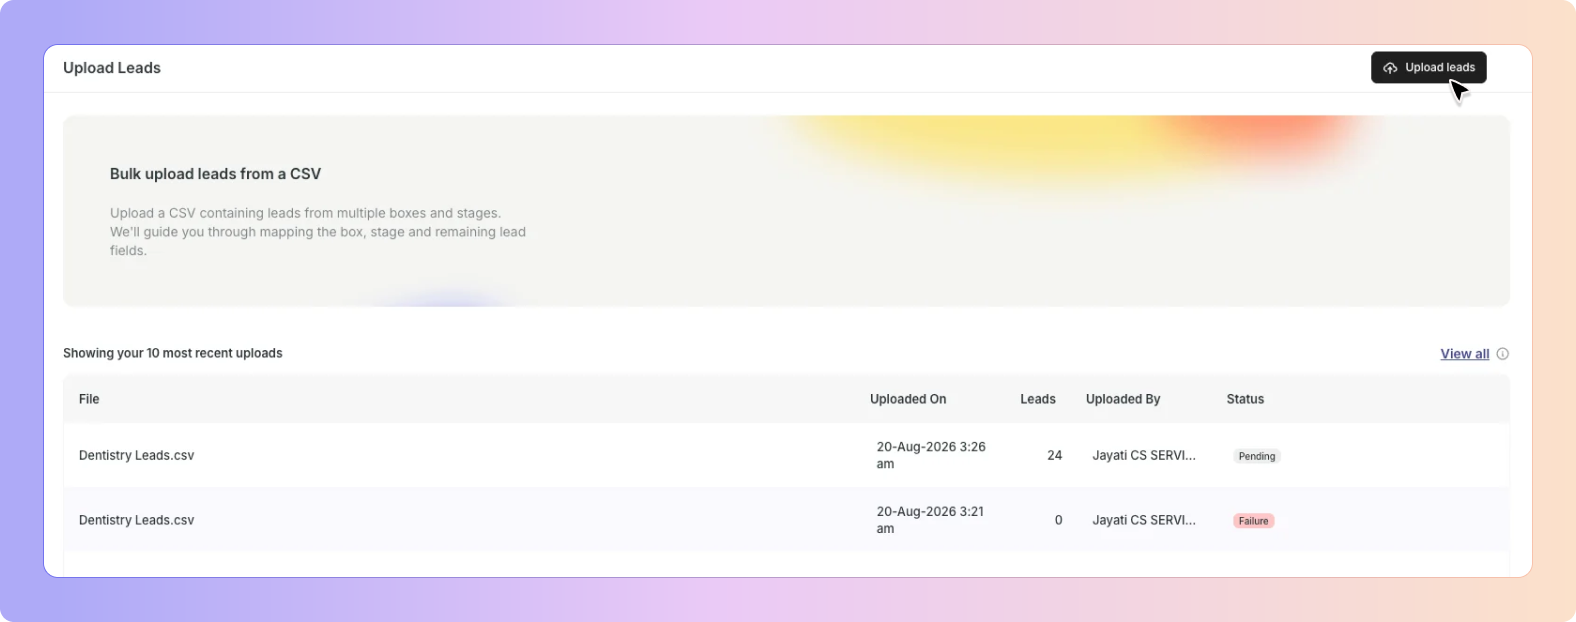
If some leads fail to upload, you'll see a Failure status in the upload history.
To see which leads failed and why:
✅ Find the upload with the Failure status
✅ In the Failed Leads column, click the download icon
This will download a CSV file containing only the leads that didn't upload, along with error messages explaining why. Common reasons for failures include:
No email address or phone number
Missing Box or stage name
A Box or stage that doesn’t exist in Boxly
An invalid phone number
Review the error messages, correct the data in your CSV, and upload again.
Go to Upload Leads