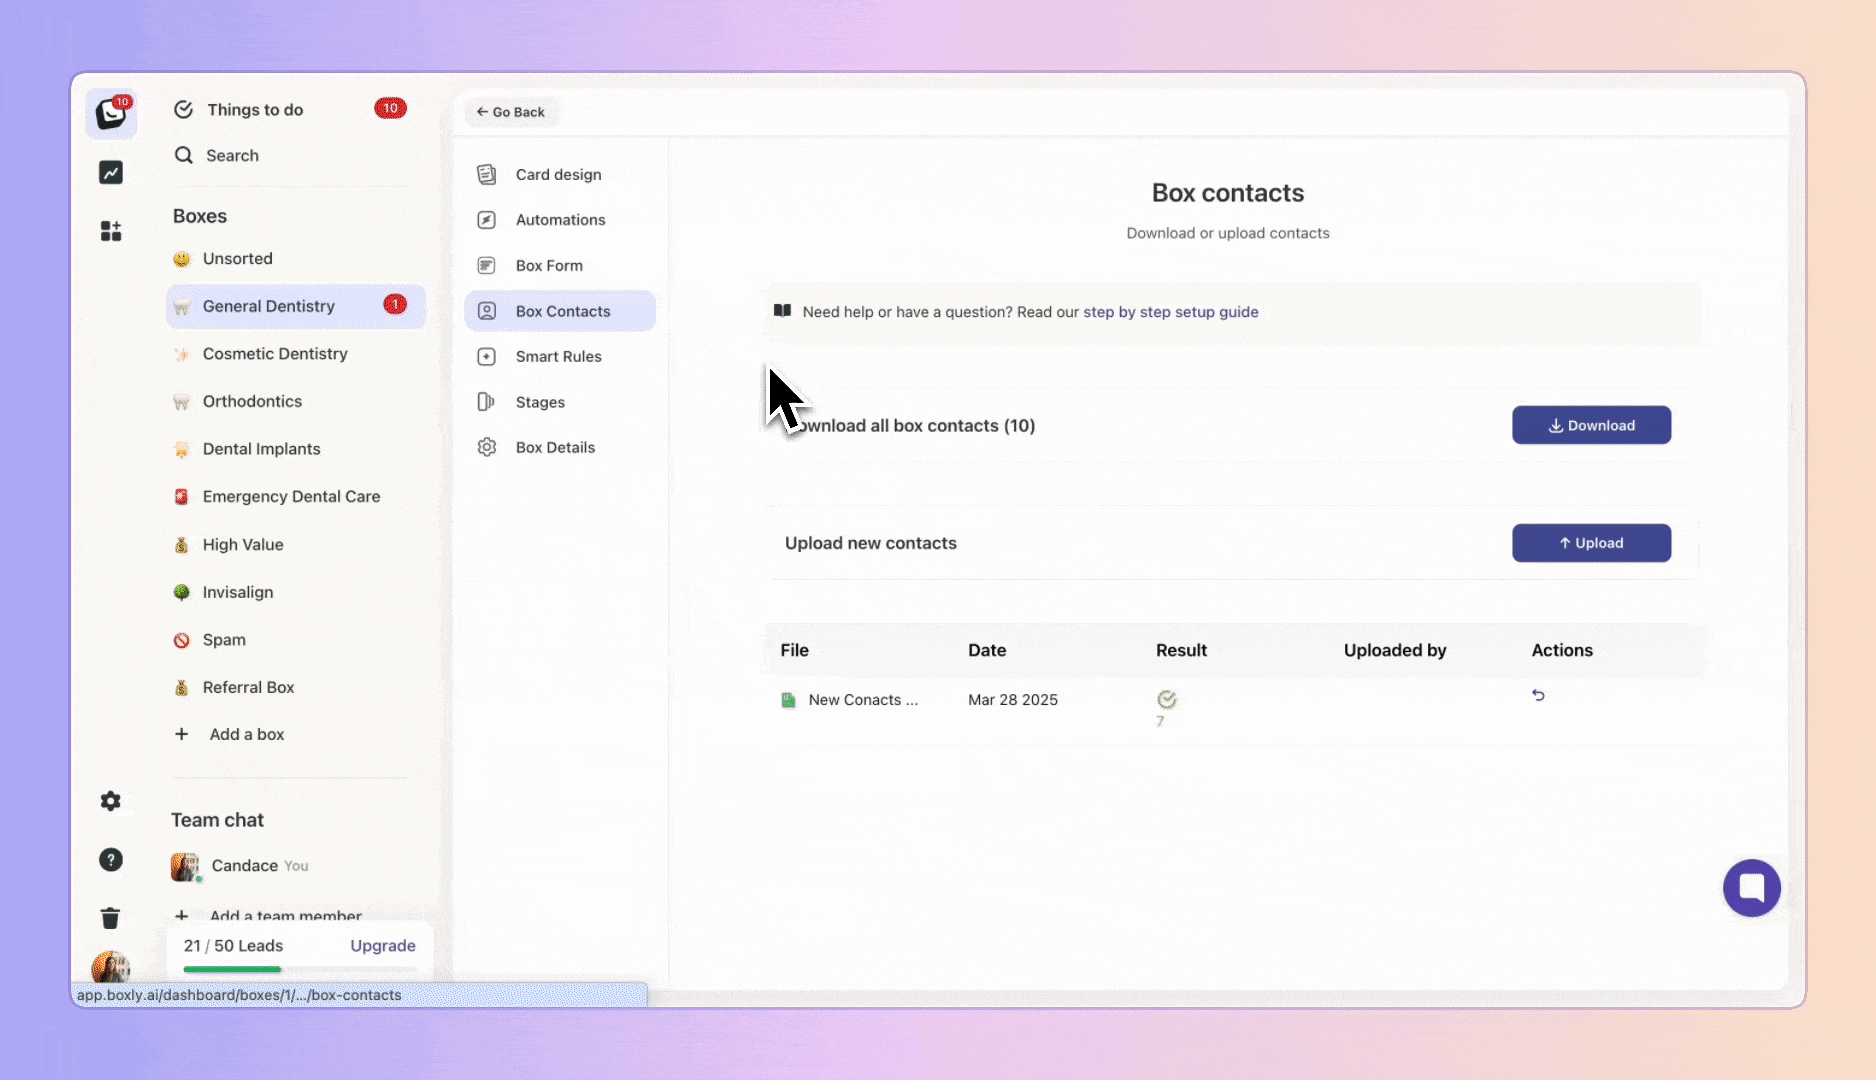
Need to import contacts from a CSV file or a contact list? With the Box Contacts settings, you can quickly upload and download your contacts hassle-free.
When you are inside a box, in the top bar, click on "Box Setup".
Then click on "Box contacts".
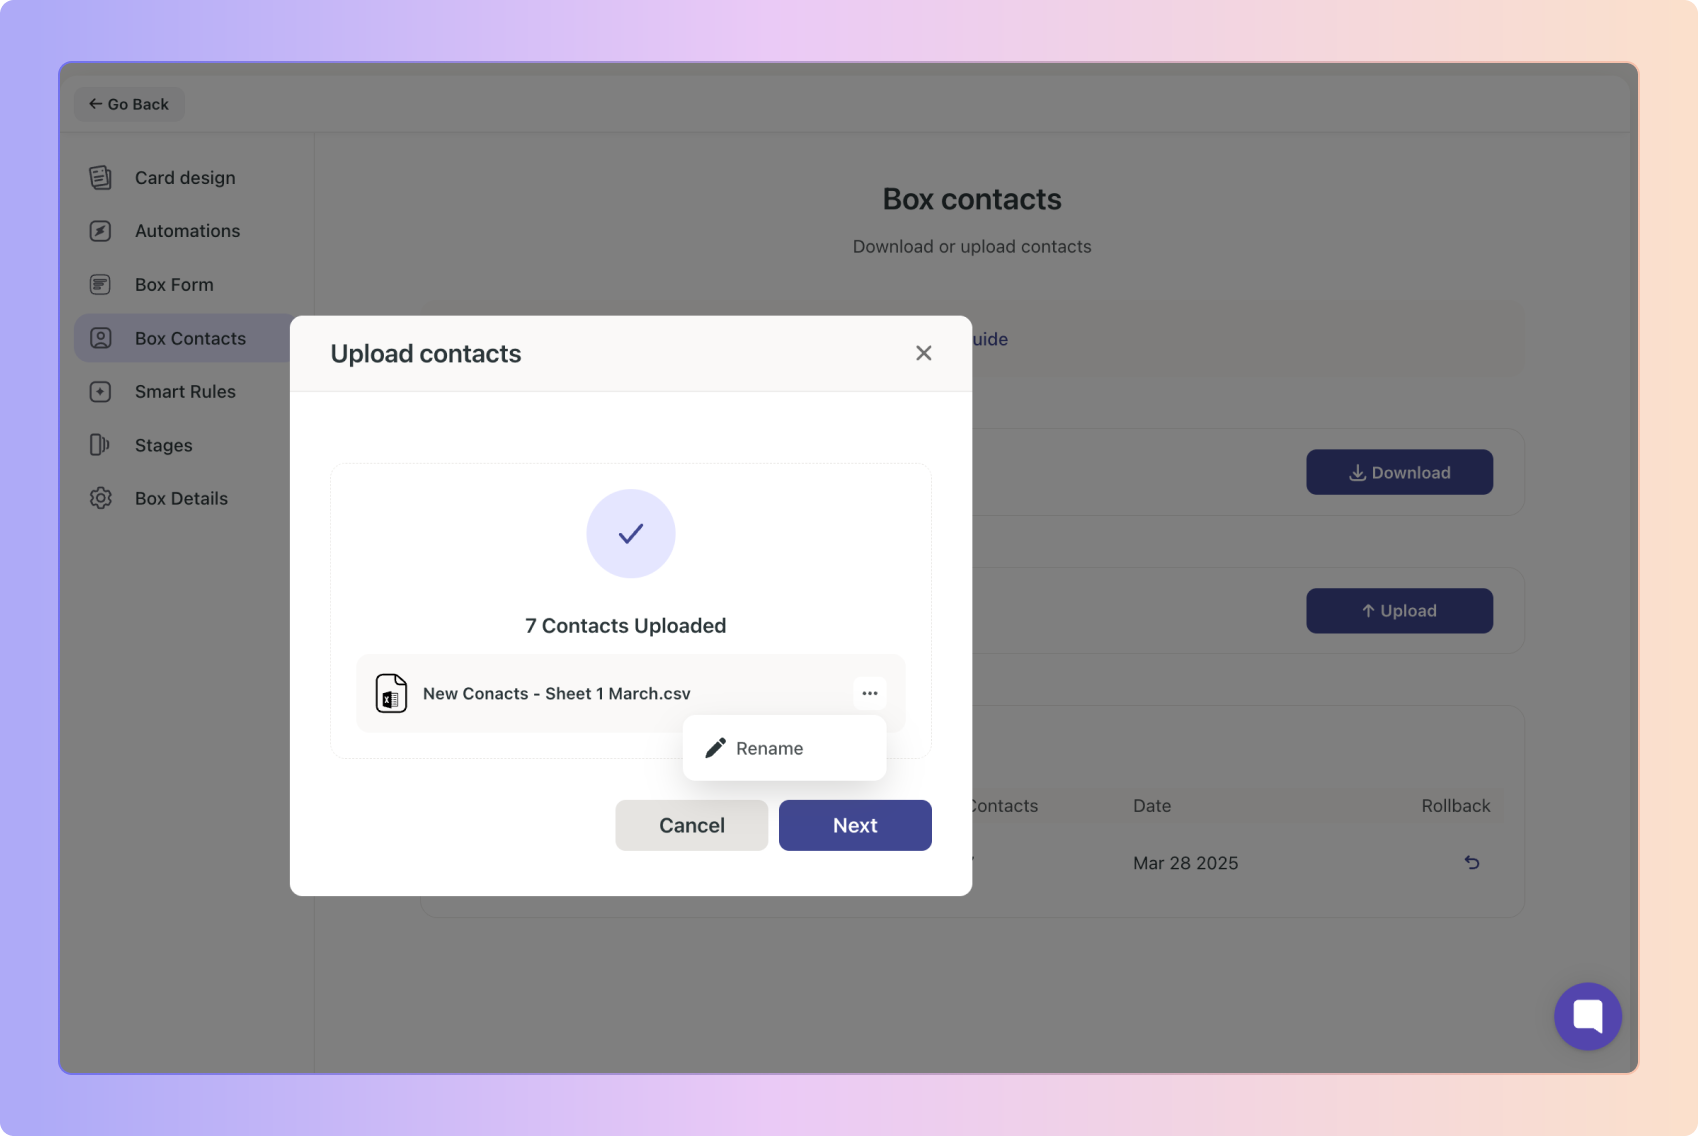
Easily upload contacts that you already have. To upload contacts, simply click the "Upload" button or “Drag and drop” the file from your system.
Guidelines for Uploading Contacts
Before you upload your contacts, please make sure your CSV is formatted correctly to avoid errors. Follow these steps:
Your CSV must include the following Mandatory Columns:
First Name, Last Name (or Full Name)
Email and/or Phone Number
StageRemember to remove the additional blank columns & rows in your CSV before saving and uploading.

Following these steps will help ensure a smooth and successful upload process.
A pop-up will show. Here you can drag the file you would like to upload or click on browse to find the file on your computer.
The uploader supports the uploading of Excel Spreadsheets in both XLSX and CSV format.
Once uploaded, you can rename the uploaded file if you like for future reference by clicking on the 3 dot icon and clicking rename. This is optional.
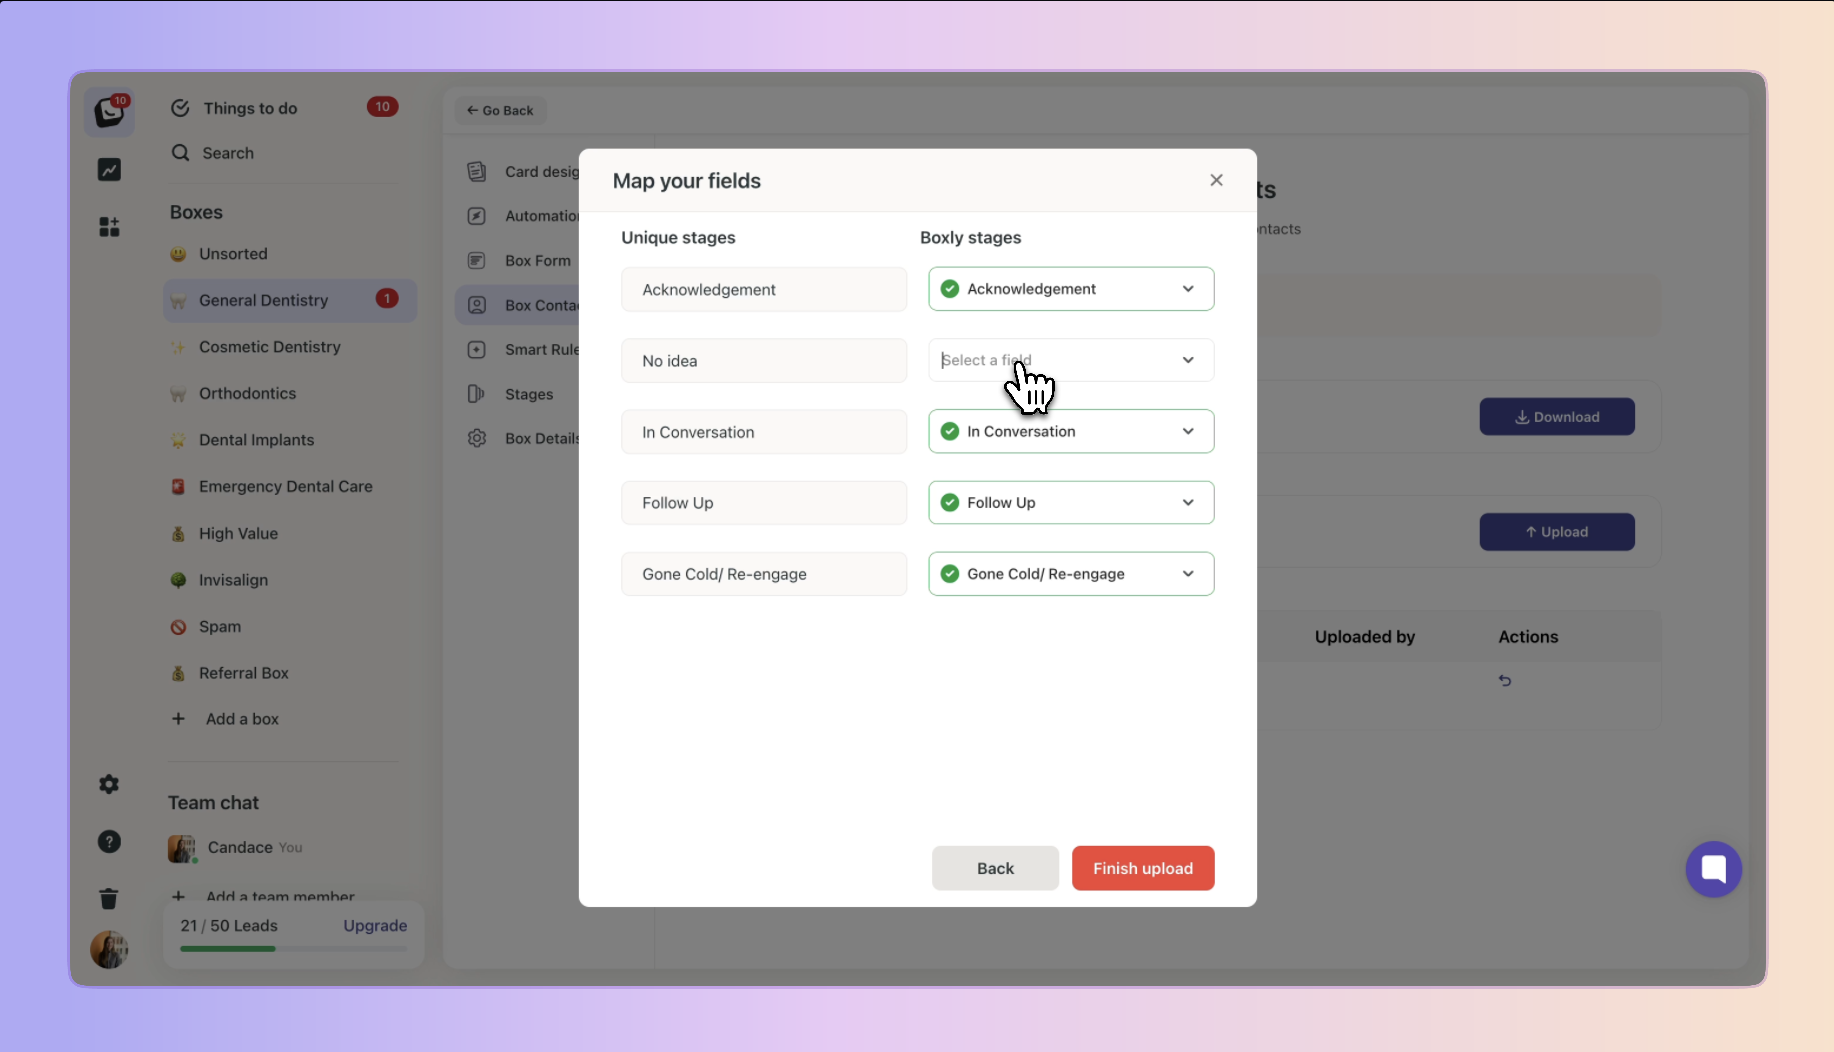
Now, click "Next" and you will be asked to Map your fields.
This is about as technical as it gets in Boxly! So here it goes...
When you upload your file, Boxly will use the column headings (like First Name, Last Name, and Email) as your "Imported Fields."
You can then map these fields to your Boxly questions so that the data is properly organised in the right place.
Note: All fields that you don’t map will automatically be mapped to "Do not map" option.
If a field doesn’t match any in Boxly but you still want to keep the information, choose the “Add to note” option.
Once you've mapped all the fields to Boxly questions, you can click "Finish Upload"

On the final mapping line, you will have the option to select the Box stages that you would like to import these contacts to. Simply click the dropdown, and select the stage.
Keep in mind, any ⚡ automations you have in place that are initiated by enquiries entering a particular stage will be activated when contacts are added to that stage.
Rollback contacts:
If for any reason you made a mistake with the mapping or want to have a "do-over" then simply click the rollback button.

Keep in mind, if you choose to rollback the contact import, all the contacts you imported in that upload will be deleted and cannot be recovered.

Download failed leads:
If for any reason some of the leads failed to upload, simply click the download button in the “Actions” column, this will only be available if you had leads that failed to upload - you will see if any of your leads failed to upload in the “Result” column (like the below: ⚠ 226).

Once you download and open the file, you will see the “eb_error_message” in the last column of your downloaded file. We will tell you what went wrong, in the example below, two of the stages were left empty, amend the issue (fill in their stages for this example), export the document as a CSV file and upload the newly fixed file.

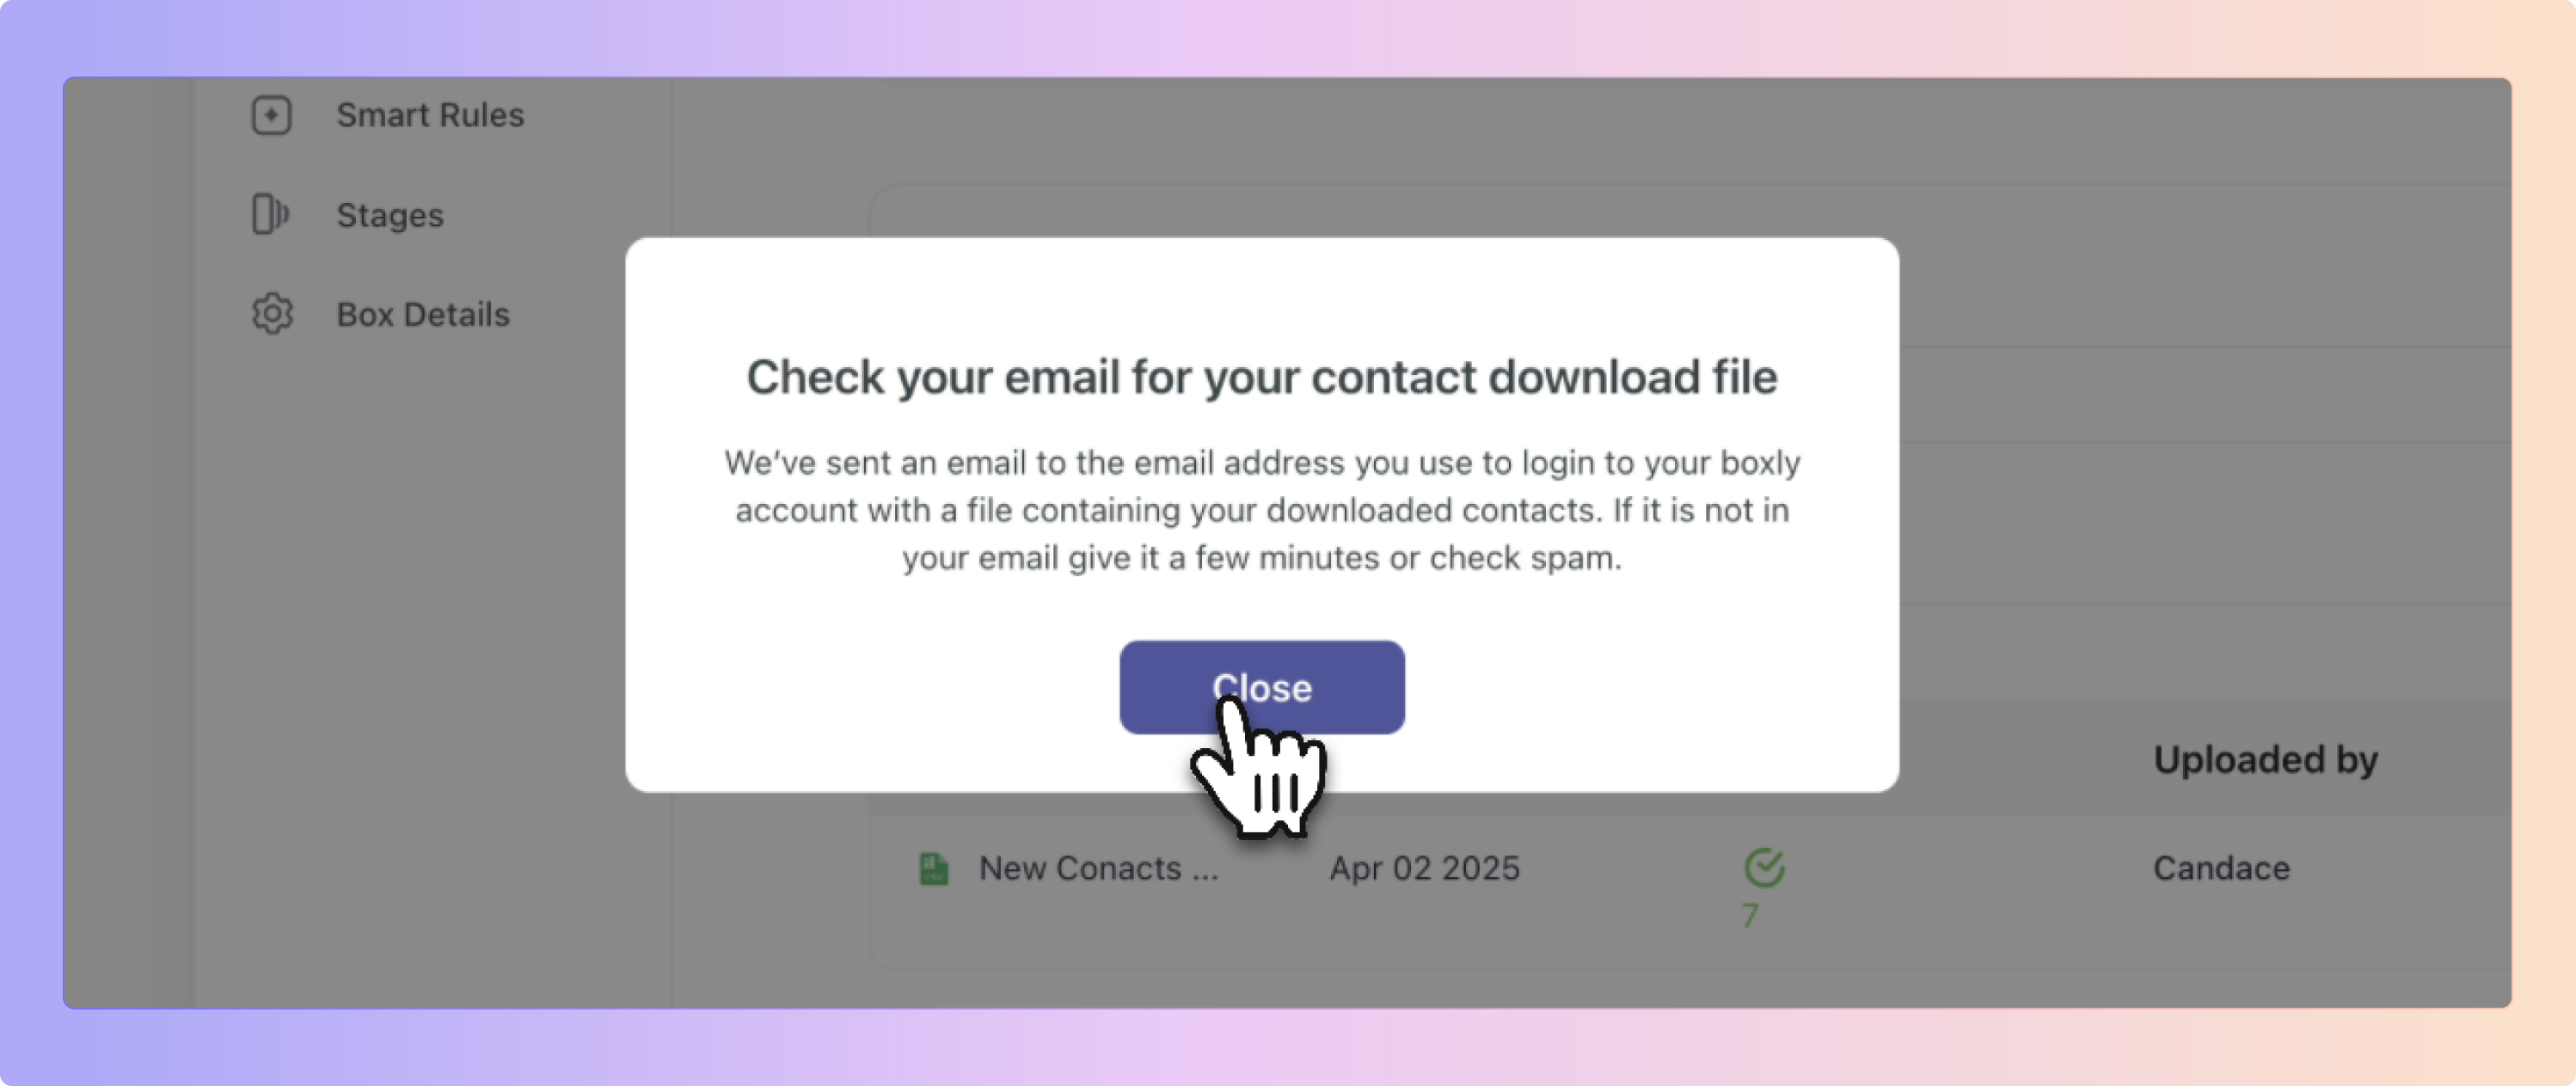
You may want to download the contacts in a particular box at some stage. Doing that just takes one click. Simply click on the download contacts button.
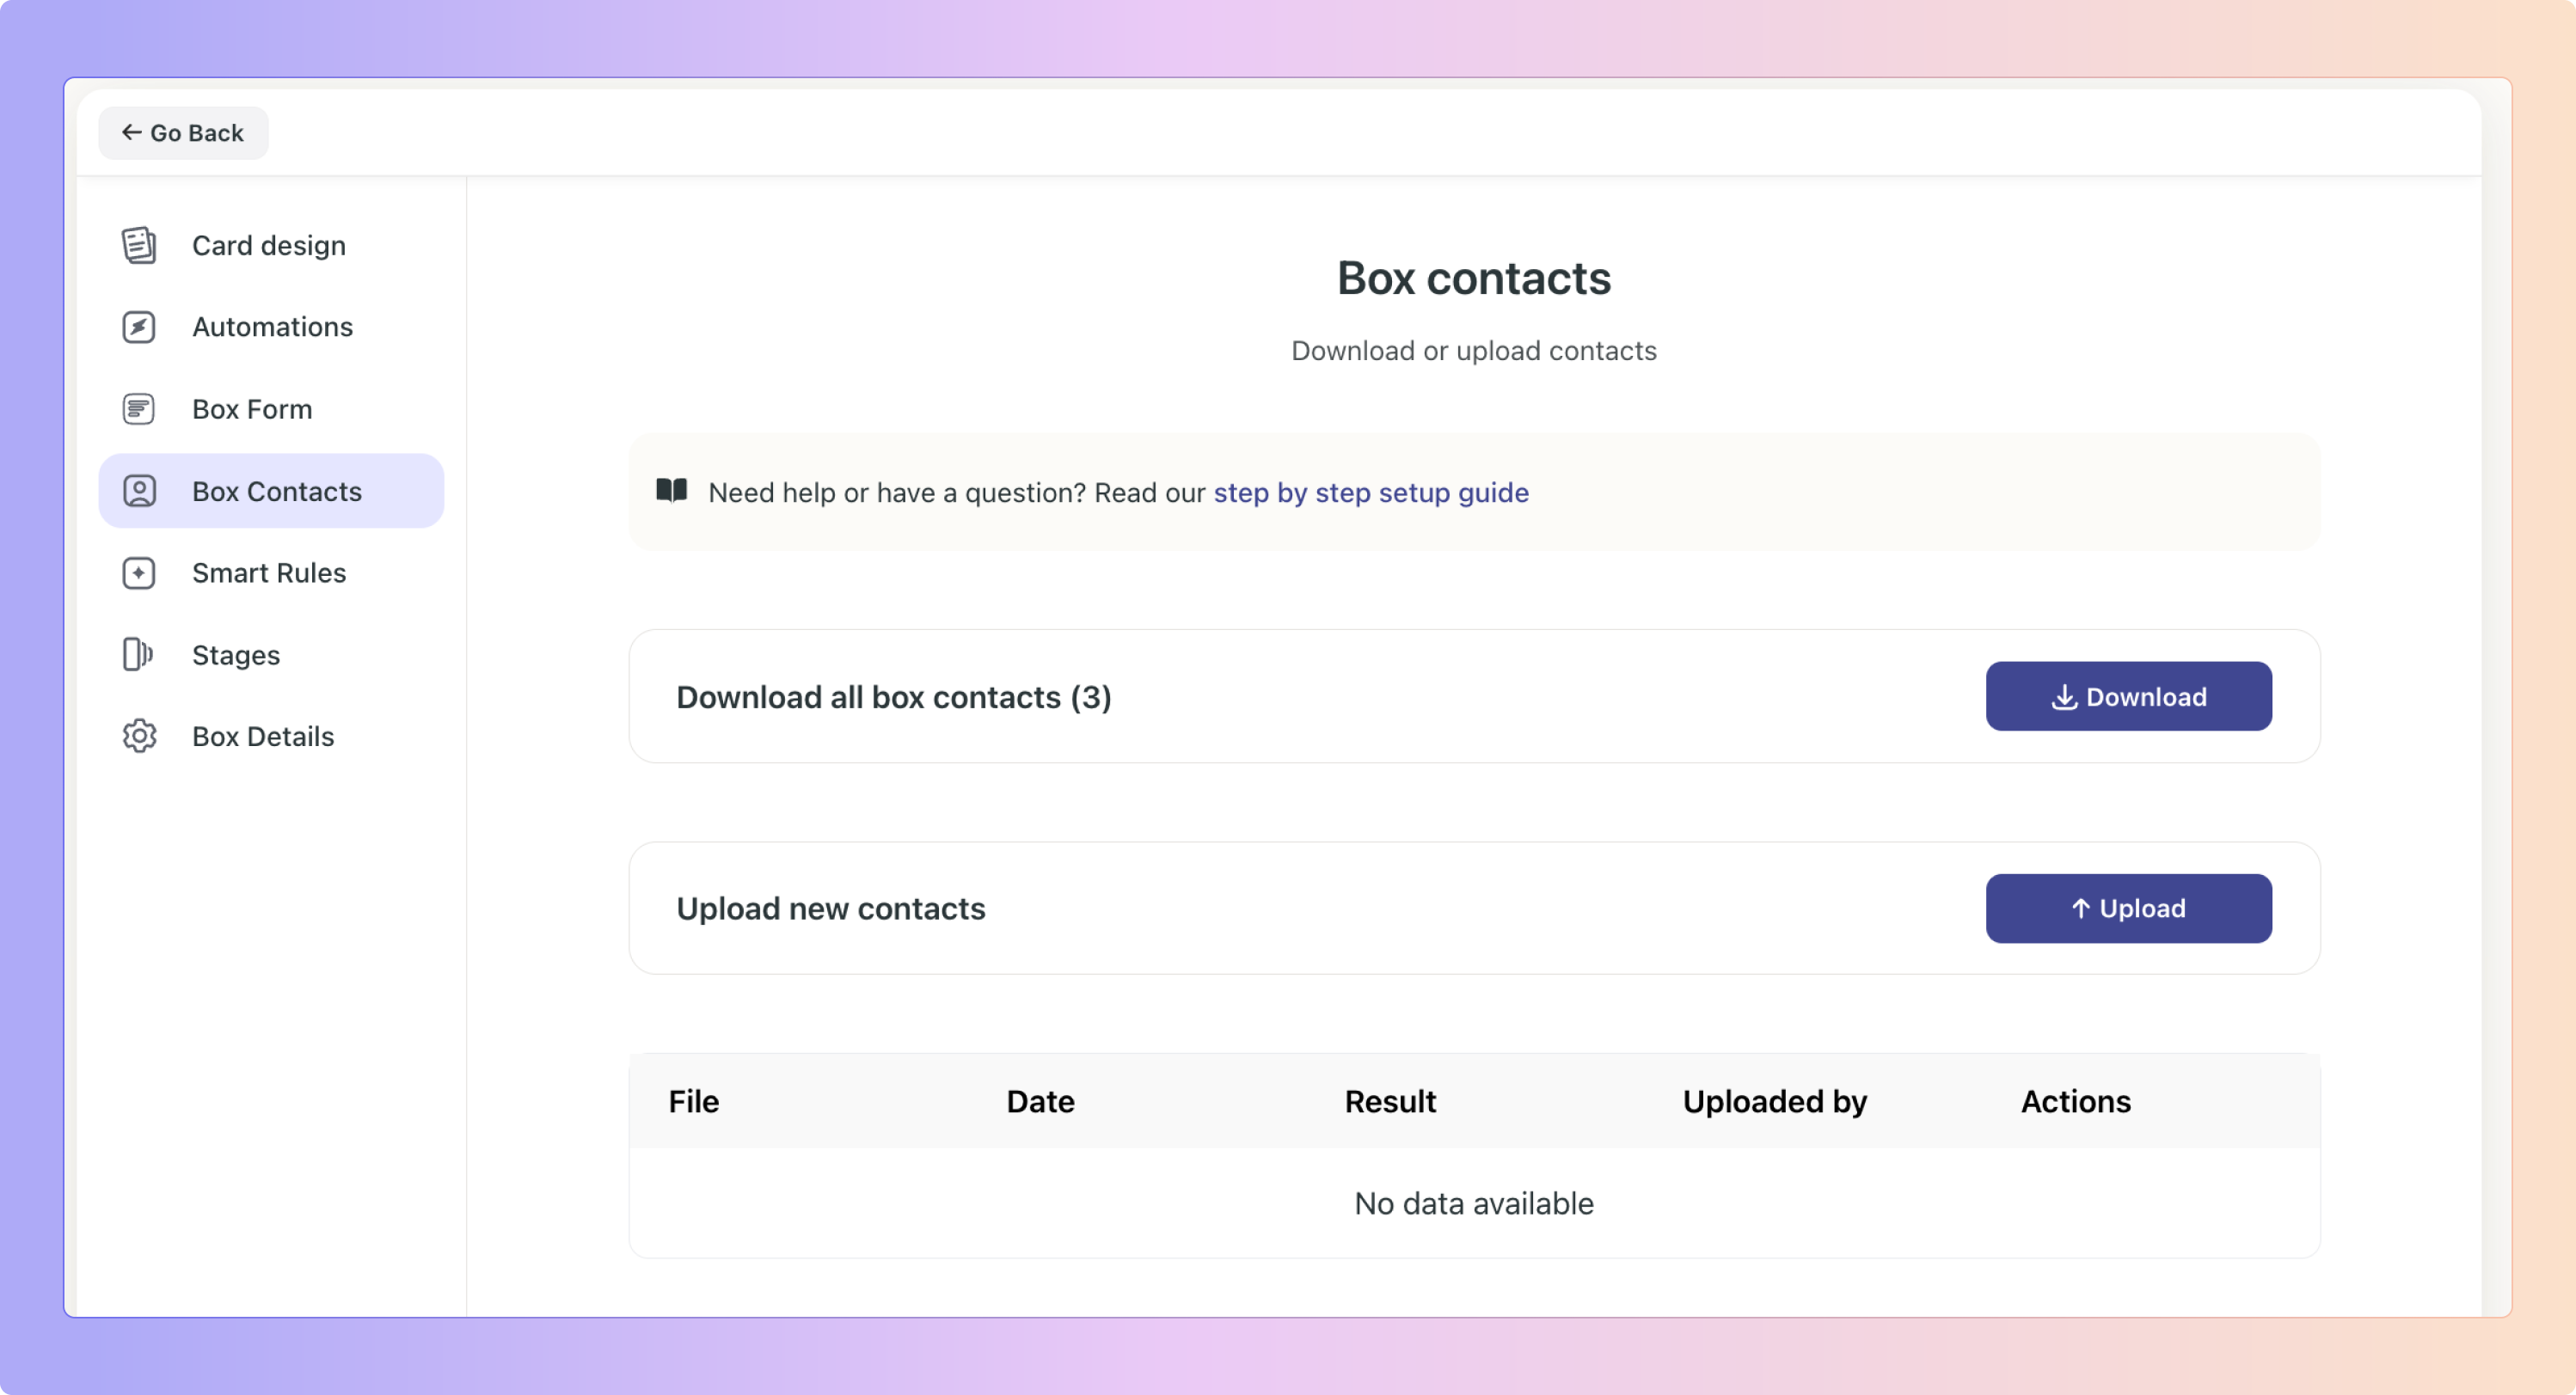
An email will be to the email address you use to login to your Boxly account with a file containing your downloaded contacts. If it is not in your email give it a few minutes or check spam.