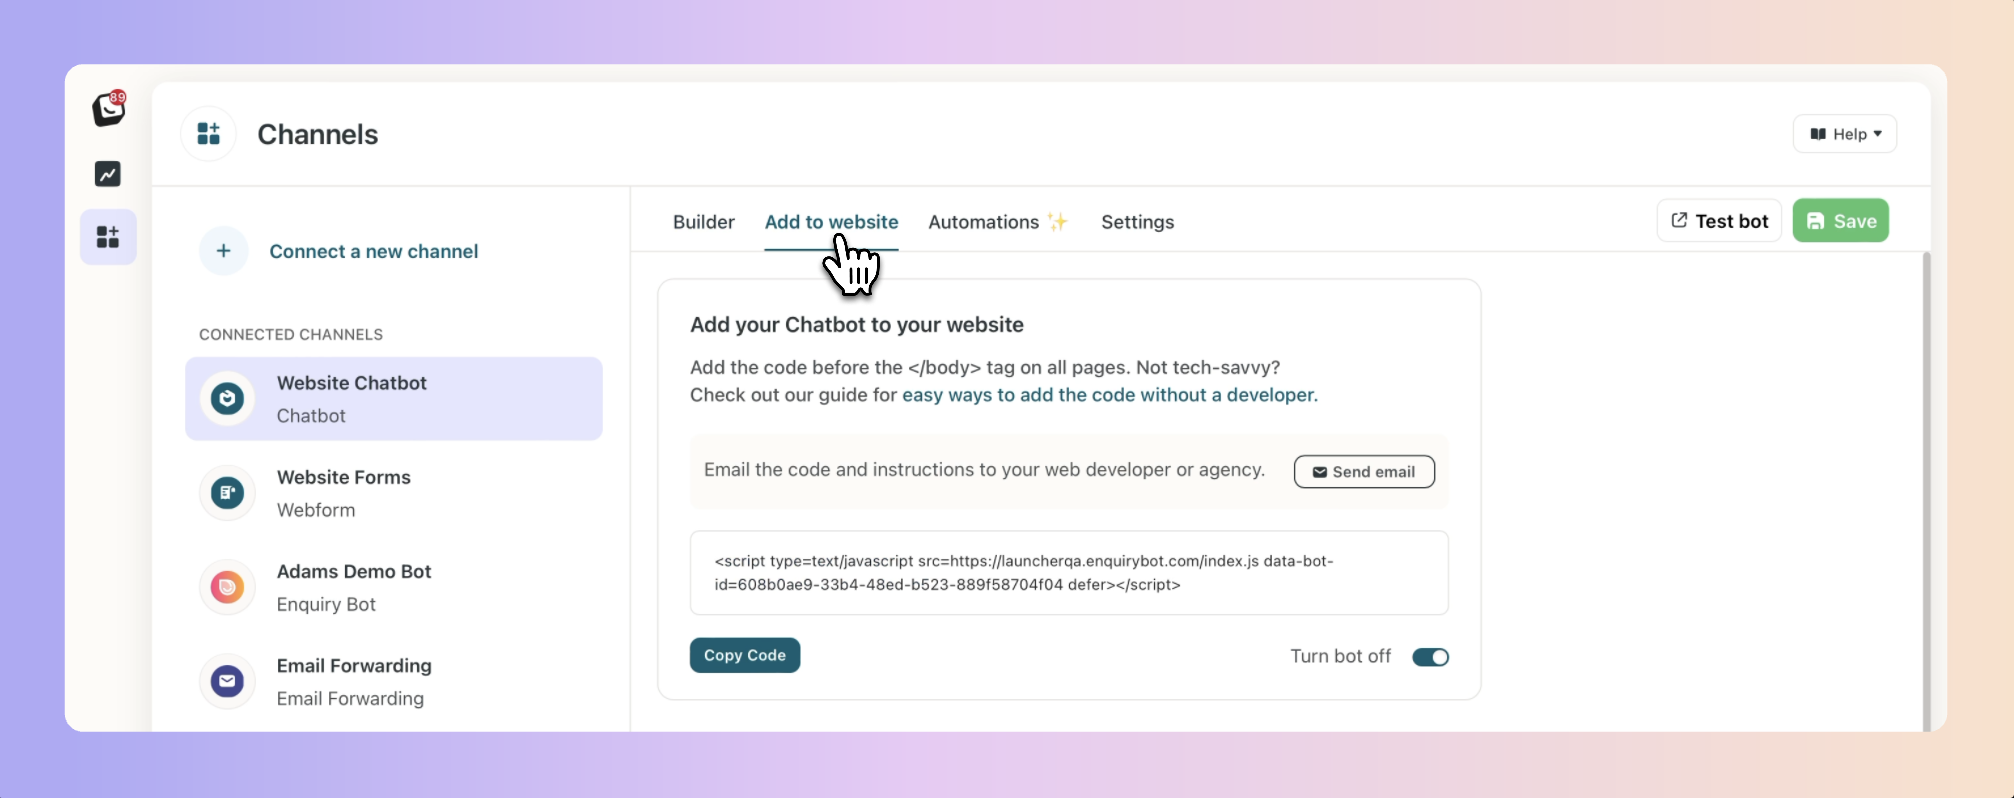
To add the Chatbot to your website, click on the "Add to website" tab, then use one of 2 options.

Option 1. Send it to your website developer
Send the code to your website developer and ask them to do it. To do this, click send email. A pop-up will show with the code and instructions already in it. Simply add in their email address and send it.
Option 2. Copy the code and add it to your website yourself.
Copy the code and place it on all pages just before the closing of the </body> tag.
For example:
<head></head> <body>..........<chatbotcode></body><footer></footer>*Important: Any editing of this code or spaces or line breaks can result in your bot not showing or not working correctly on your website. Please ensure not to edit the code. Editing the code of your website with this approach should only be handled by a web developer as it may break your website if not added correctly.
If your website is a WordPress website, follow these instructions:
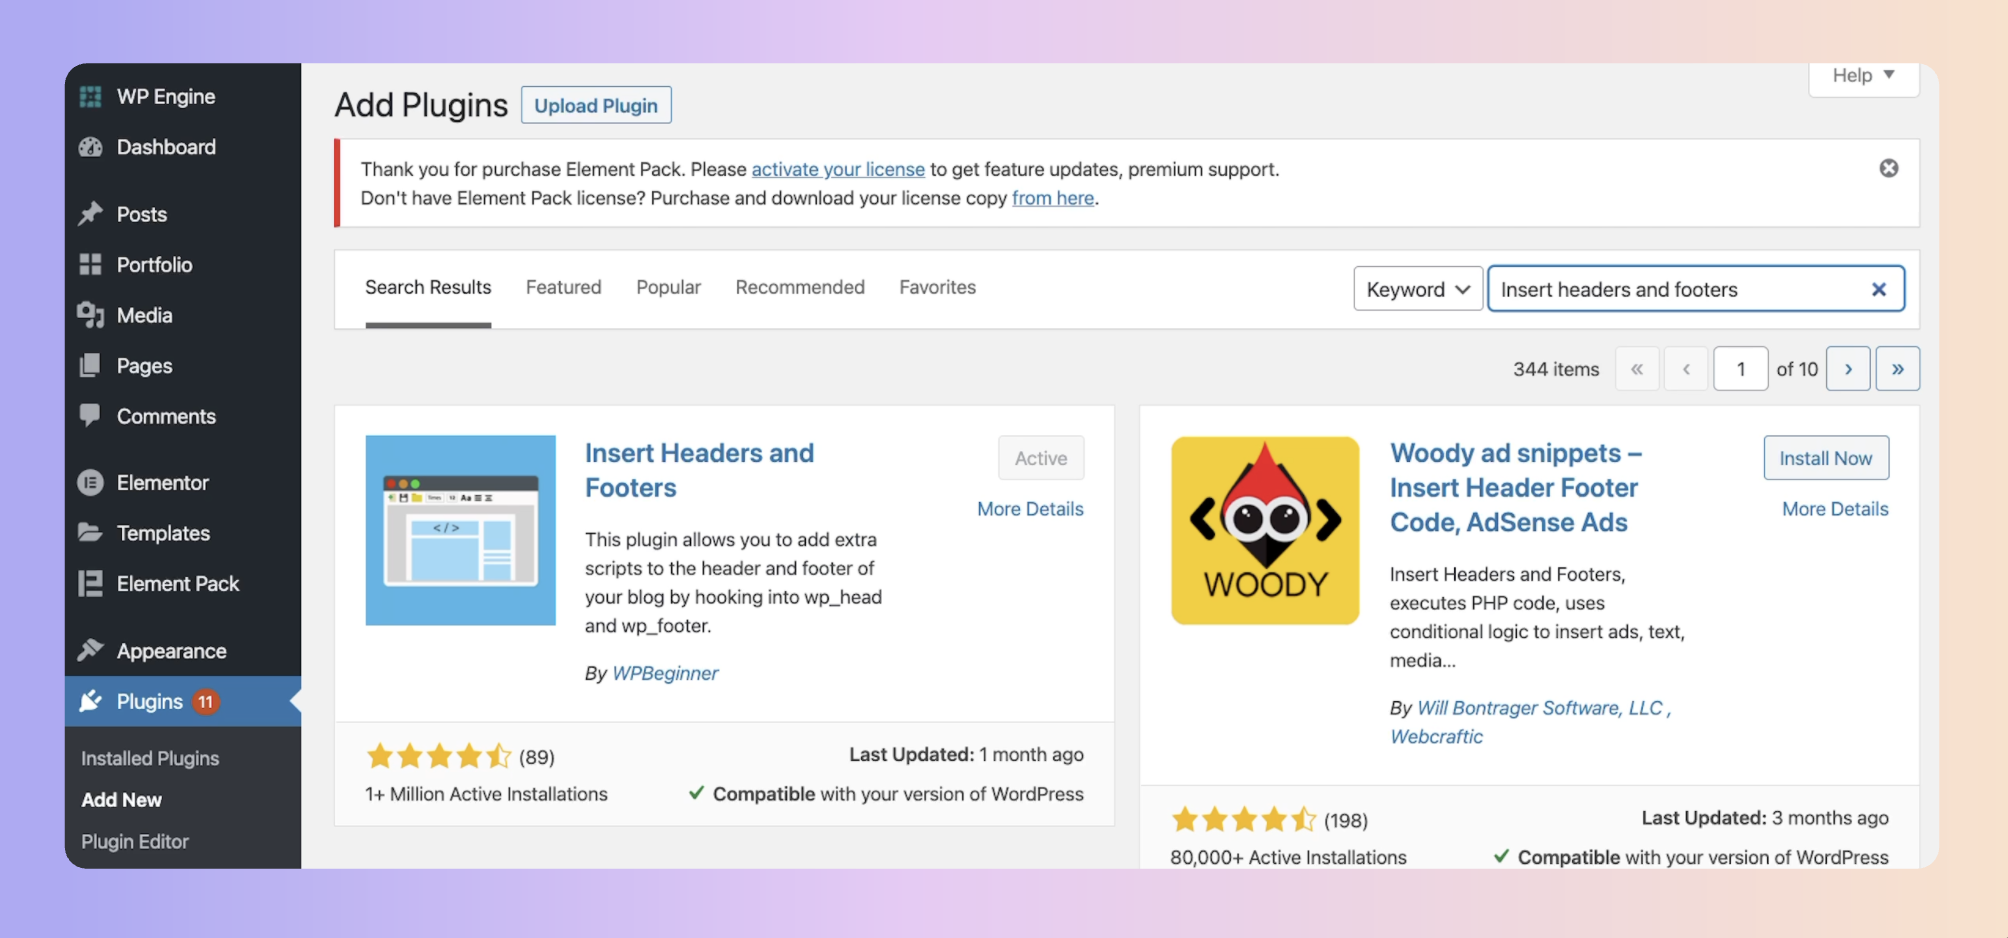
Firstly, login to your WordPress Website, go to Plugins on the main menu and search for "Insert Headers and Footers Plugin"
Once found, click Install Now. Once installed, click activate.

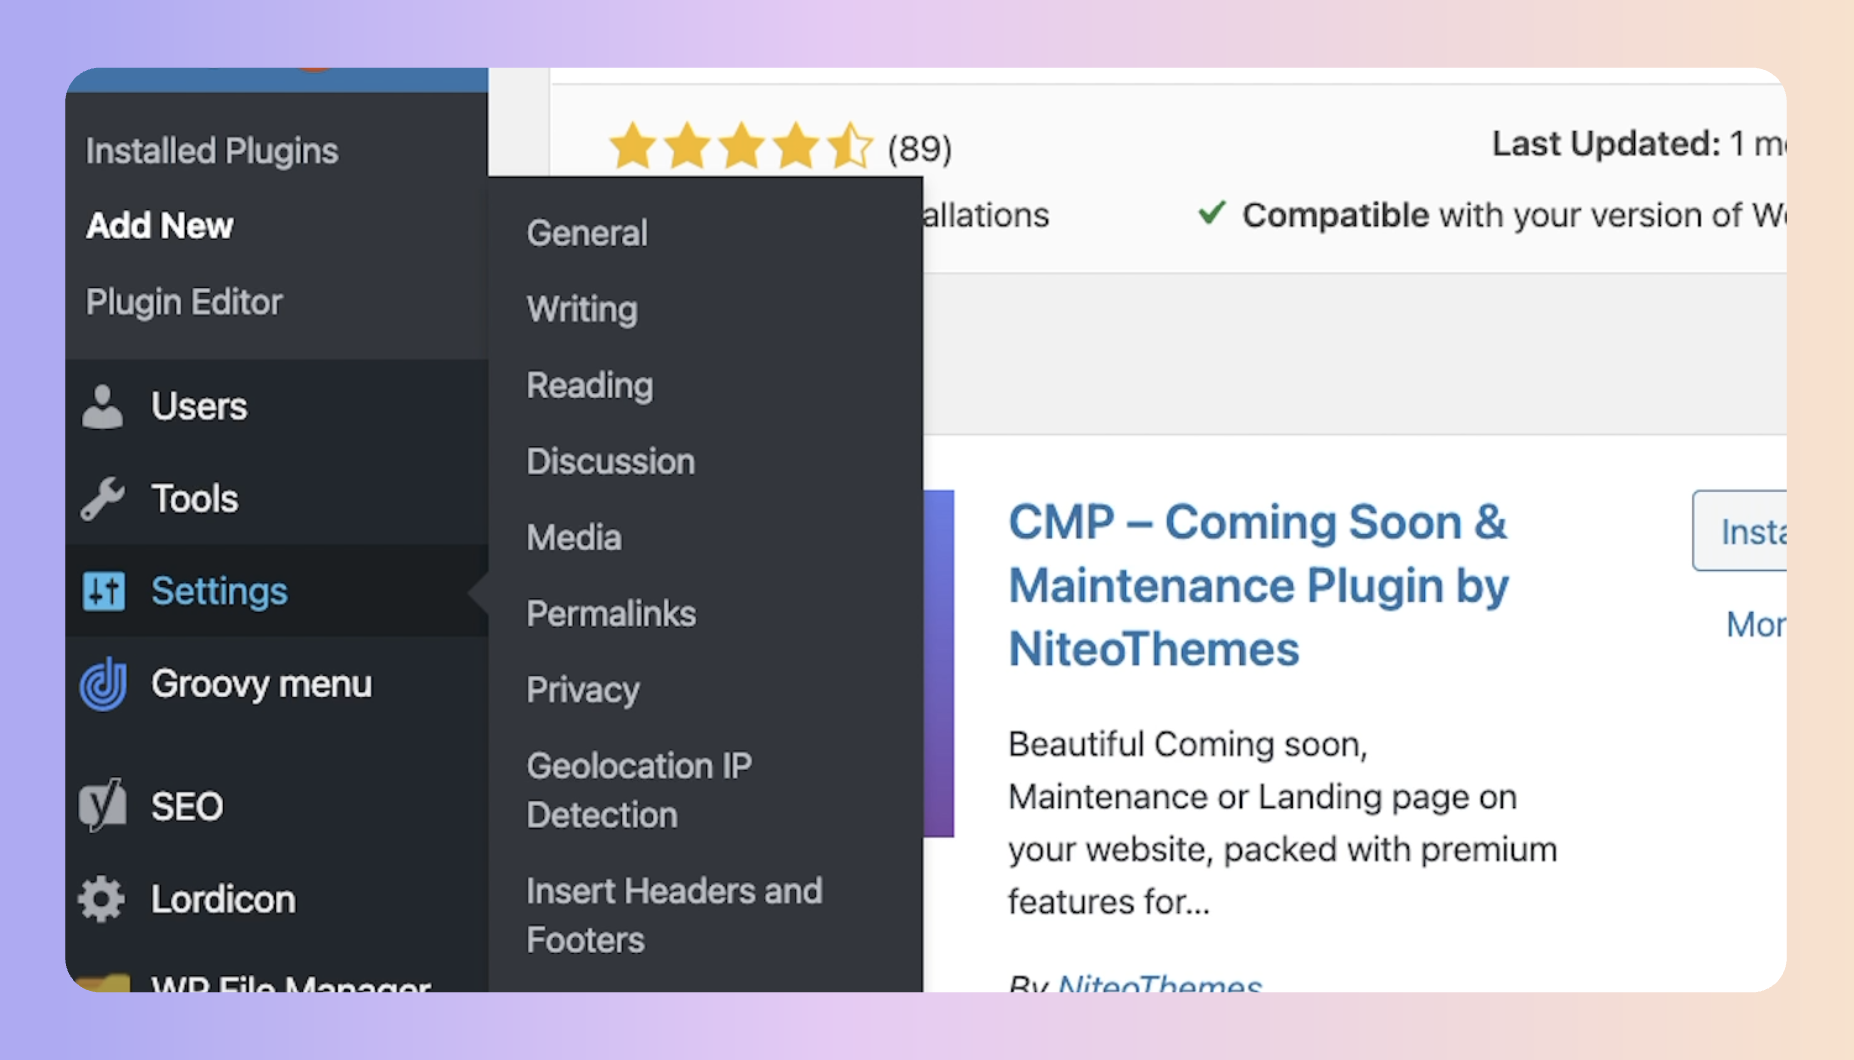
Next, go to settings and click on Insert headers and footers.

Then, in the "Scripts in Footer" section, simply paste your Chatbot embed code and hit save.

If there are any issues on your site, try adding the code in the footer section "scripts in
And that's it! Refresh your website and you will see your website chatbot live and generating enquiries for you.
If you have any difficulties in adding the code we'd be happy to assist you in any way we can. Simply contact your customer success manager or your support team on support@boxly.ai