When people visit your website, they are looking for answers or a quick resolution to their problem.
They don't want to waste time looking around for a contact form or phone number. In fact, 99 out of every 100 people come to your website and leave without making contact with you!
That's a scary figure, think of all the lost opportunity.
That's why we build our proactive, simple website Chatbot. It's designed and tried and tested to turn more of your website visitors into paying customers.
The Chatbot will collect the following details from your visitors
Opening starter option (What they would like to do)
Email address
Phone number
Lead Message (Any additional details they would like to add)
Step 1. Go to Channels and click on "Website Chatbot"
Step 2. Hover over it and click "Connect"
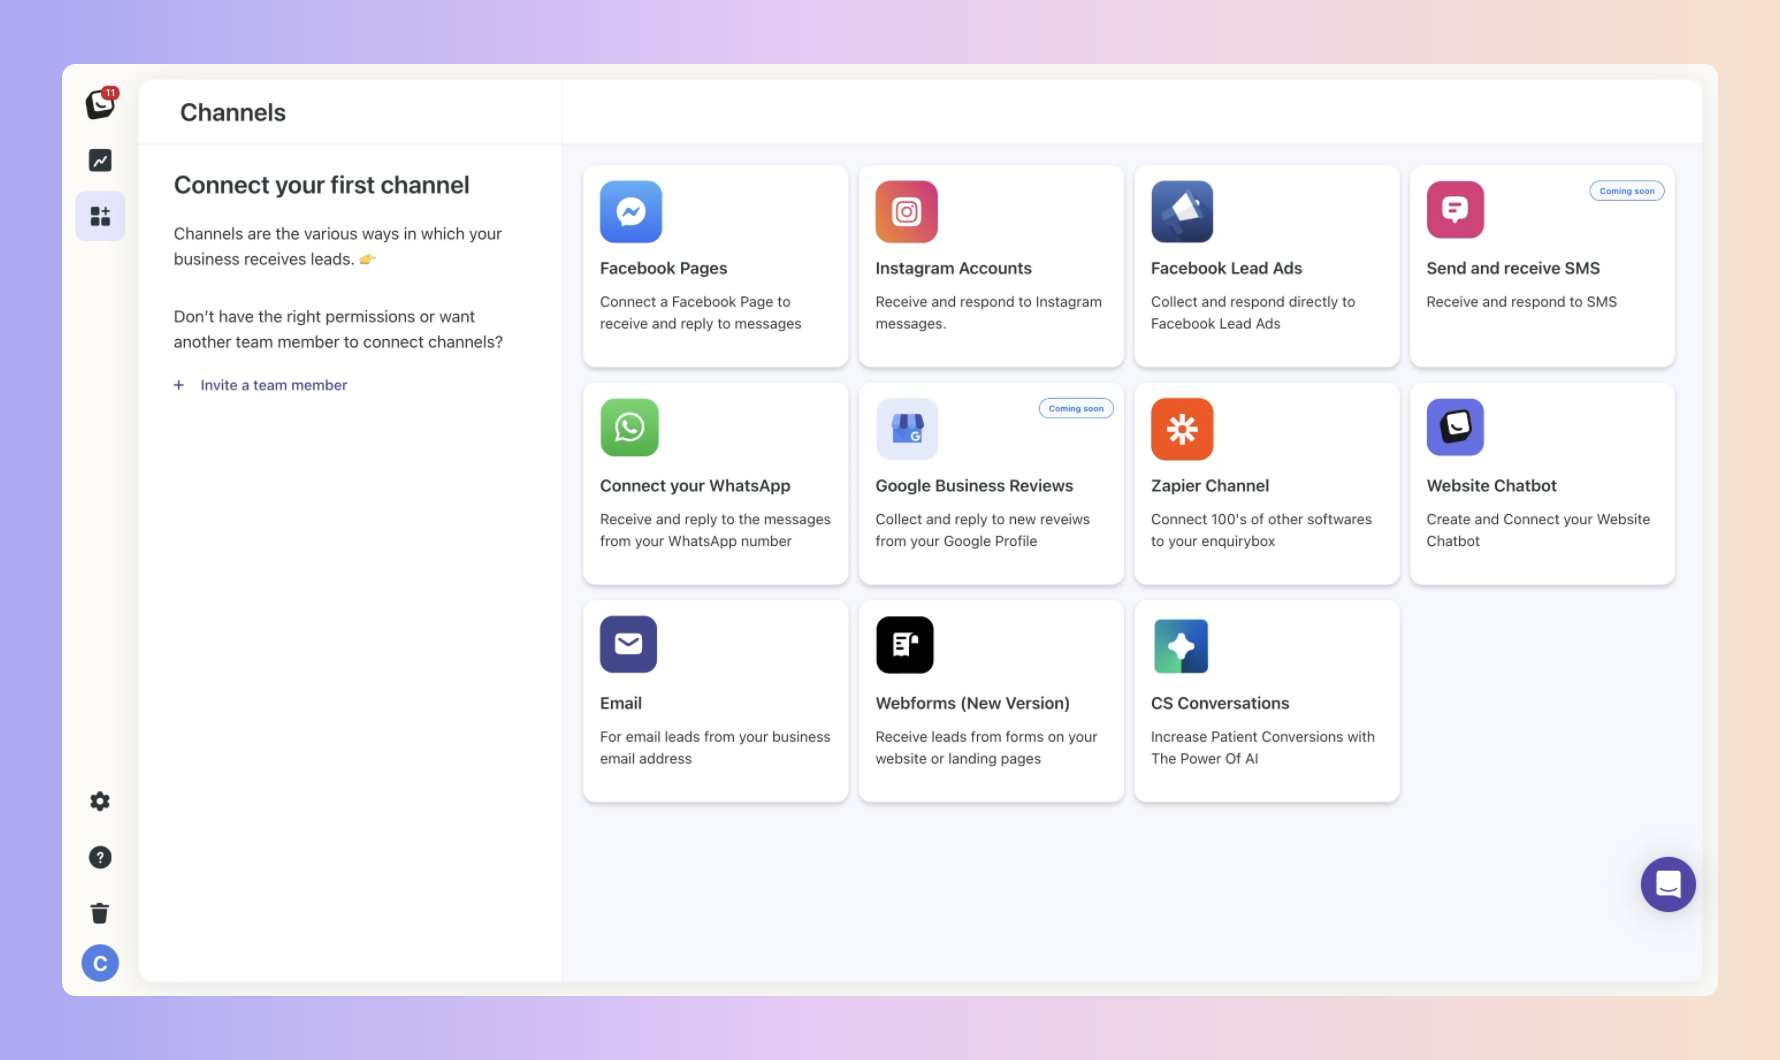
Once connected, click on the Builder tab.
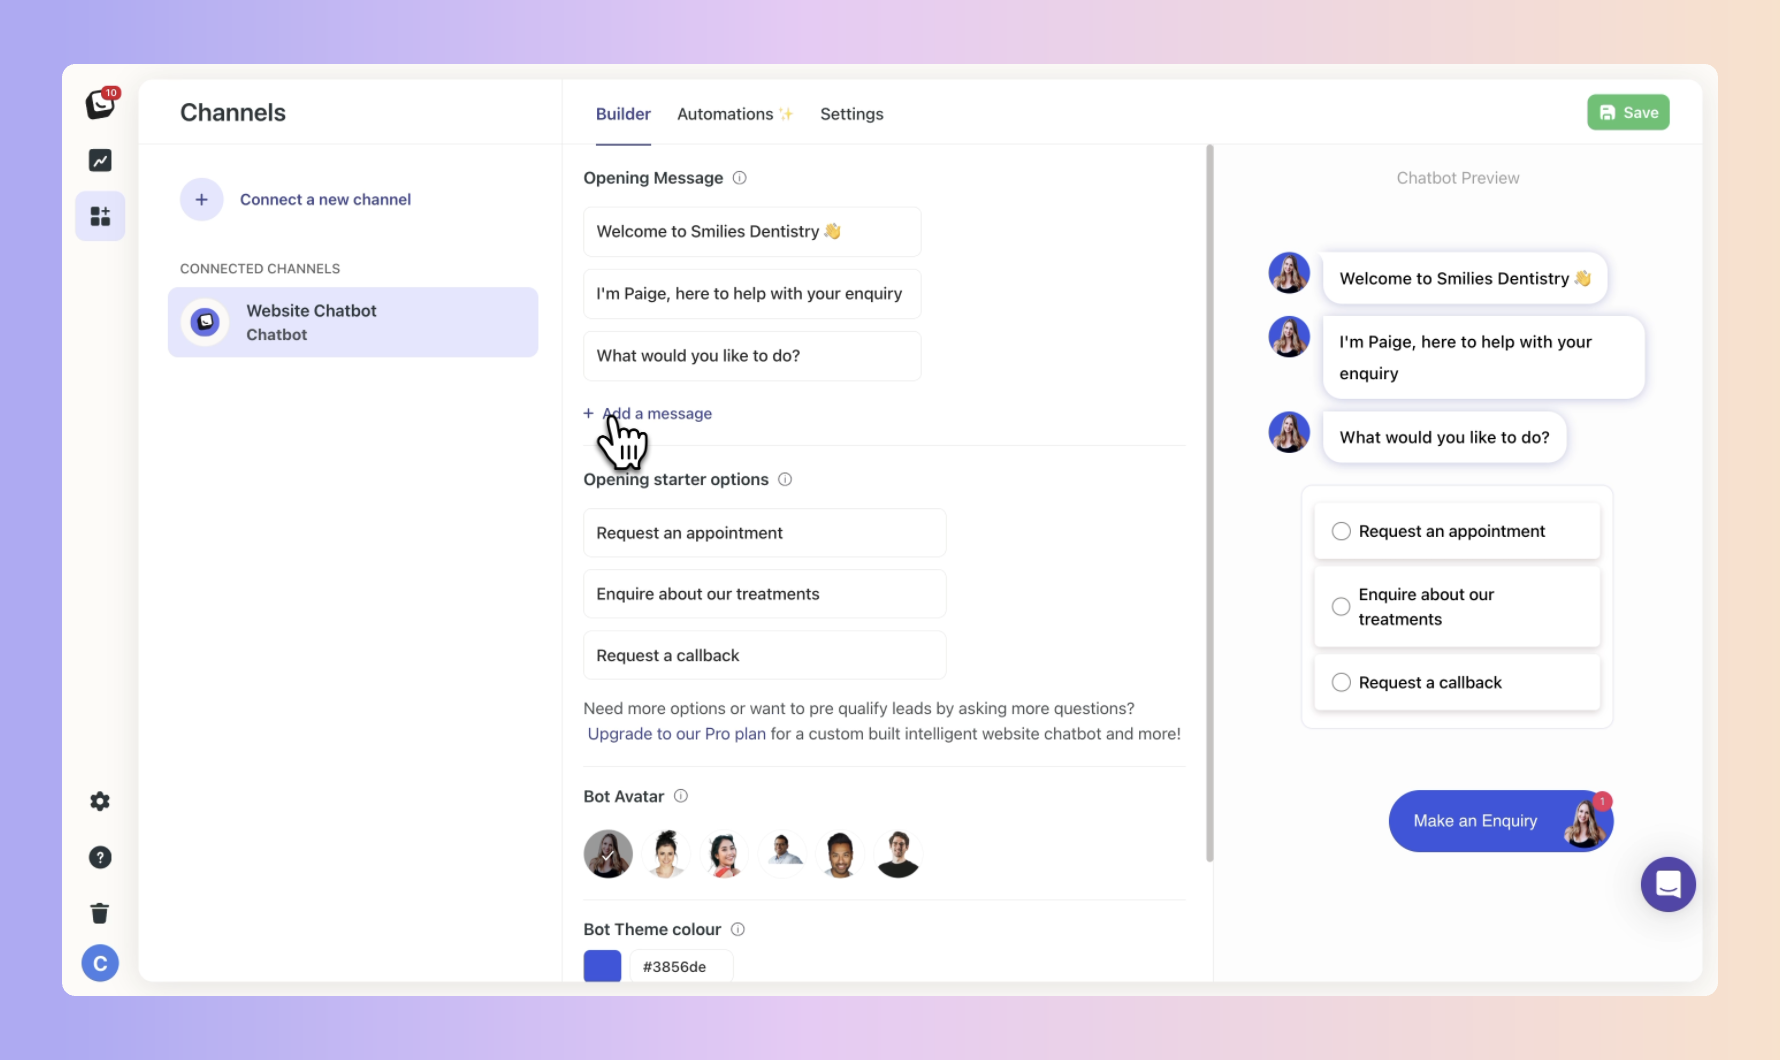
Opening Message
By default we have added a tried and tested opening message for you. The opening message is the first message that shows when the bot opens.
To change the opening message, click on it or click + Add a message to add another line.
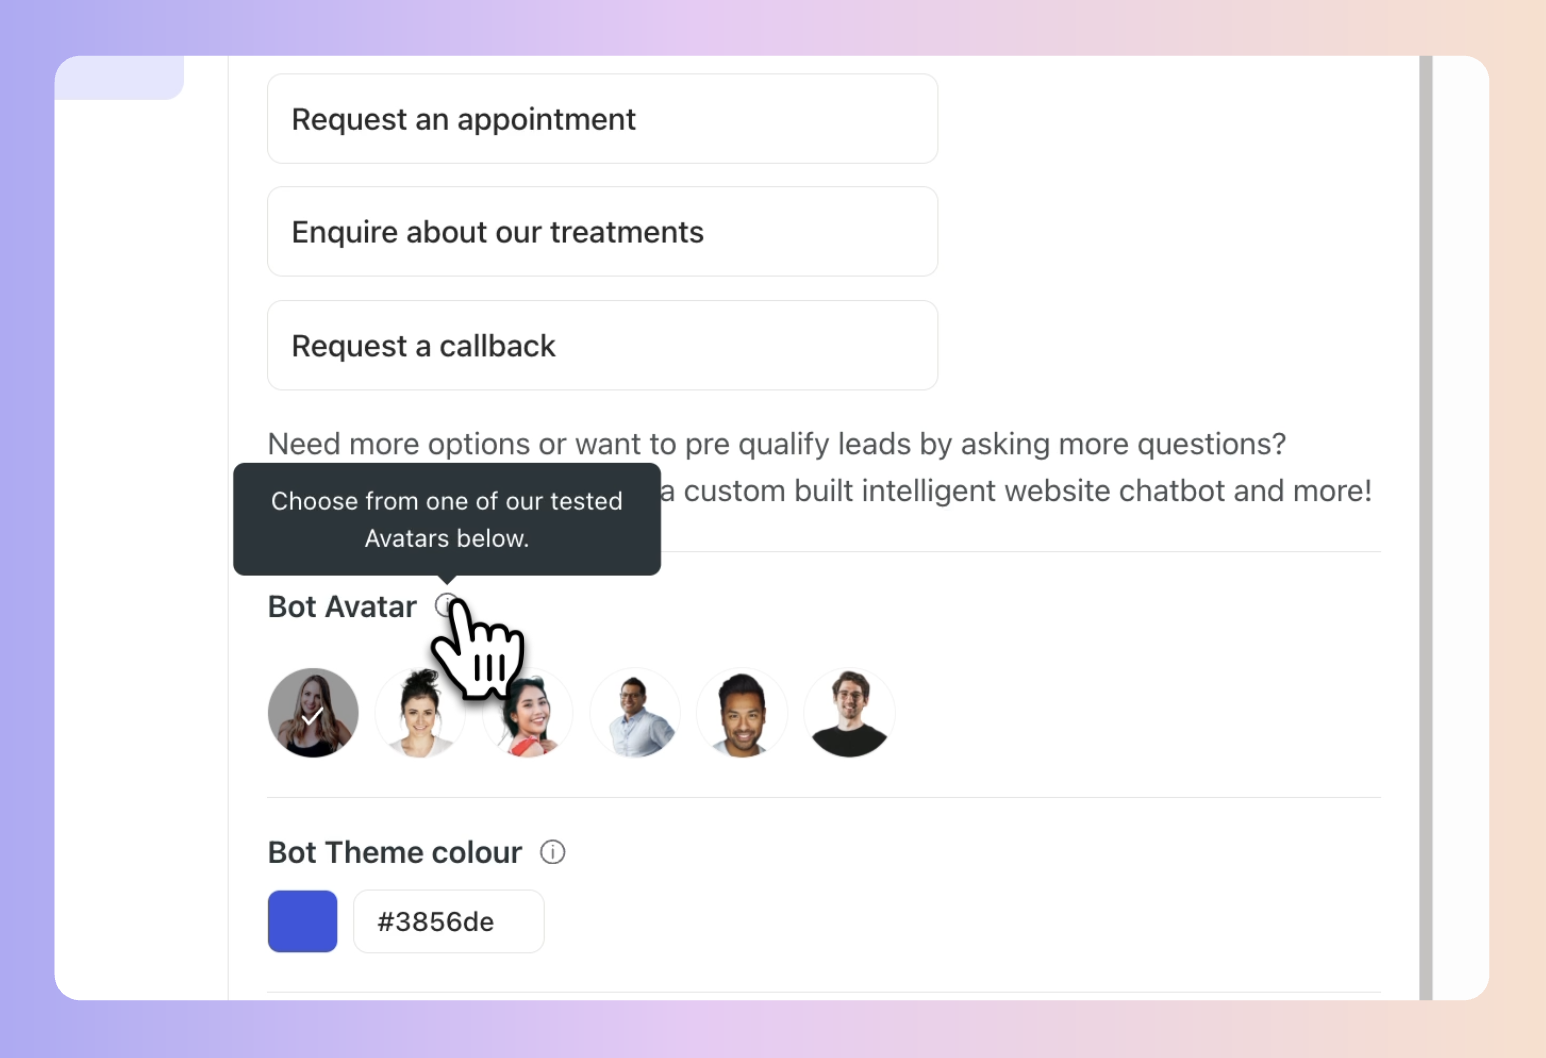
Opening starter options
Opening starter options give you a better idea of what the visitor would like to do. we offer 3 opening starter options in our Website Chatbot.
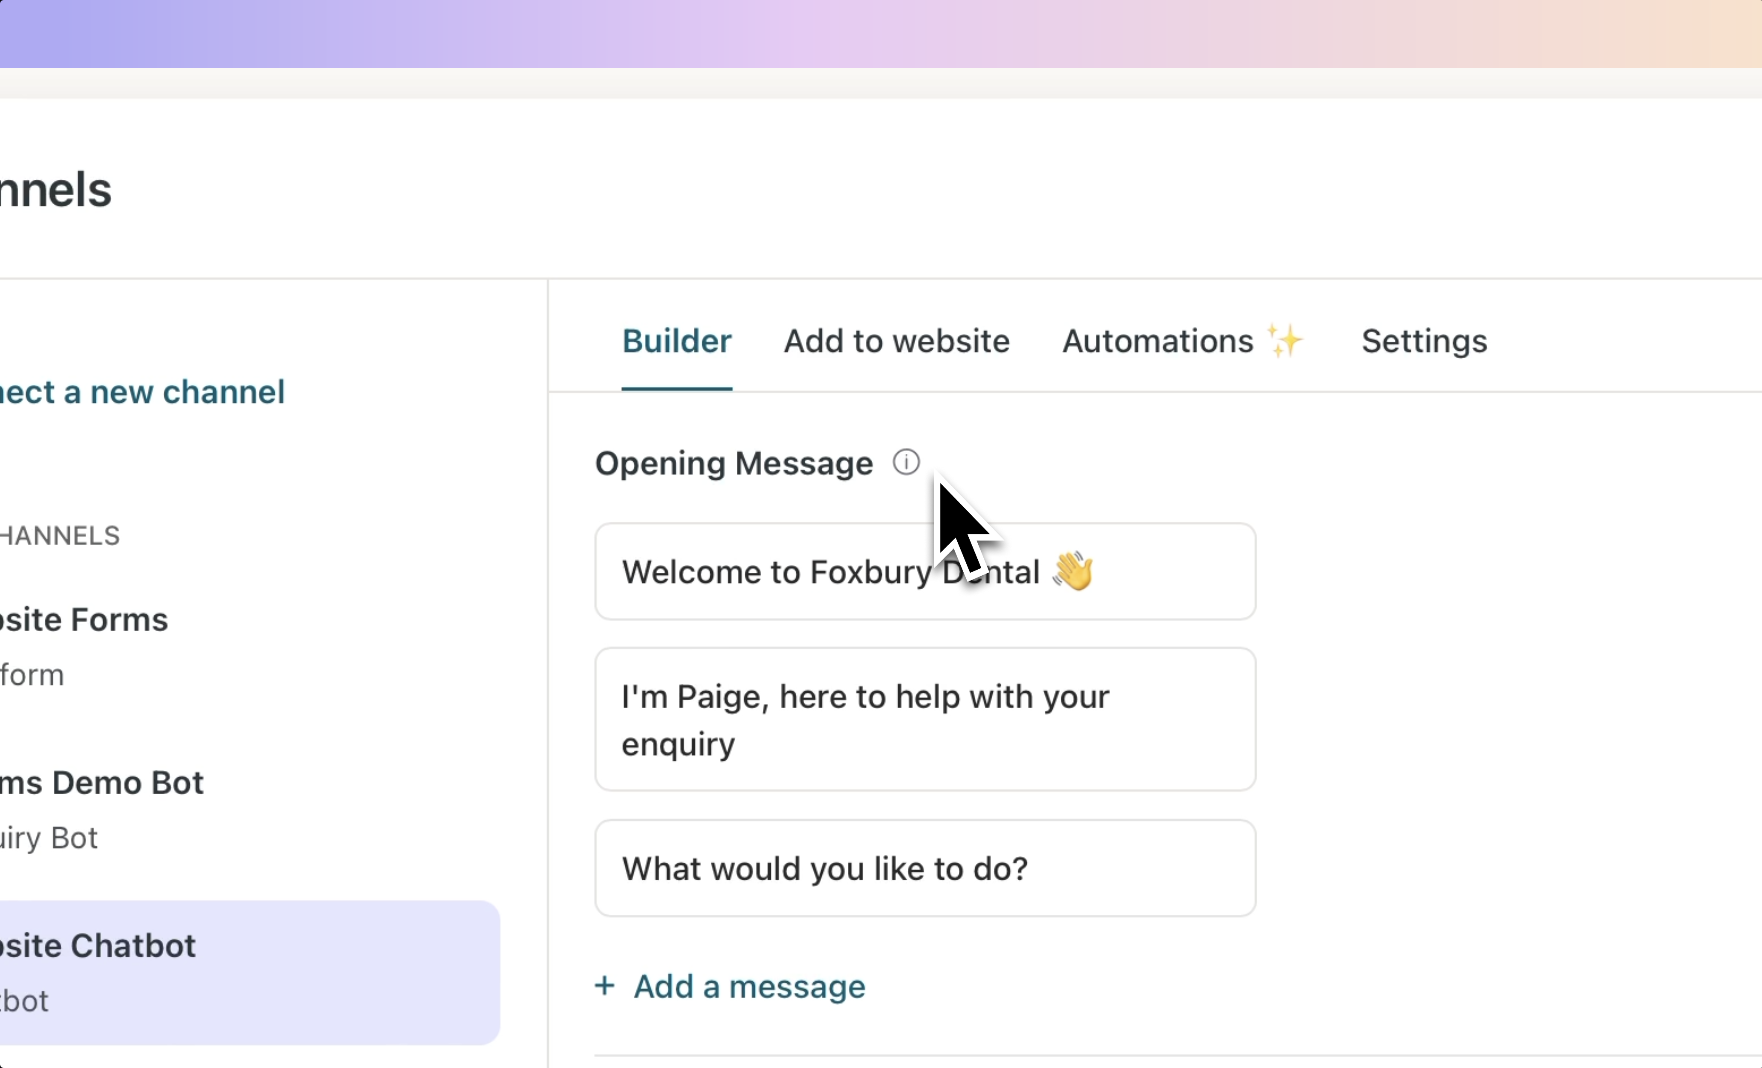
Bot Avatar and theme
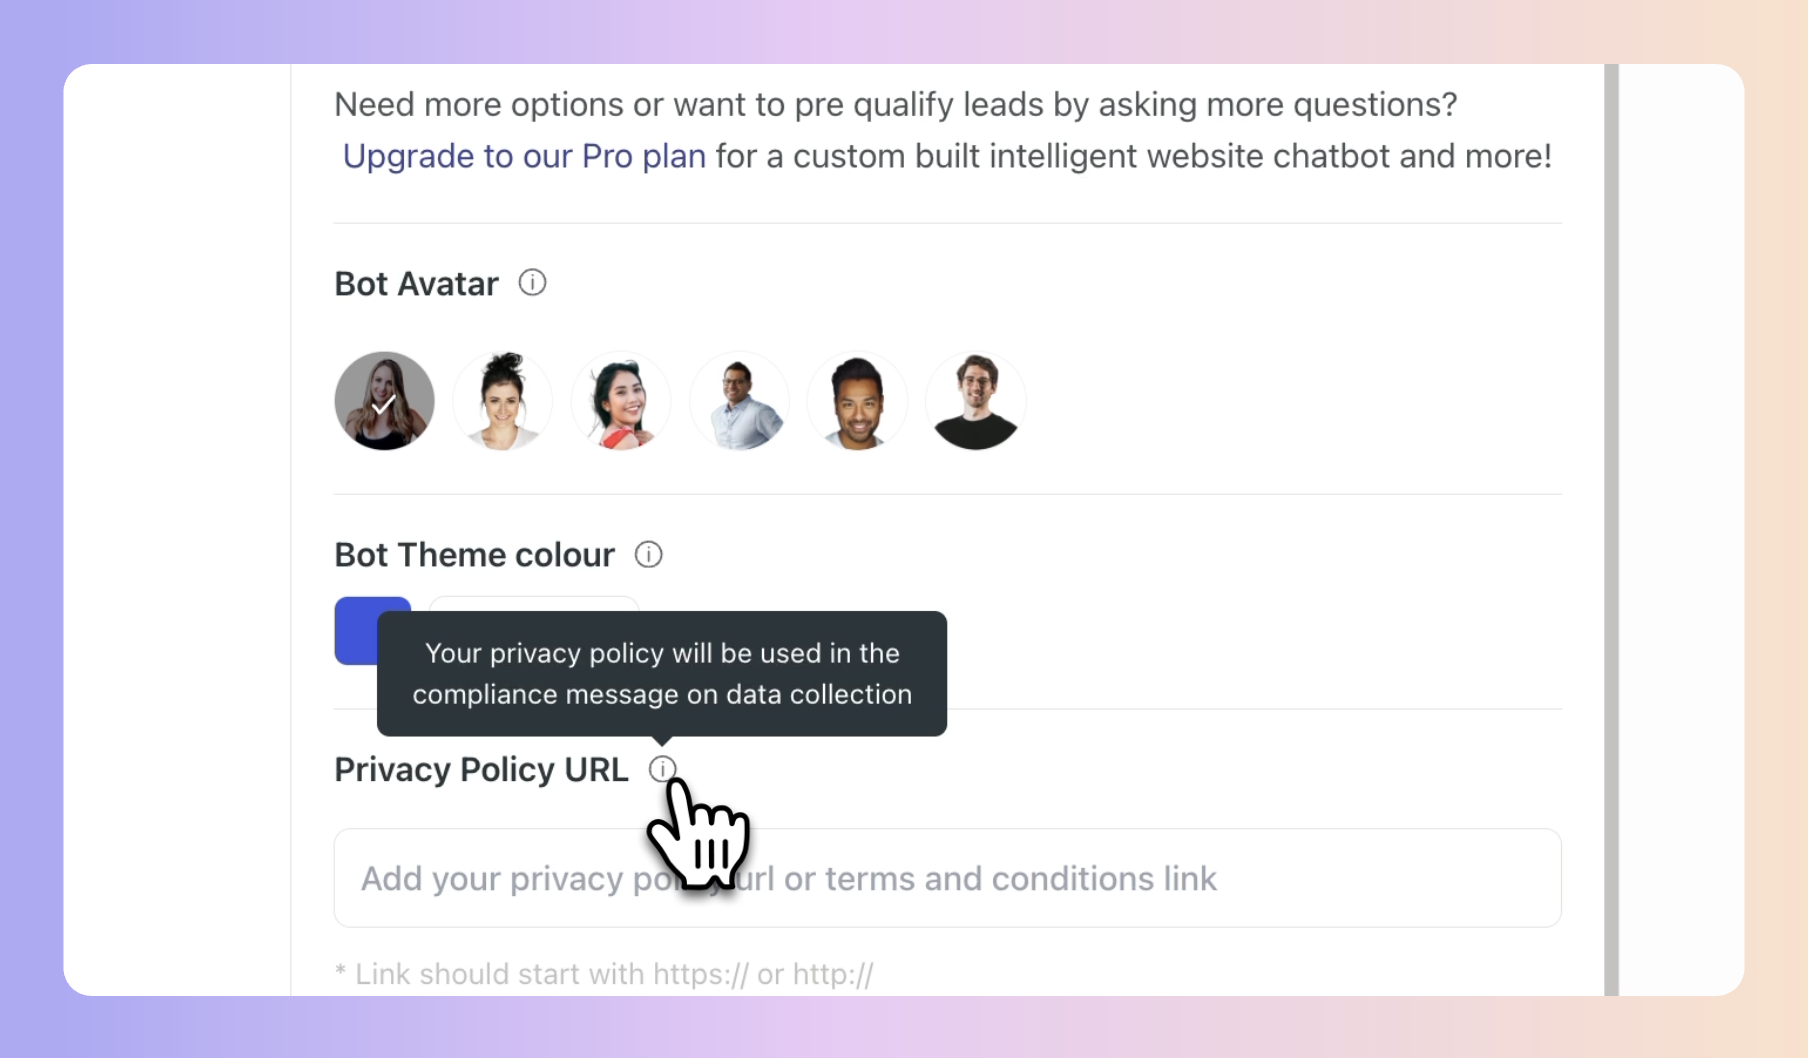
You can choose from our 6 Bot Avatars and match the them of the bot to your brand colours.
Privacy Policy
You can add in your privacy policy link which will be linked in a message which will be shown to the visitor prior to collecting any contact details for compliance and GDPR reasons.
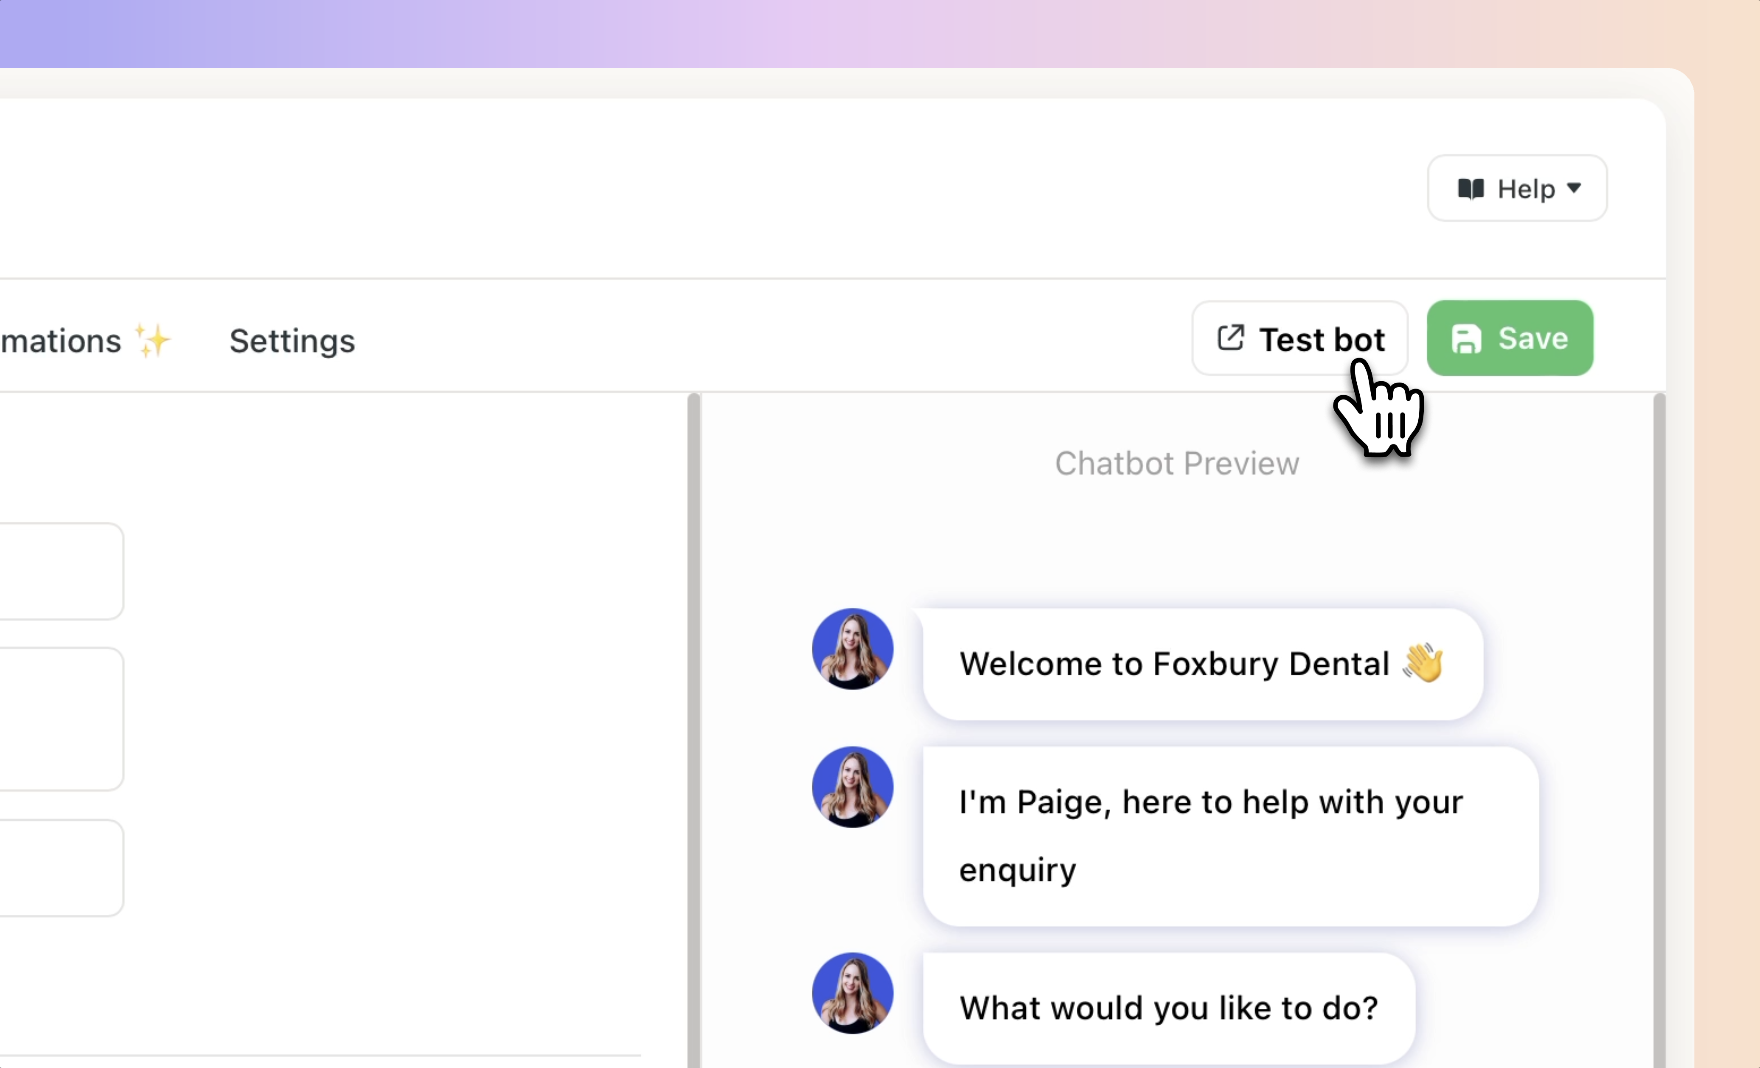
To preview your Chatbot, make sure to first click Save, then click "Test bot"
Your preview page will open in a new window where you can test it out.
To add the Chatbot to your website, click on the "Add to website" tab, then use one of 2 options.
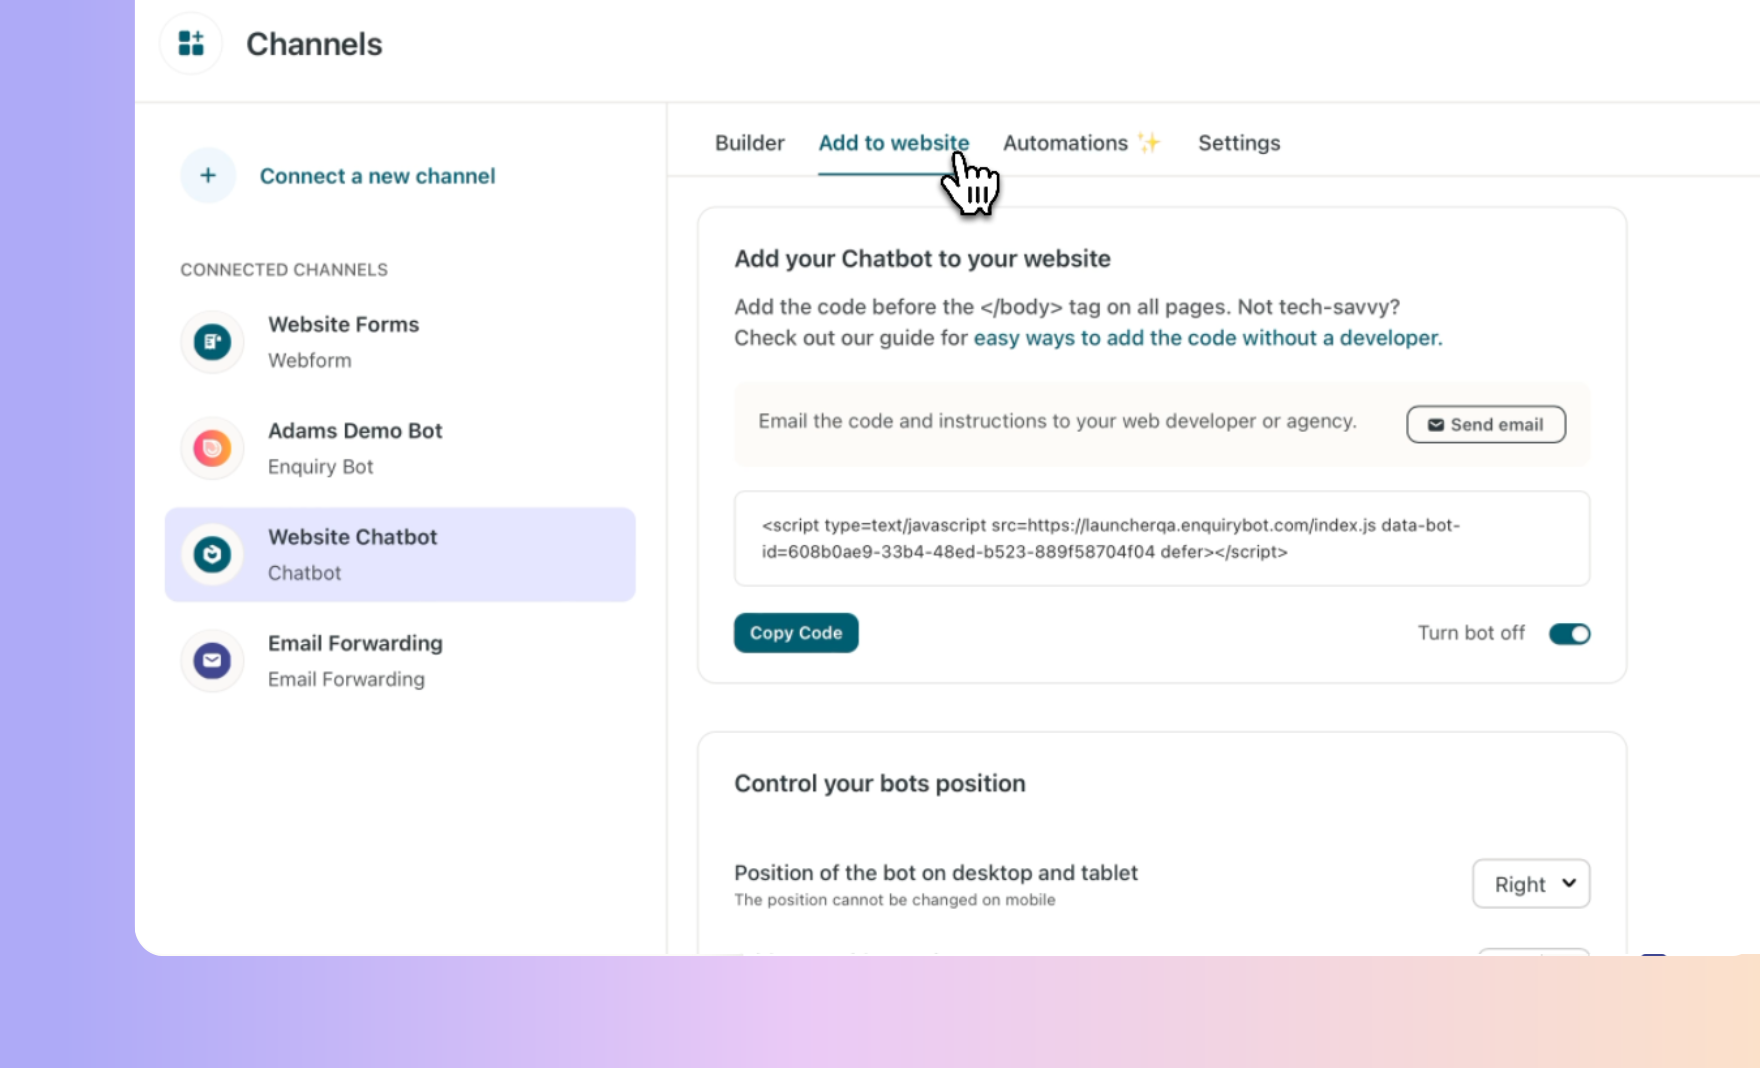
Option 1. Send it to your website developer
Send the code to your website developer and ask them to do it. To do this, click "Send email". A pop-up will show with the code and instructions already in it. Simply add in there email address and send it.
Option 2. Copy the code and add it to your website yourself.
Copy the code and place it on all pages just before the closing of the </body> tag.
For example:
<head></head> <body>..........<chatbotcode></body><footer></footer>If your website is a WordPress website, follow these instructions:
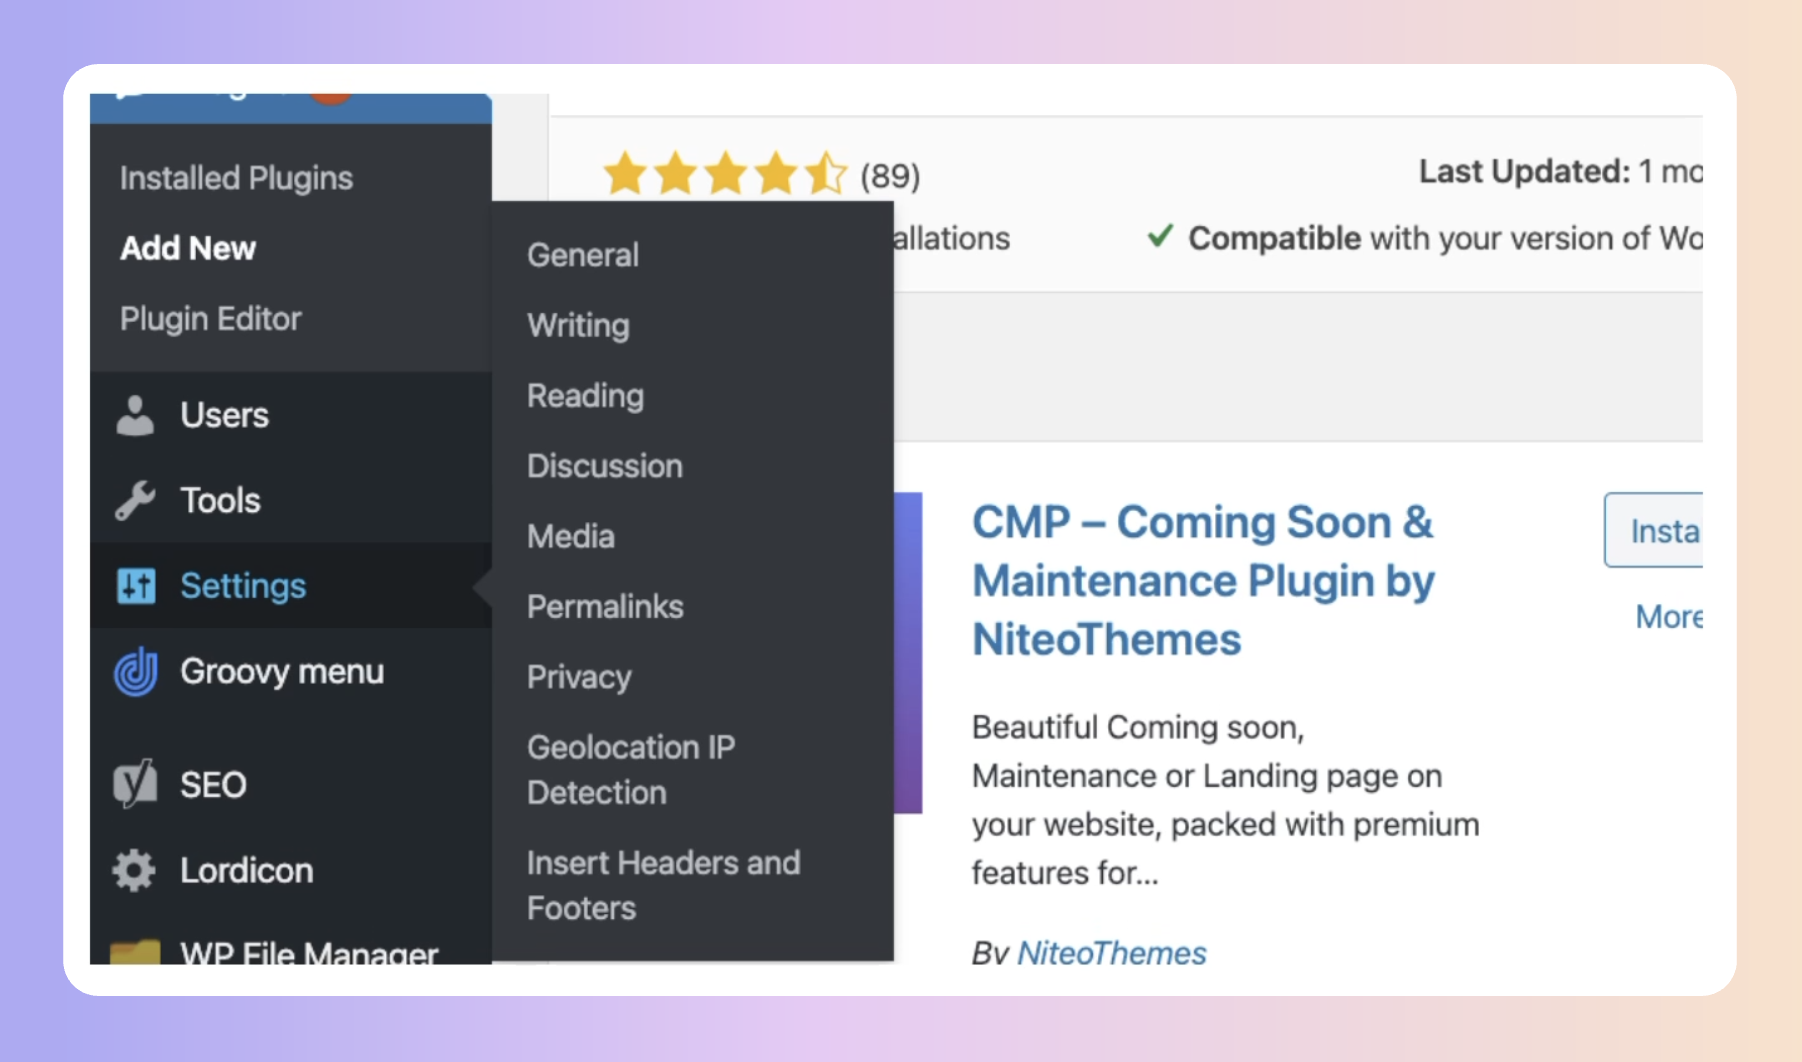
Firstly, login to your WordPress Website, go to Plugins on the main menu and search for "Insert Headers and Footers Plugin"
Once found, click Install Now. Once installed, click activate.
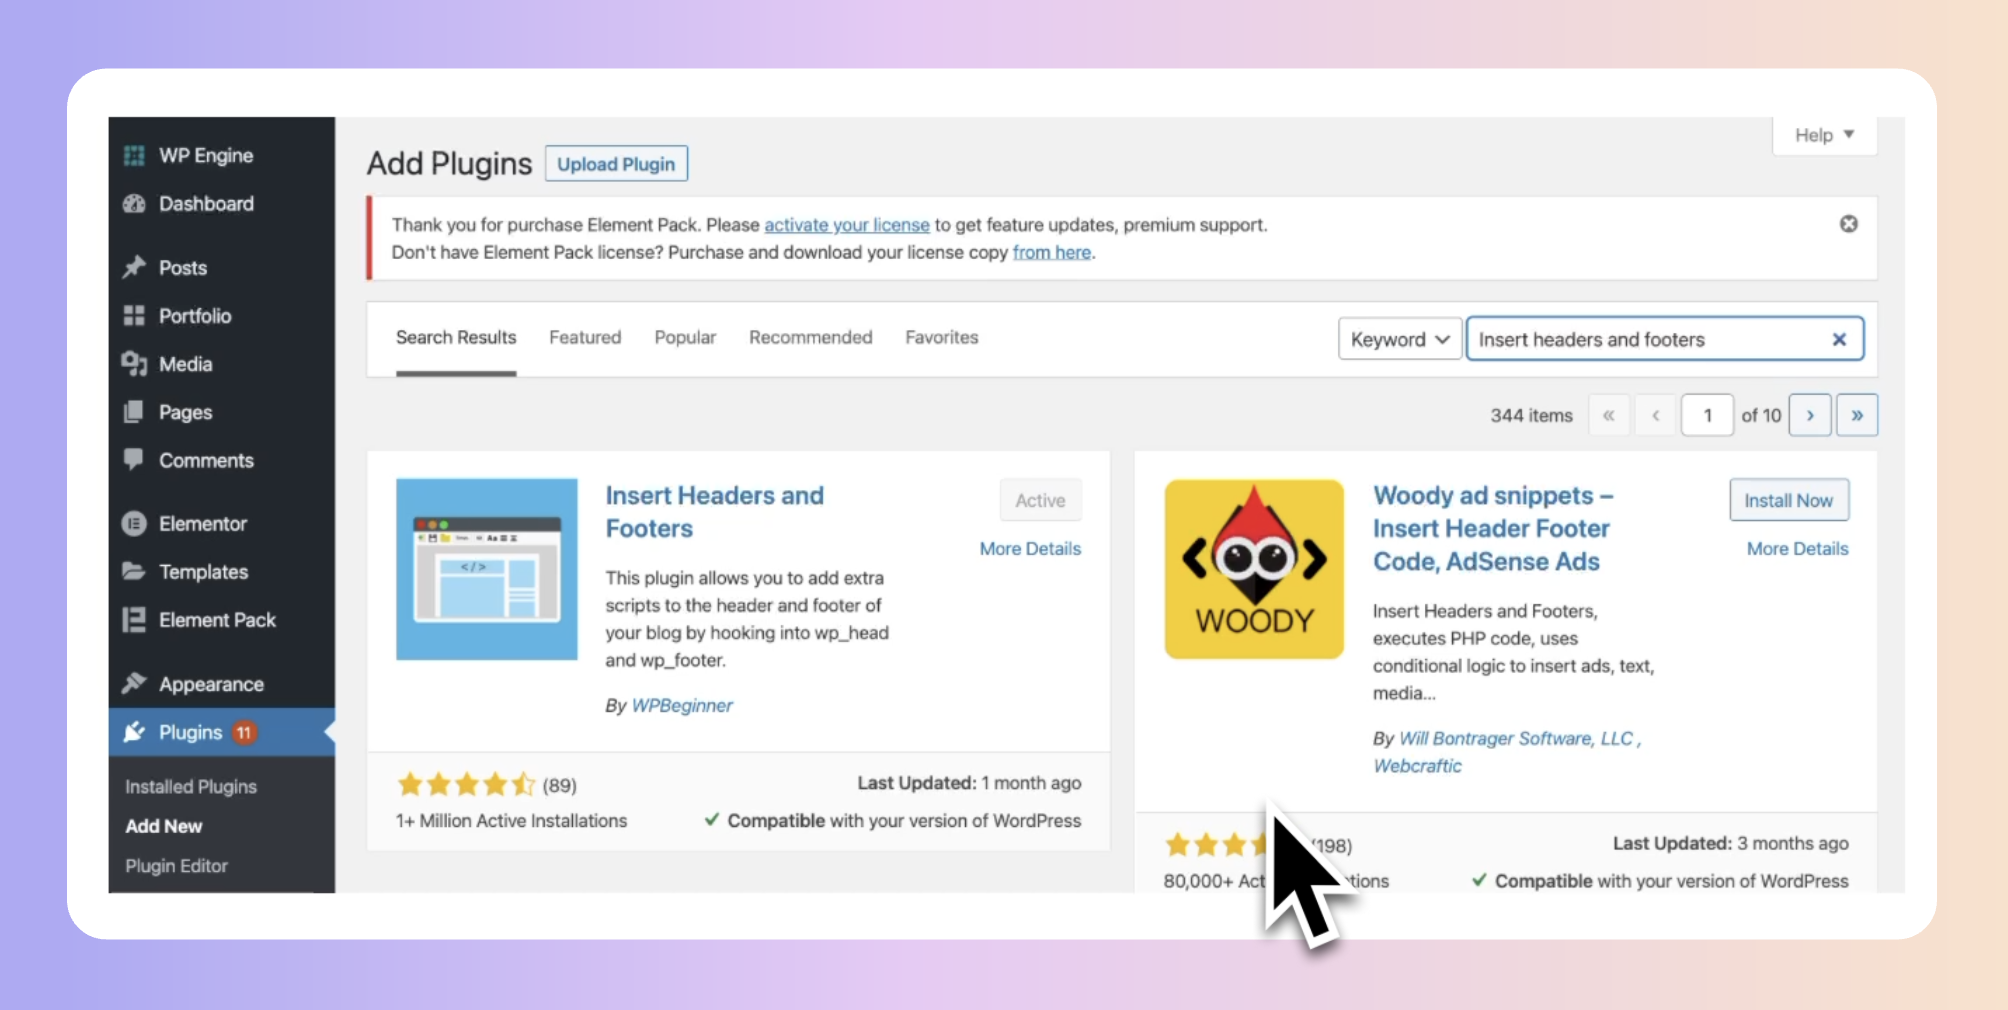
Next, go to Settings and click on "Insert headers and footers".
Then, in the "Scripts in Footer" section, simply paste your Chatbot embed code and hit save.
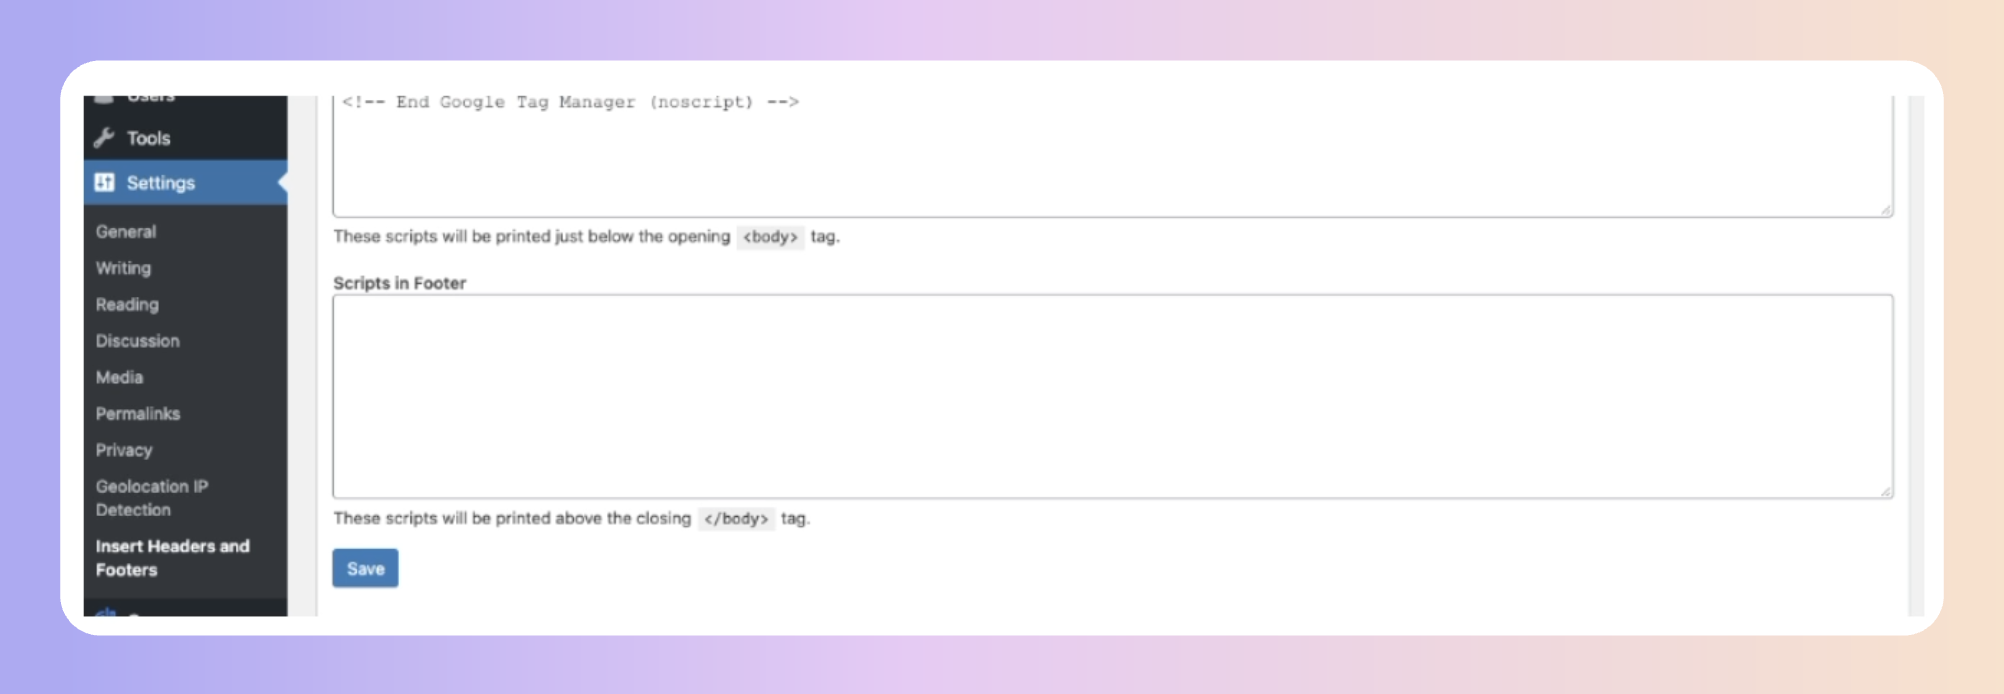
If there are any issues on your site, try adding the code in the footer section "scripts” in
And that's it! Refresh your website and you will see your website chatbot live and generating enquiries for you.
If you have any difficulties in adding the code we'd be happy to assist you in any way we can. Simply contact your customer success manager or your support team on support@boxly.ai
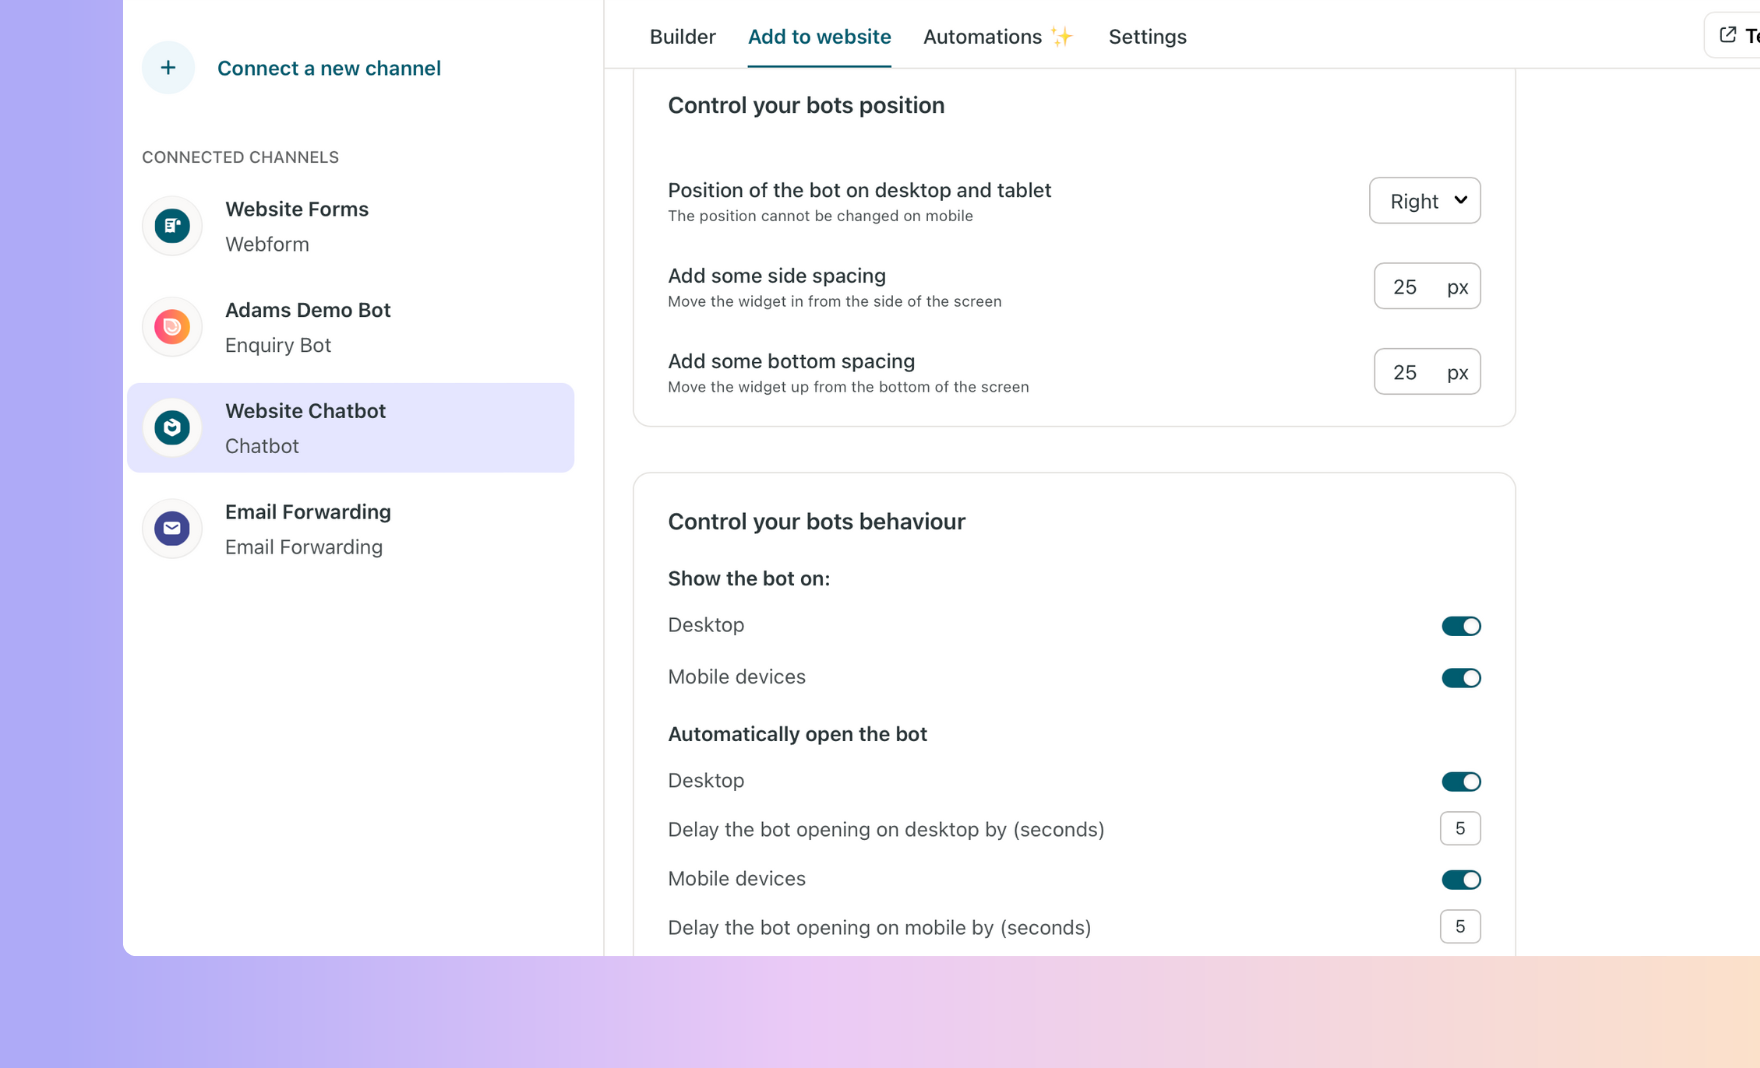
There are a number of settings on the add to website tab to control your bots position and behaviour. See the options below.
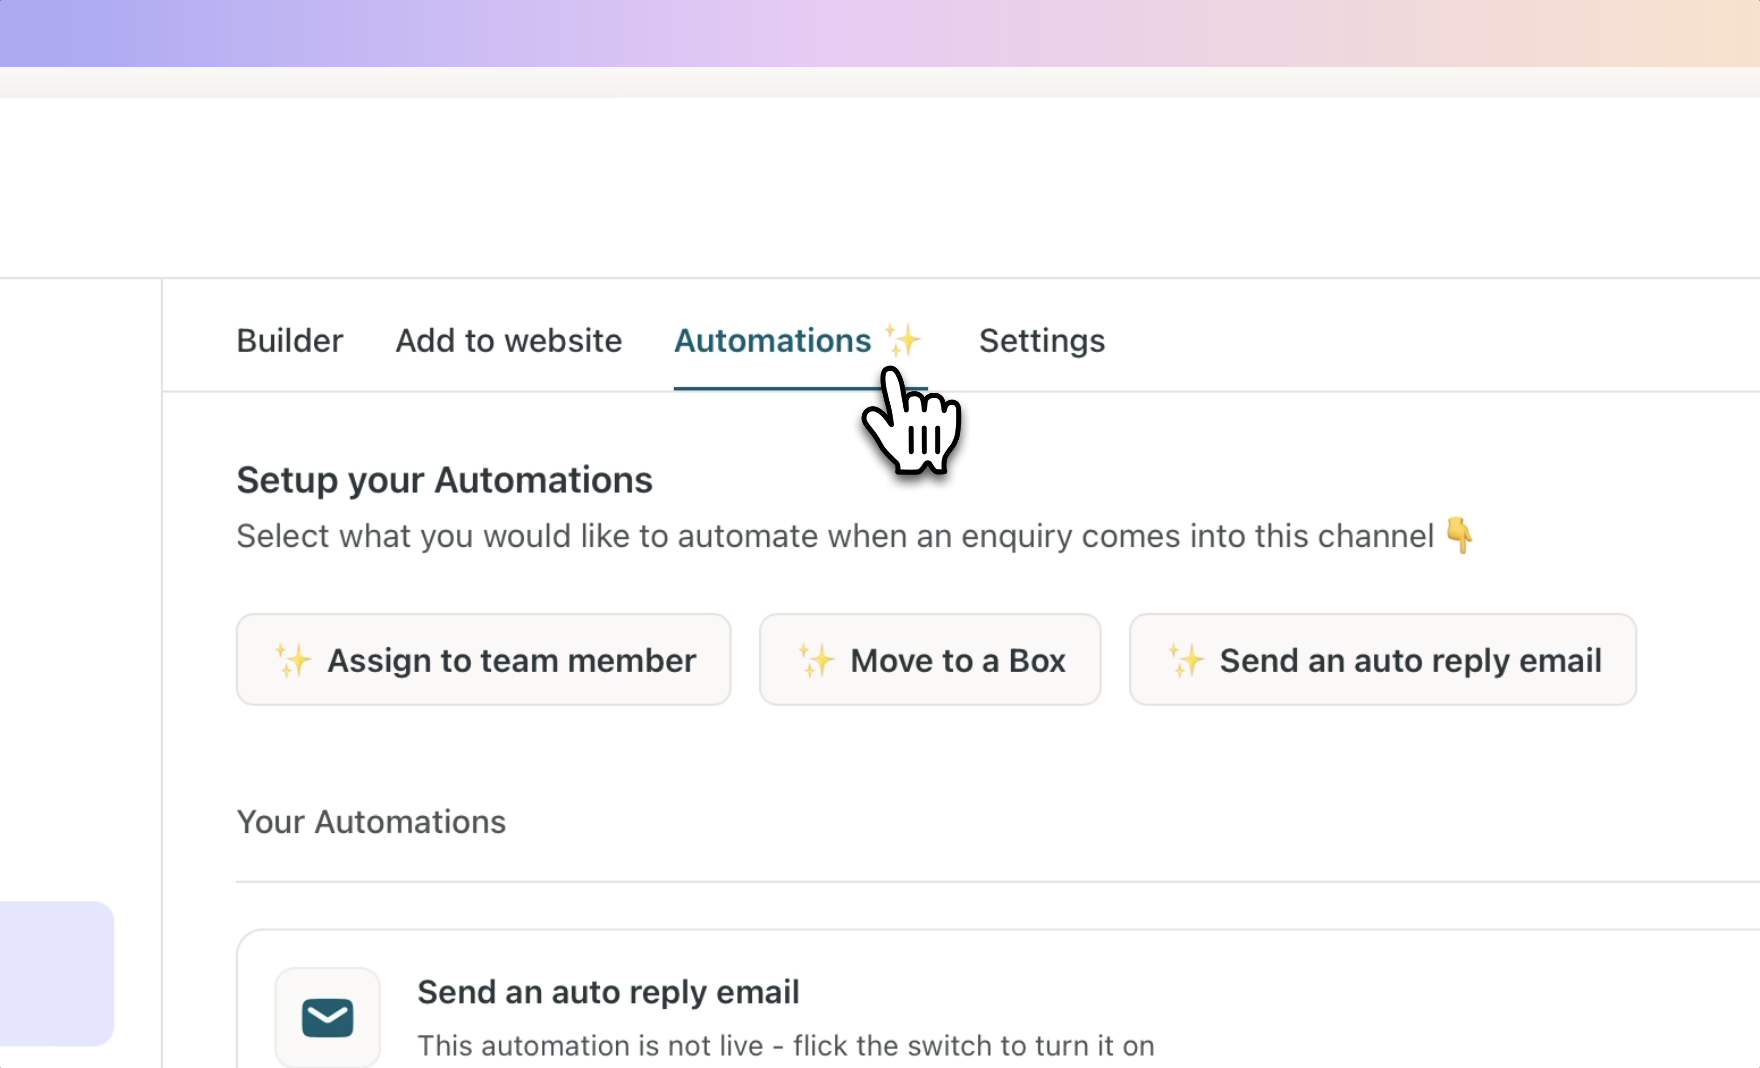
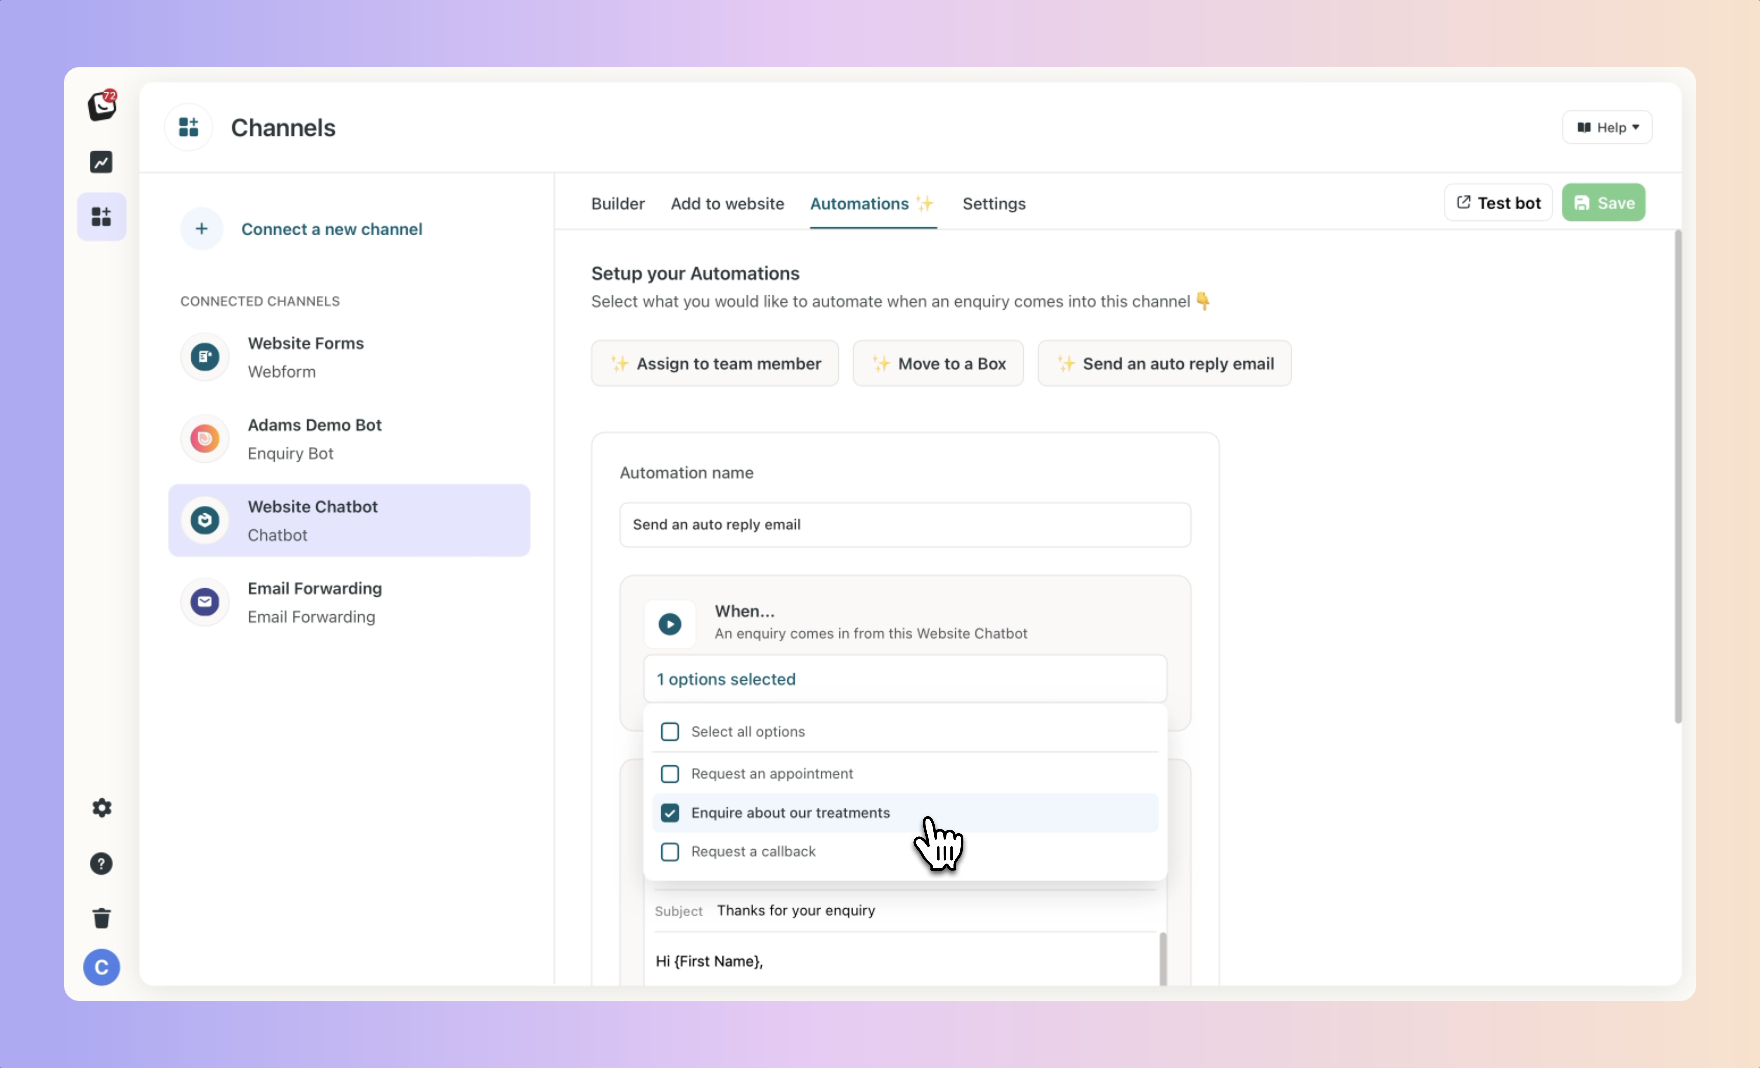
When a lead comes in from your chatbot you can automate the following things.
Send an auto reply email
Move the lead to a Box
Assign a lead to a team member
And here's the powerhouse....
You can run any other these 3 automations based on the opening starter option that the visitor selected!
Here's an example...
I want to send a specific email when a visitor selects Enquire about our services.
In order to do this, click the "Send an auto reply email" automation, then in the "When" section click on that option, write your email and save.
That's it!
I need to add more than 3 opening starter options
For this free version of our Website Chatbot we only offer 3 options. For a more options or a more complex question flow in the bot conversation check out EnquiryBot our custom built intelligent solution.
I want to change the privacy policy message
For this free version of our Website Chatbot we only offer this standard message. For custom messaging, check out EnquiryBot our custom built intelligent solution.