When the Email Forwarding channel is connected, all your emails will start flowing into Boxly.
The key thing to remember about email forwarding is that if the email comes from the same email address, it will always appear as part of an existing thread.
If you’d prefer these emails to come in as separate leads each time and want the details from the email to be automatically added to the contact details, you can use the Webform Forwarding Address feature.
With the Webform Forwarding Address, our AI extracts the lead’s contact details from the email body and automatically maps them for you, making it easier to respond to the customer.
✅ First, block the specific email address you don’t want to group in threads and instead want to process as separate leads.
Open Boxly
Go to Channels, then open your already setup Email forwarding
If you haven’t set up your email forwarding yet—Go to this article
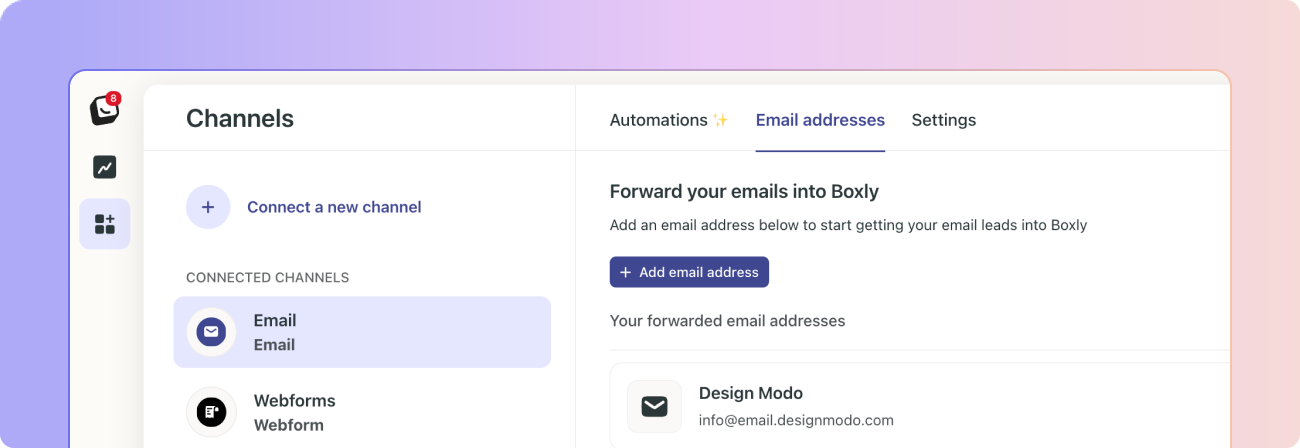
Go to the second tab, Email addresses, which has a list of all your forwarded email addresses
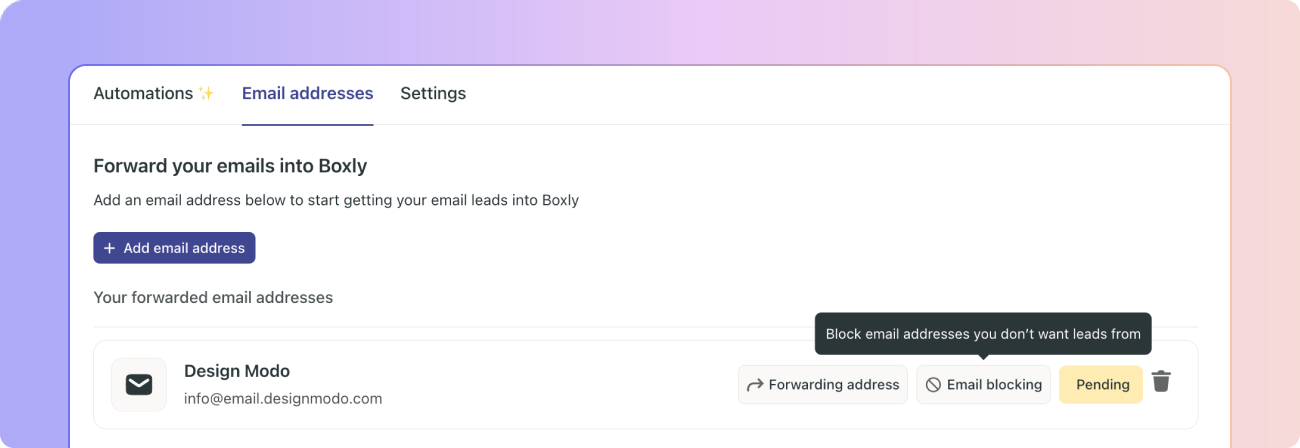
On the email address you wish to come in as separate leads each time, click “Email blocking”.
Select “Block certain email addresses”
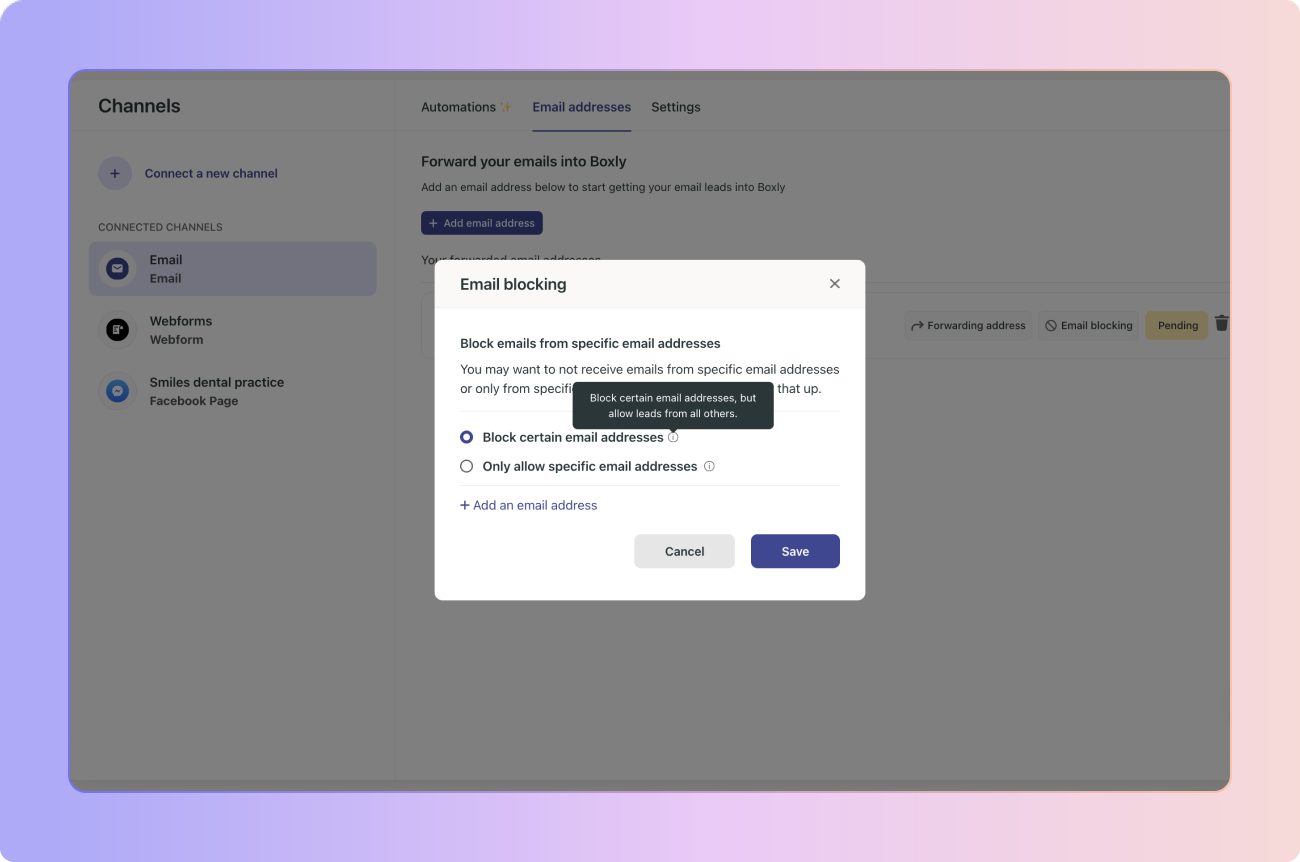
Click “Save”.
✅ Create a rule in Gmail or Outlook to forward emails from the specific address (e.g.,[email protected]) to the Webform Forwarding Address provided by our team.
Go to Gmail Settings and click on the "Filters and Blocked Addresses" tab.
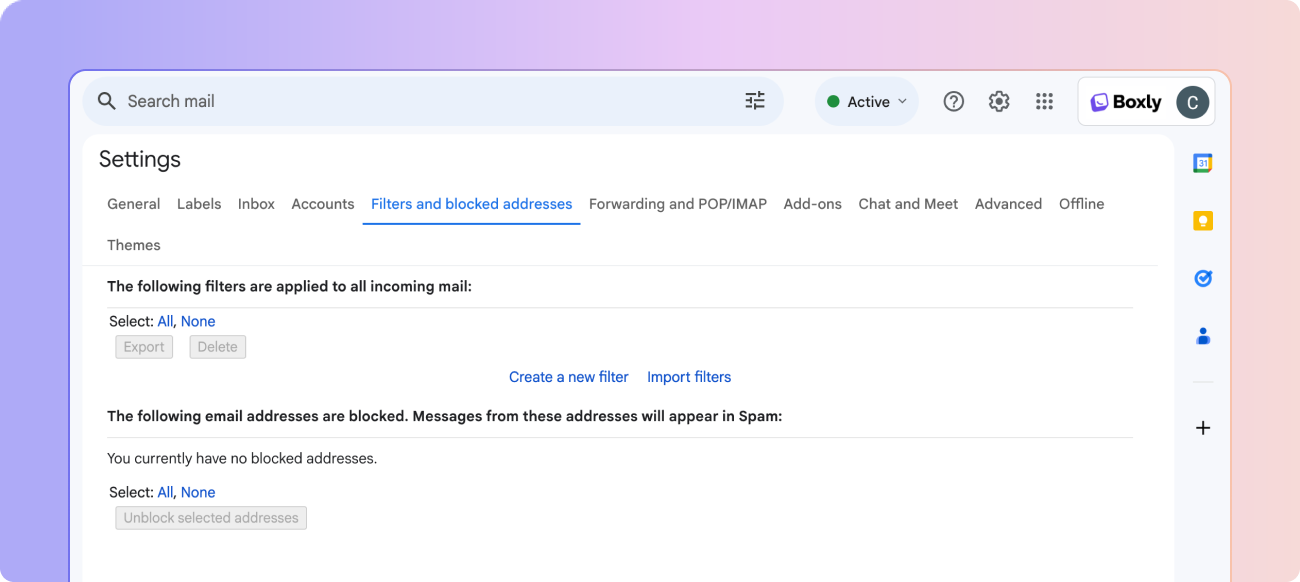
Click on "Create a new filter."
In the "From" field, enter the email address (e.g., [email protected]).
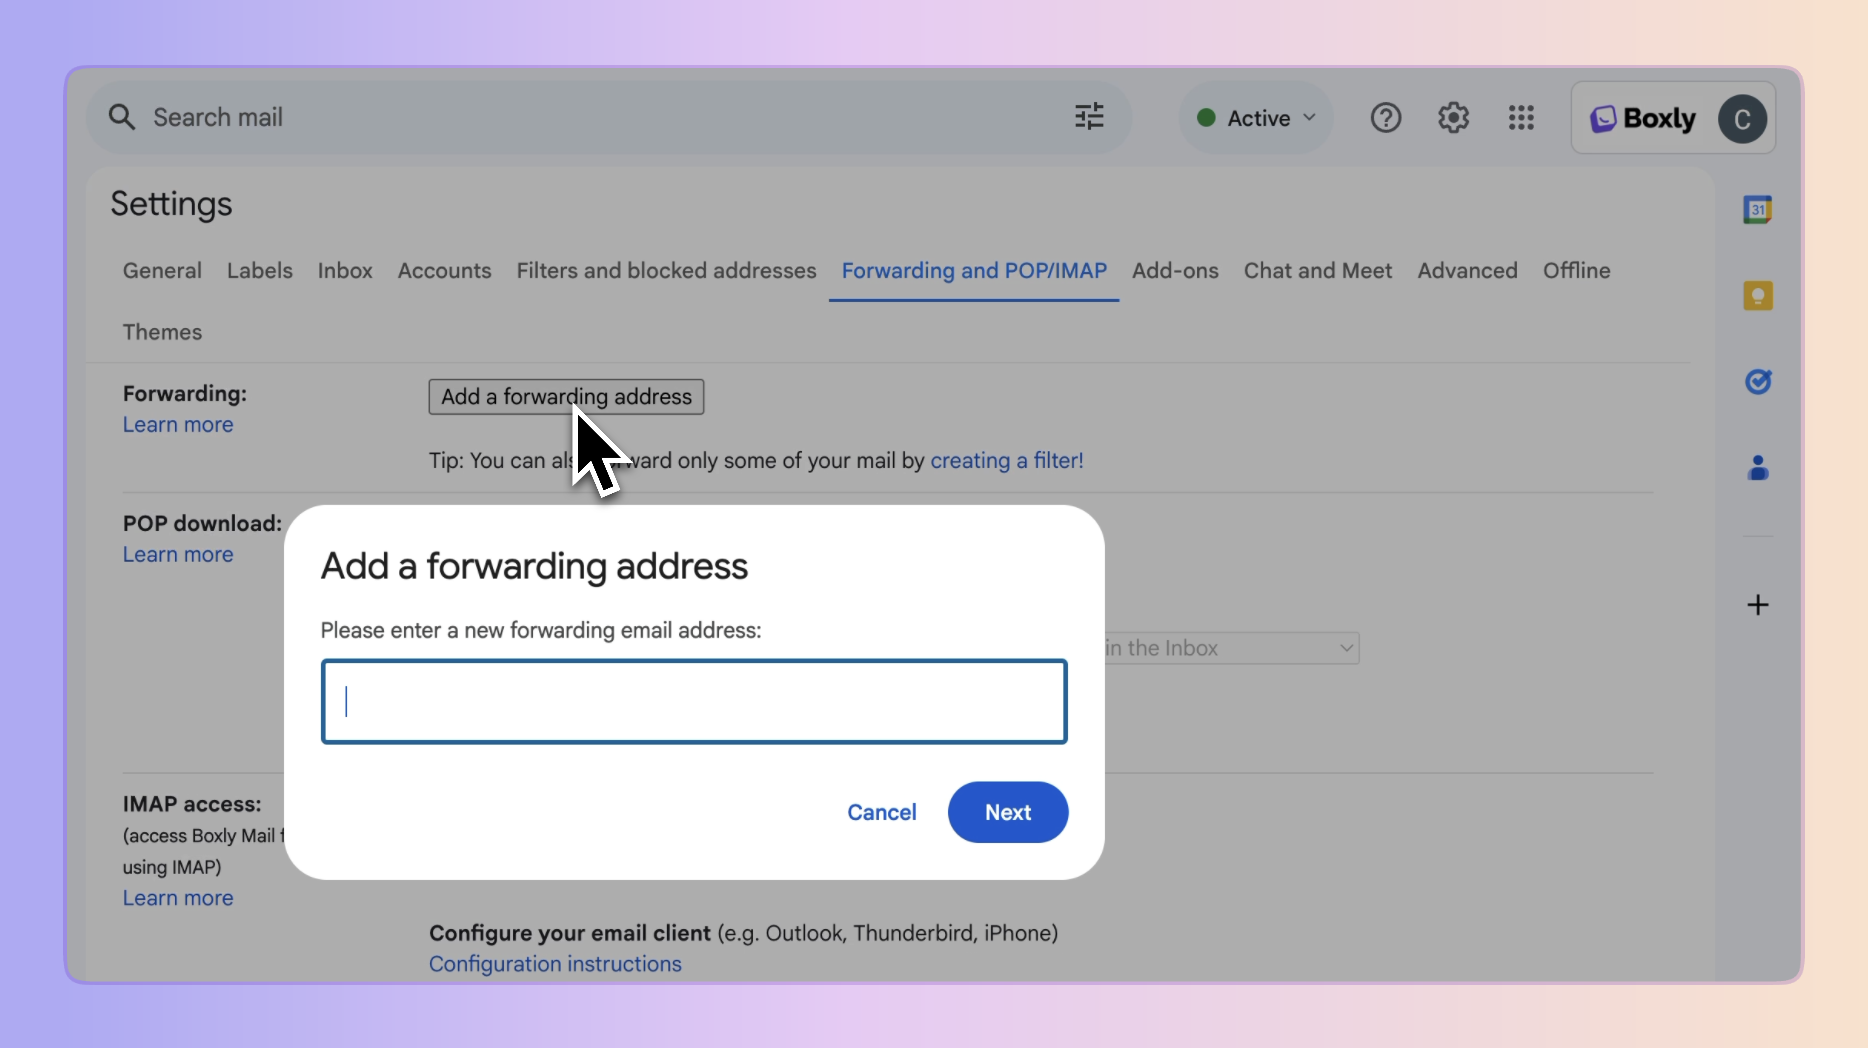
Click "Create Filter" and select the option to forward emails to the Webform Forwarding Address. It will take you to the next tab, “Forwarding and POP/IMAP”
Click the button “Add a Forwarding Address”
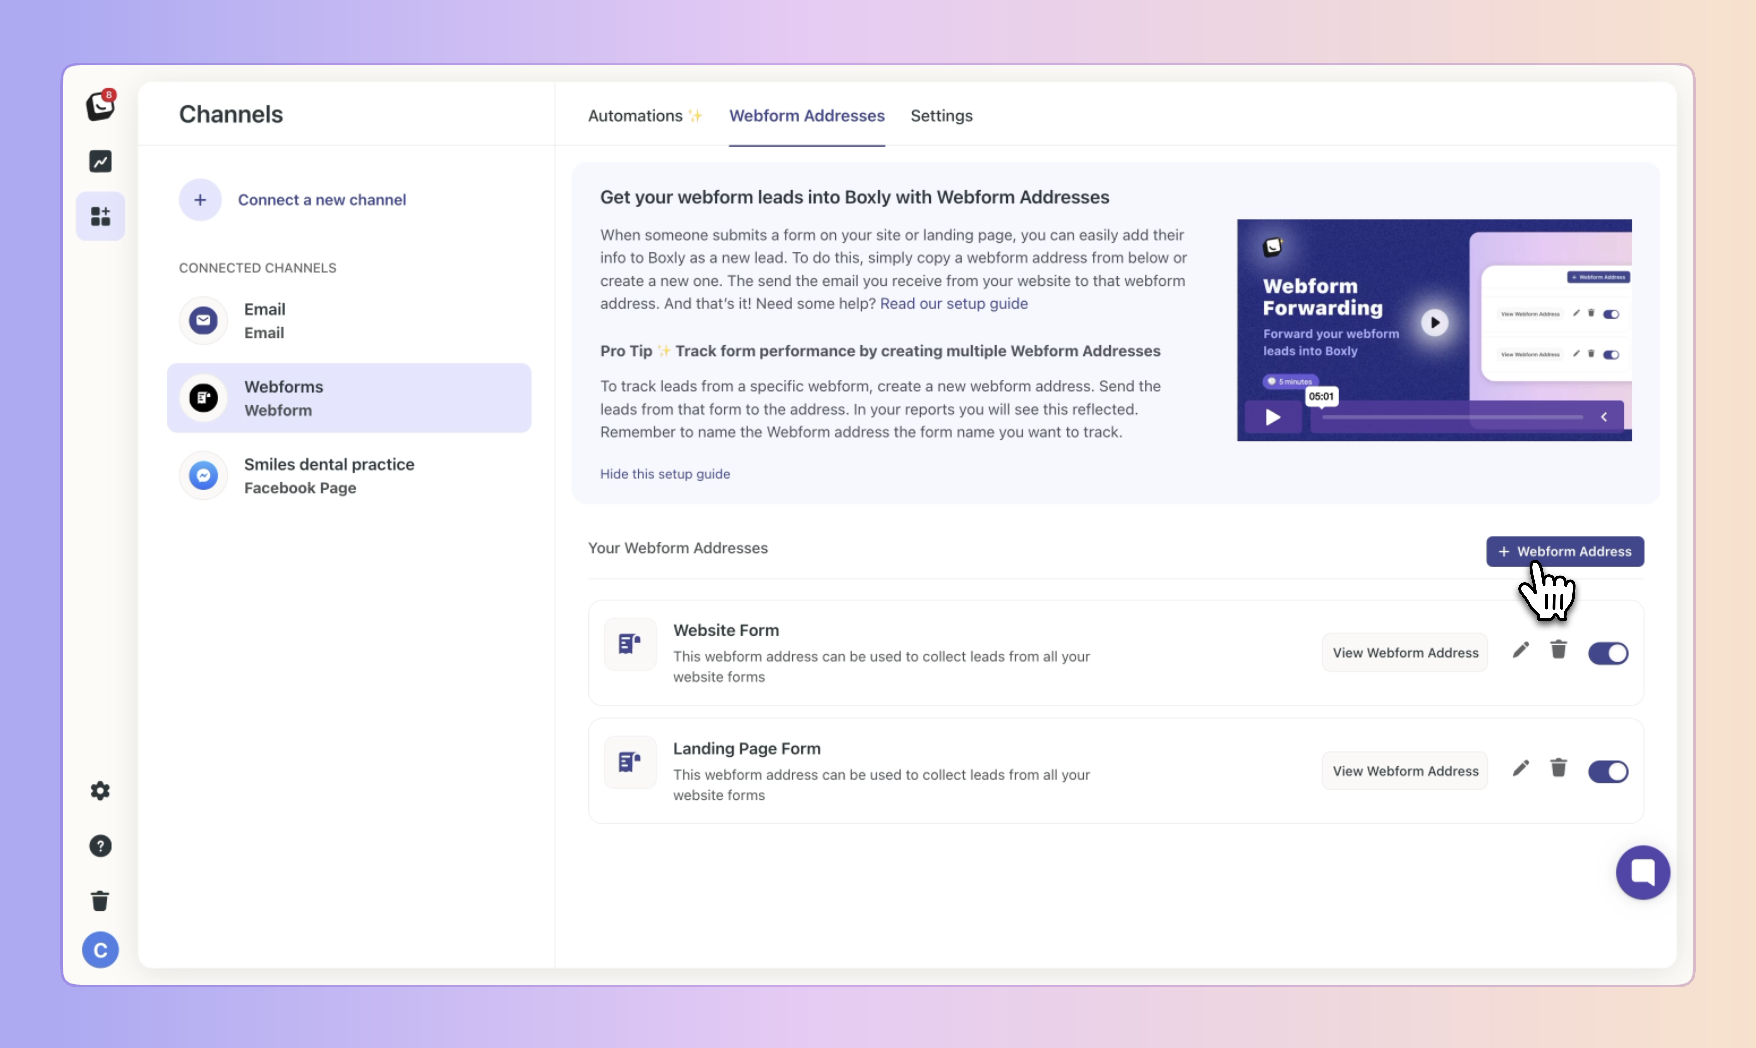
Go to Boxly, then to Channels,
Go to your Webform Channel and click “+ Webform Address” to add a new webform address.
Once it’s been created click “Copy Webform Address”
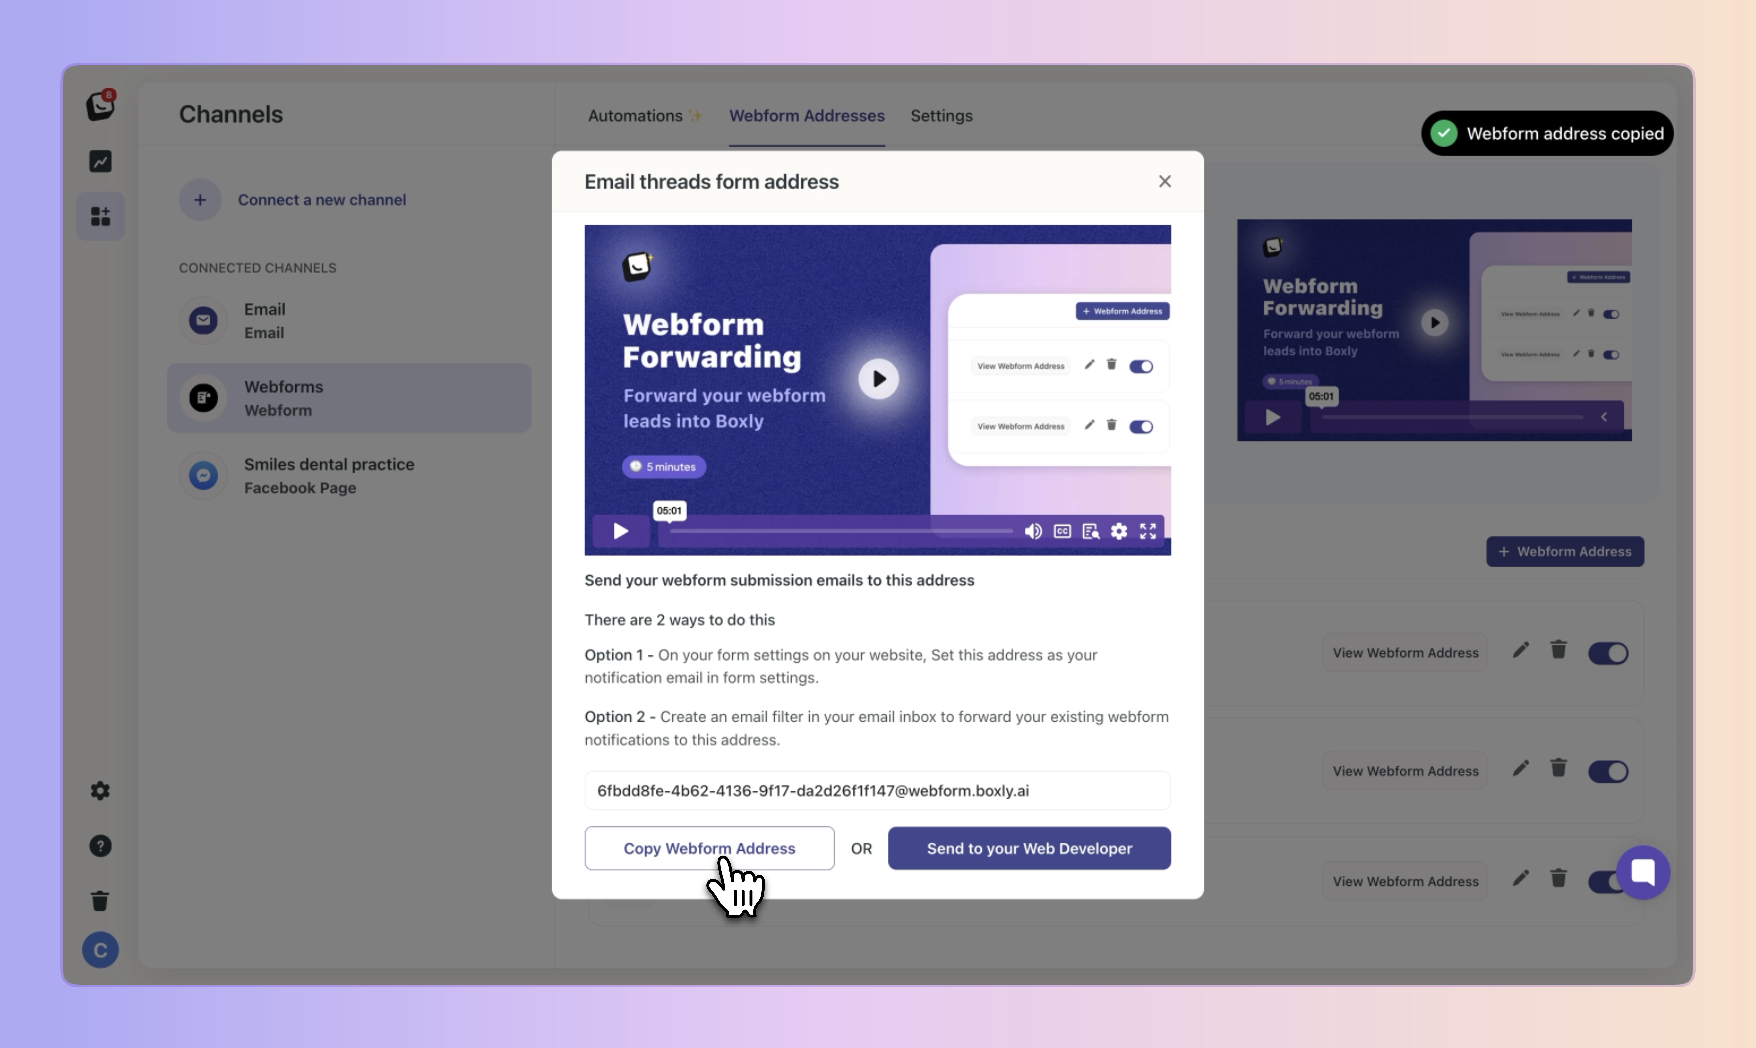
Paste it in Gmail in “Add a Forwarding Address” and click “Next”.
It will open a new page, click “proceed” then click “Okay”.
Go back to “Filters and Blocked Addresses” tab and finish creating the filter.
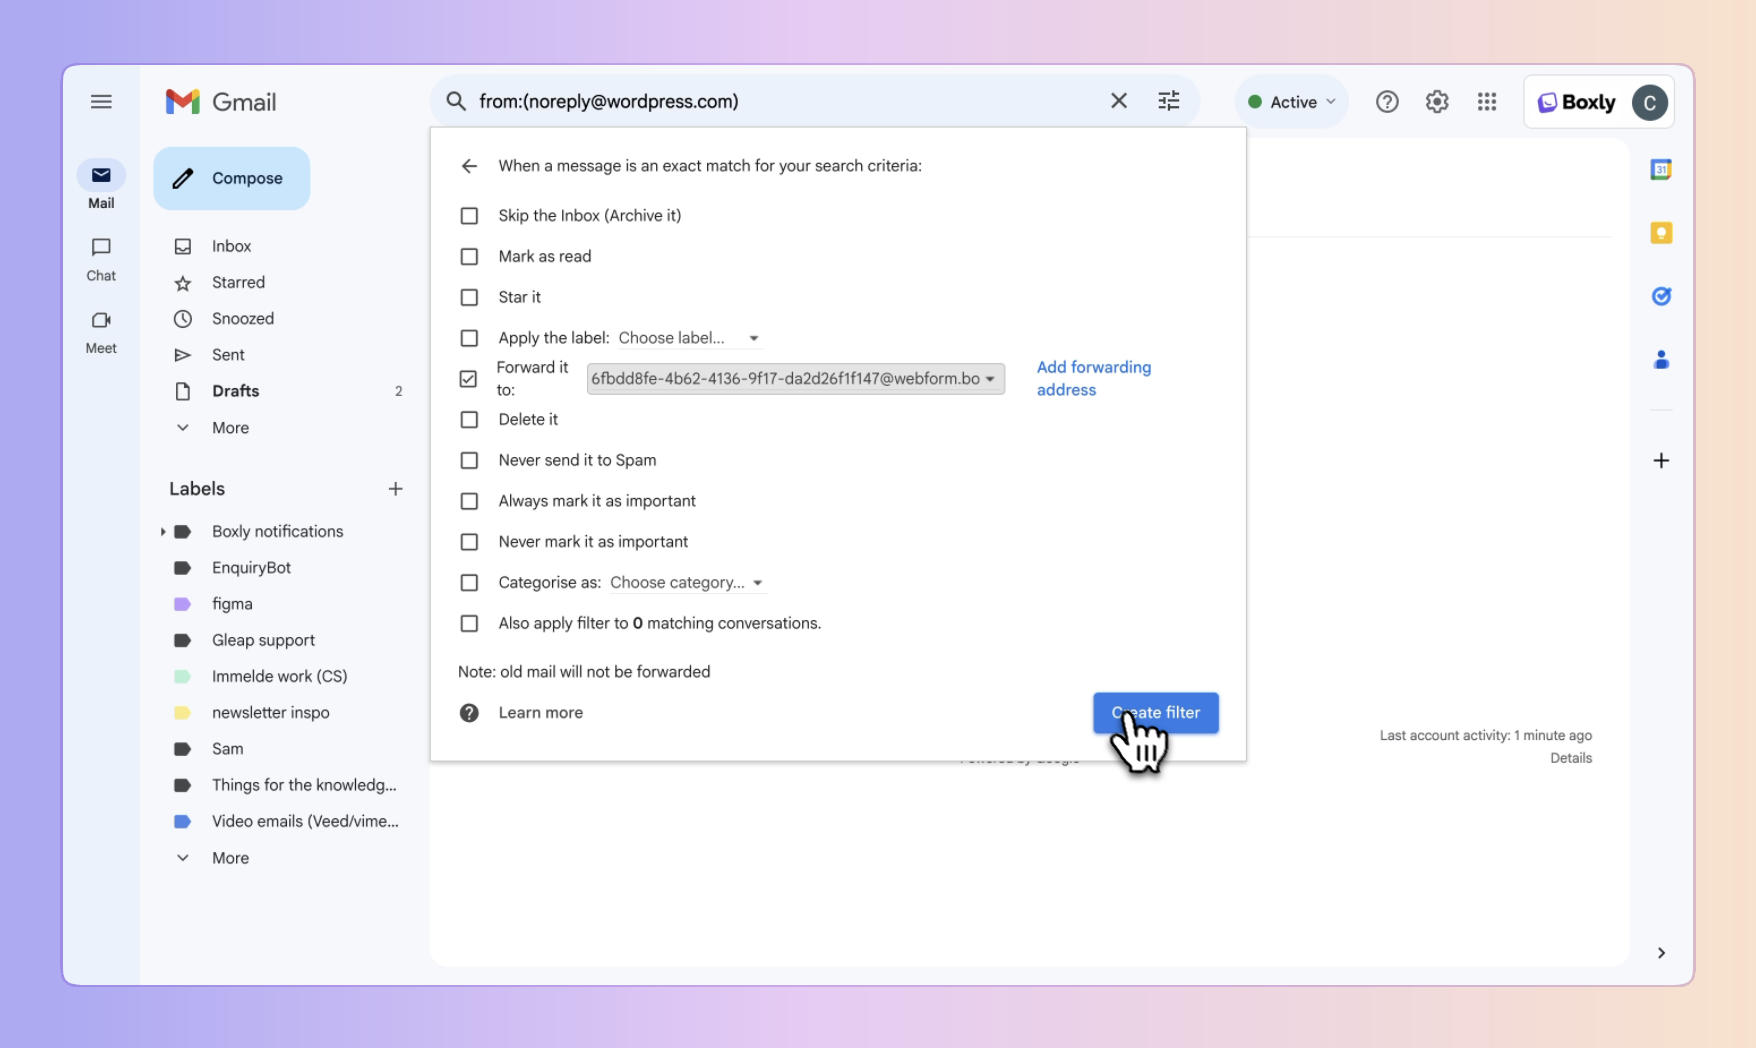
Save the filter
Go to Outlook settings and navigate to "Rules" under Mail.
Click "Add New Rule."
Name the rule and set the condition as "From" with the specific email address (e.g., [email protected]).
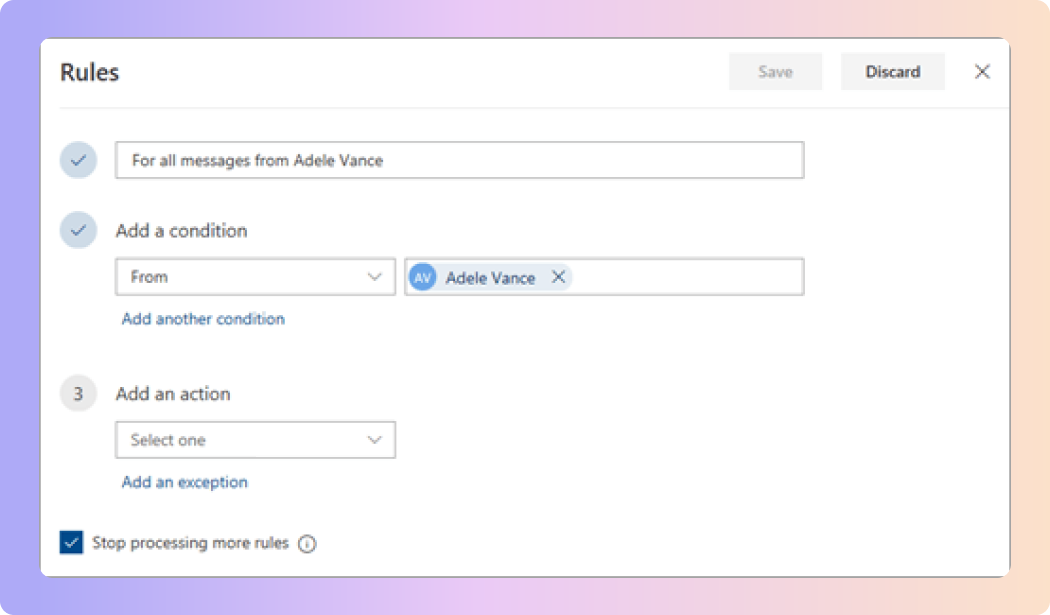
Set the action to "Forward To" and enter the Webform Forwarding Address.
To add the Webform Forwarding Address follow the steps above to “Create and Copy the Boxly Webform forwarding address”
Save the filter
What Happens Next:
Once the setup is complete, all emails forwarded from the specific address will come in as separate leads. The AI will automatically extract and map the contact details, allowing you to quickly respond to your customers without any extra effort.