Seamlessly connect Dentally with Boxly to streamline your lead management, patient data, and clinic operations. With this new channel connection, you can sync practitioners, locations, and payment plans directly from Dentally into Boxly, ensuring everything stays up to date automatically.
✅ Sync Patient & Lead Data – Keep all your Dentally information in one place.
✅ Auto-Update Locations & Practitioners – Any changes in Dentally reflect in Boxly instantly.
✅ Seamless Payment Plans Integration – Bring in your pre-set Dentally payment plans for easy reference.
✅ Less Manual Work, More Accuracy – Automate data transfers and focus on running your practice.
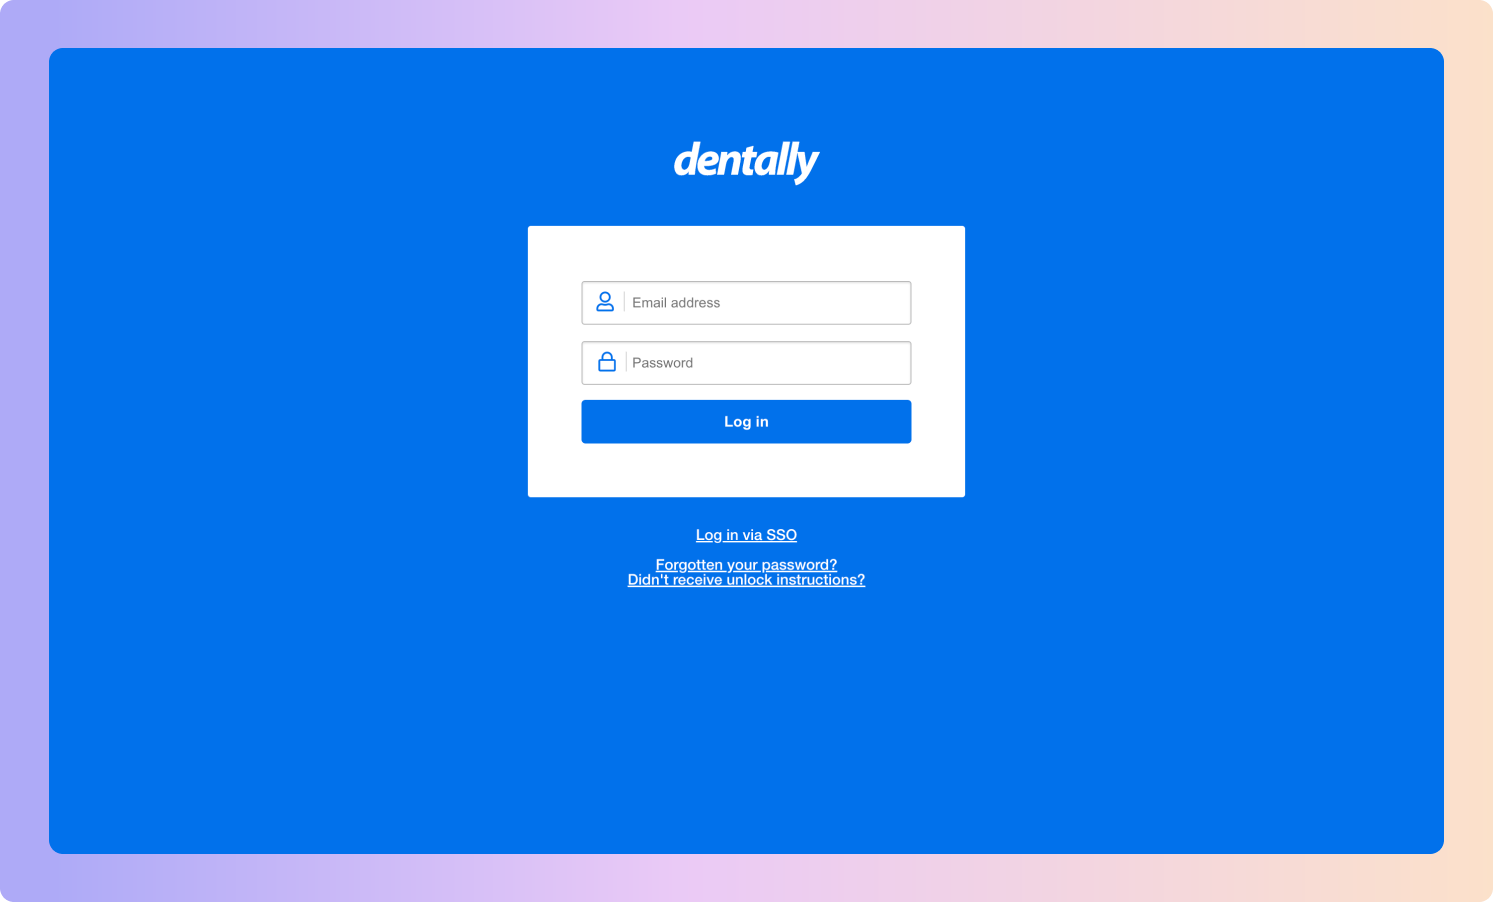
To sign in to Dentally all you need are your login details (Email Address: [email protected] & Password).
Once you’re in Dentally you’ll find your practices; patients, locations, along with the Dentally calendar for appointment management.
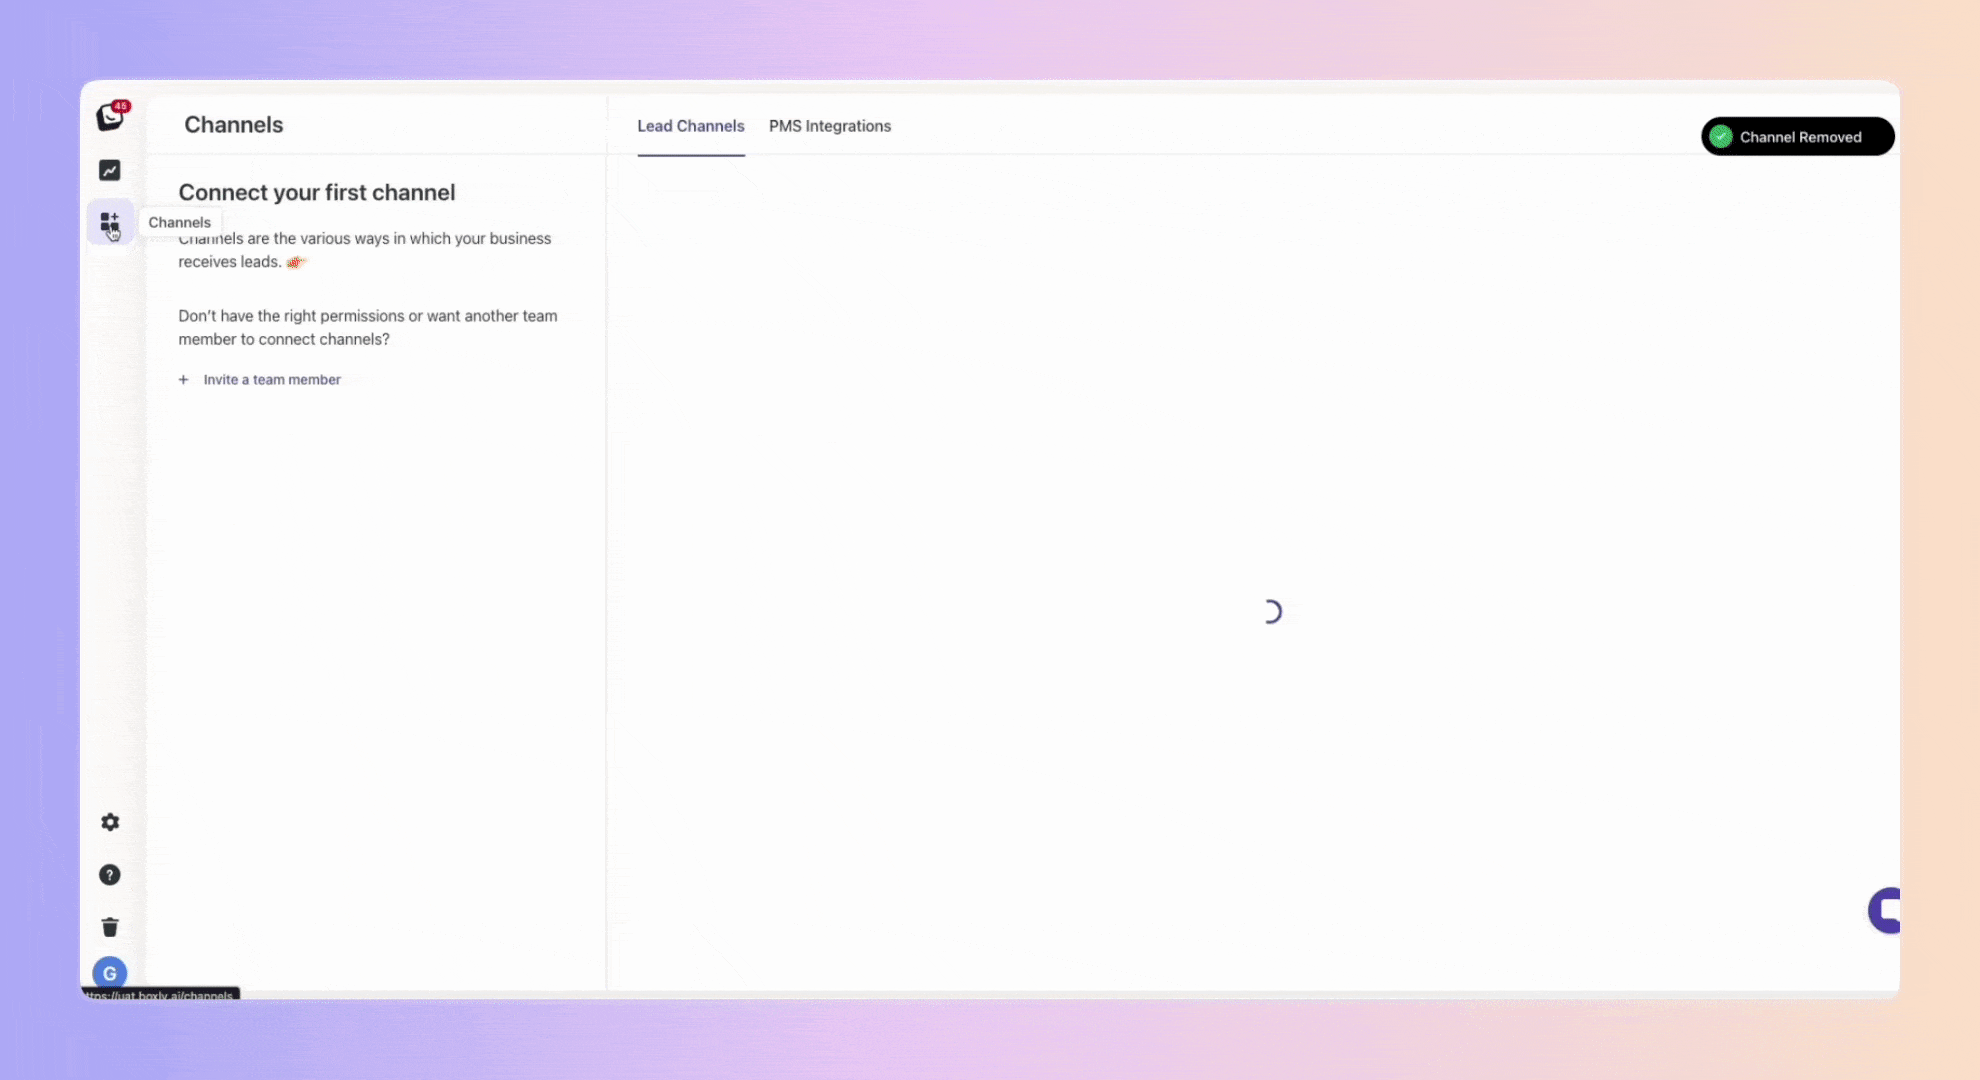
Go to "Channels" in Boxly
Click into "PMS Integrations" and select Dentally.
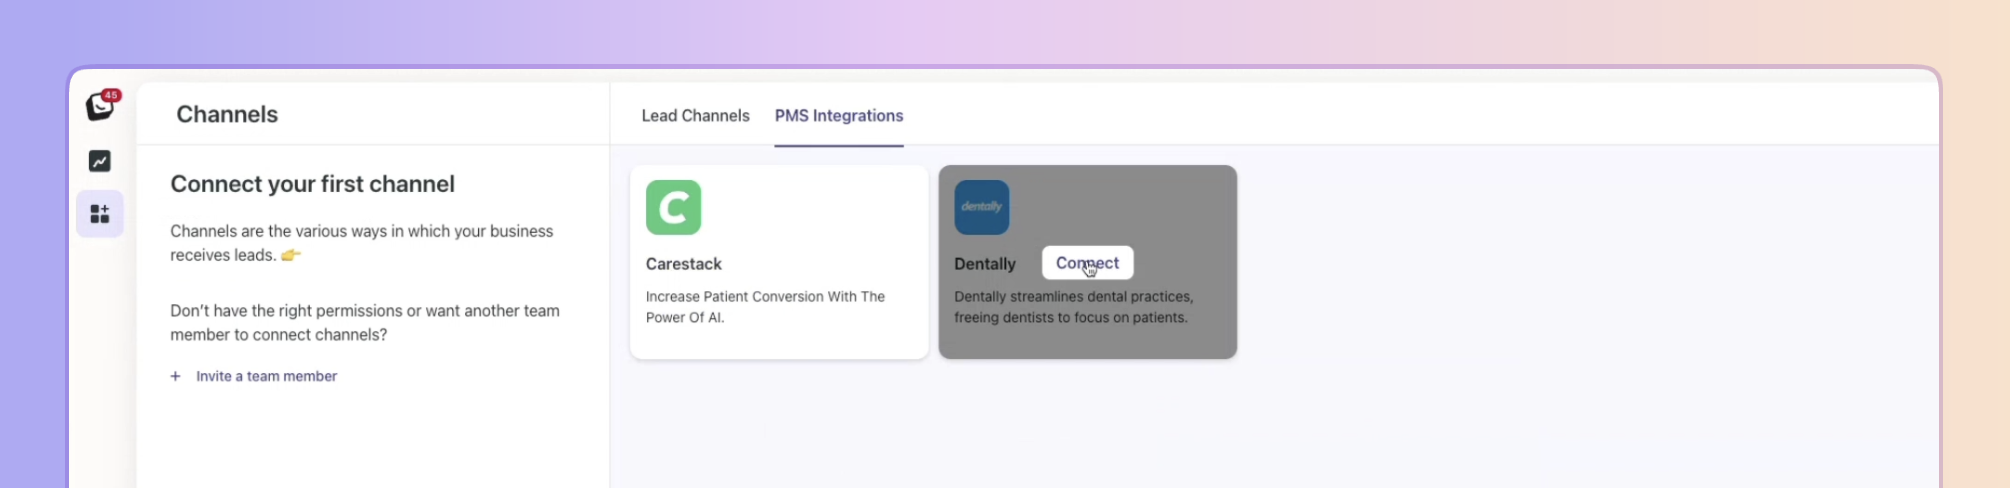
Click “Connect” and follow the authentication steps to link your Dentally account—you will need your login details to login to Dentally (as shown above, to login into Dentally).
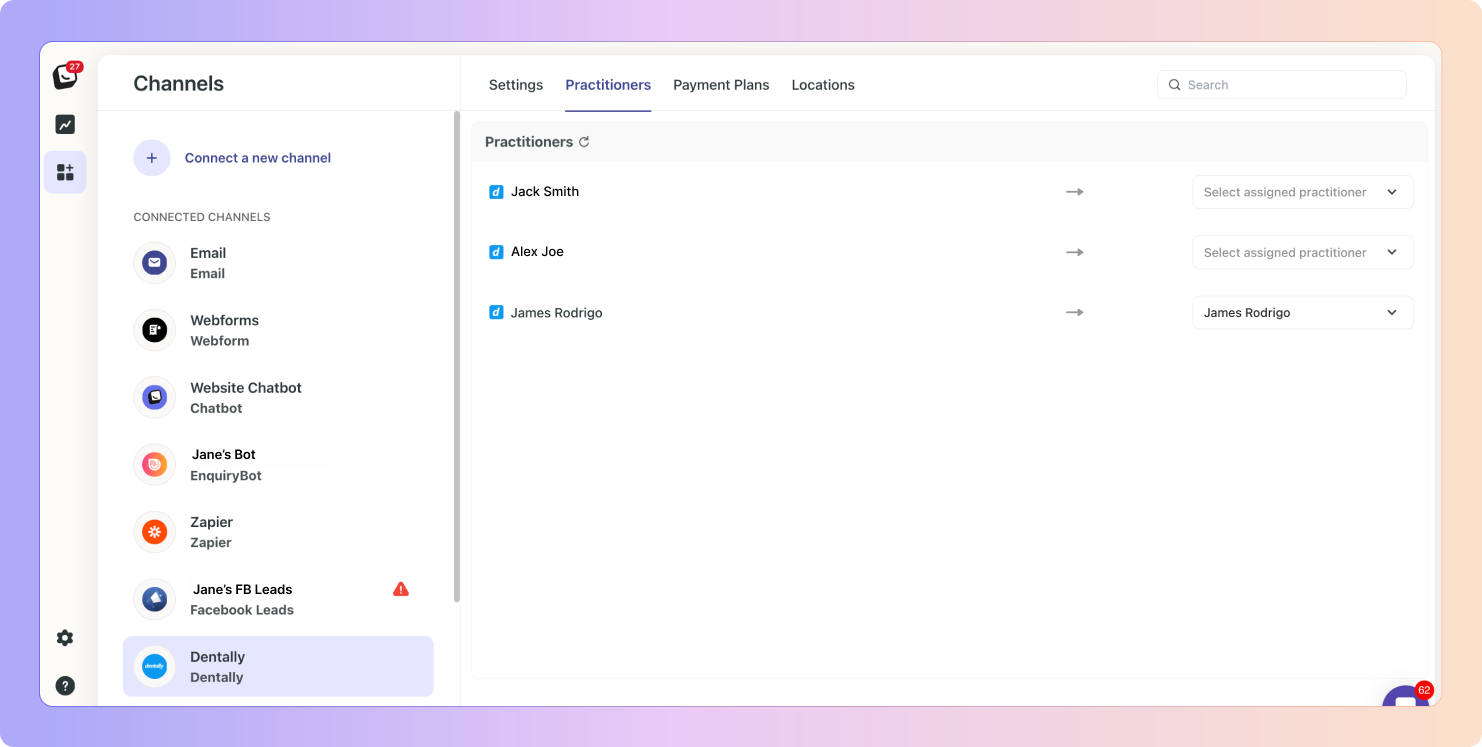
Once connected, Dentally will appear in your Connected Channels list.

✅ Navigate to the "Practitioners" tab in your Dentally Channel.
All existing Practitioners will appear in the Practitioners tab.
✅ All practitioners in Dentally will appear in the list in your Practitioner section in boxly now, click the dropdown on the right hand side where your Boxly practitioners will be listed and match your Dentally practitioners to your Boxly assigned practitioners (this is called mapping).
✅ Open the "Payment Plans" tab
✅ All existing Payment Plans will appear in the Payment Plans section in Boxly
✅ Review and verify that all plans are correctly listed.
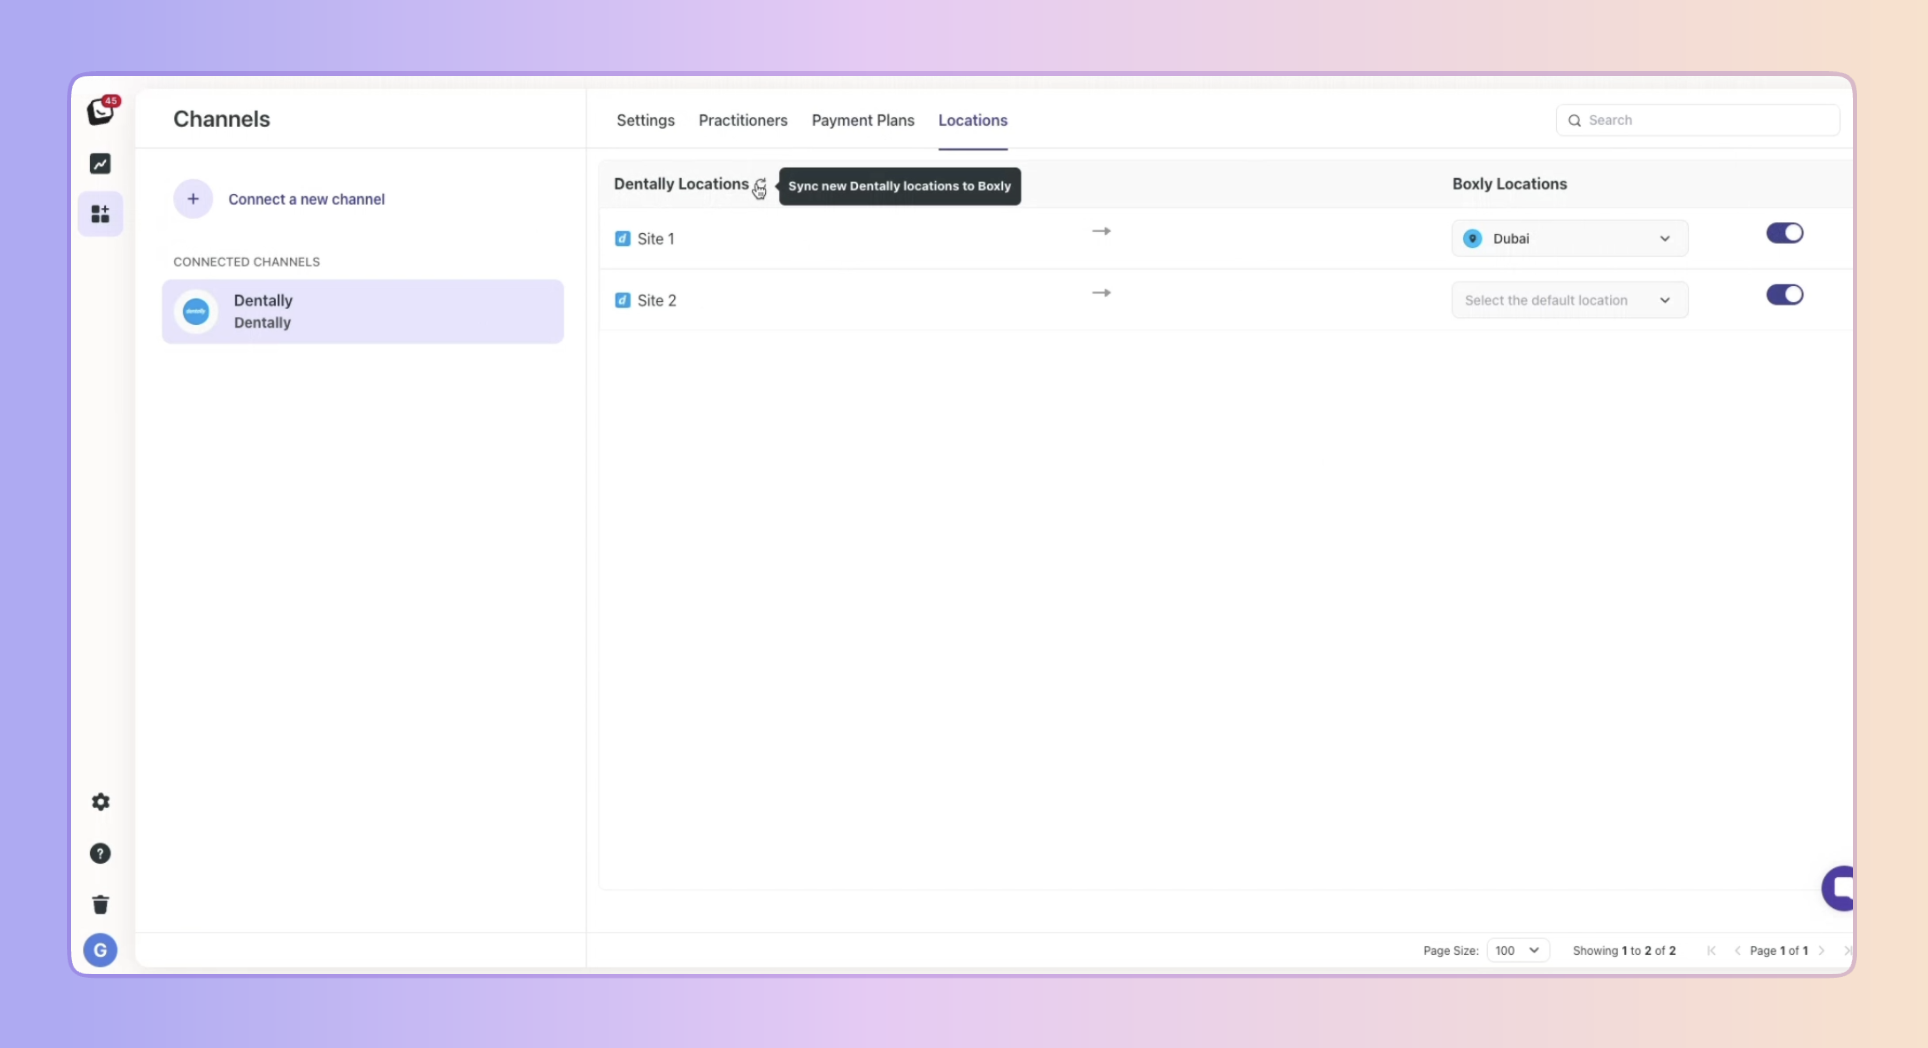
✨ New payment plans added in Dentally will sync when the sync icon is clicked into Boxly.
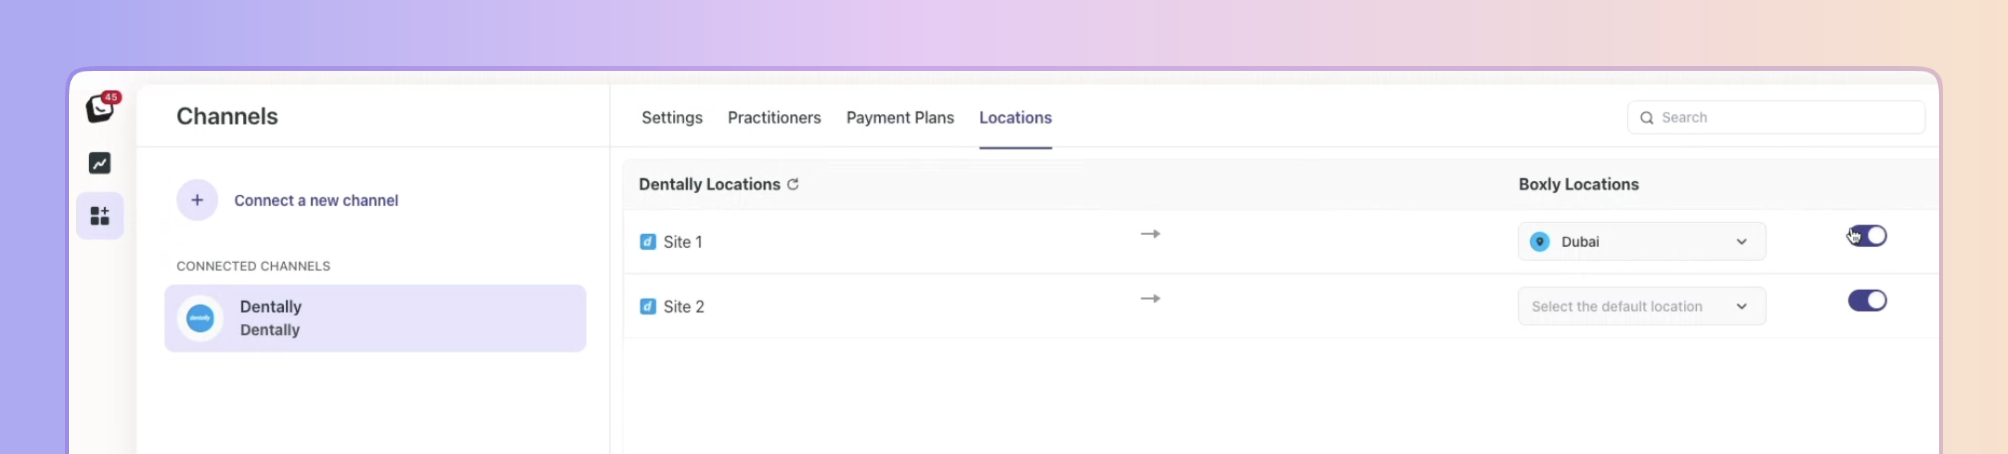
✅ Go to the "Locations" tab in your Dentally Channel.
✅ Once connected your locations from dentally will be listed in Boxly’s Dentally Locations.
✅ For each “Dentally location”, select the corresponding Boxly location from the dropdown menu under ”Boxly Locations”.
✅ Toggle on each location you want active and connected to your Boxly account.
This ensures leads and patient data are always linked to the correct clinic location.

When new leads are added to Boxly—such as through a web form— they may enter their location as part of their details. If your Dentally channel is already connected and locations are mapped, Boxly will automatically recognise the location they’ve provided and create a corresponding ‘Dentally’ patient/contact when the lead comes in.
However, if the lead doesn’t include Dentally-related information or is added manually without a location or practitioner assigned, Boxly won’t have enough data to link it to Dentally.
✅ Go to the Lead that isn’t connected—there will be no (Dentally) View Patient button
✅ Click “+ Label”
✅ Click the “Location” tab, and select the correct Location for the lead
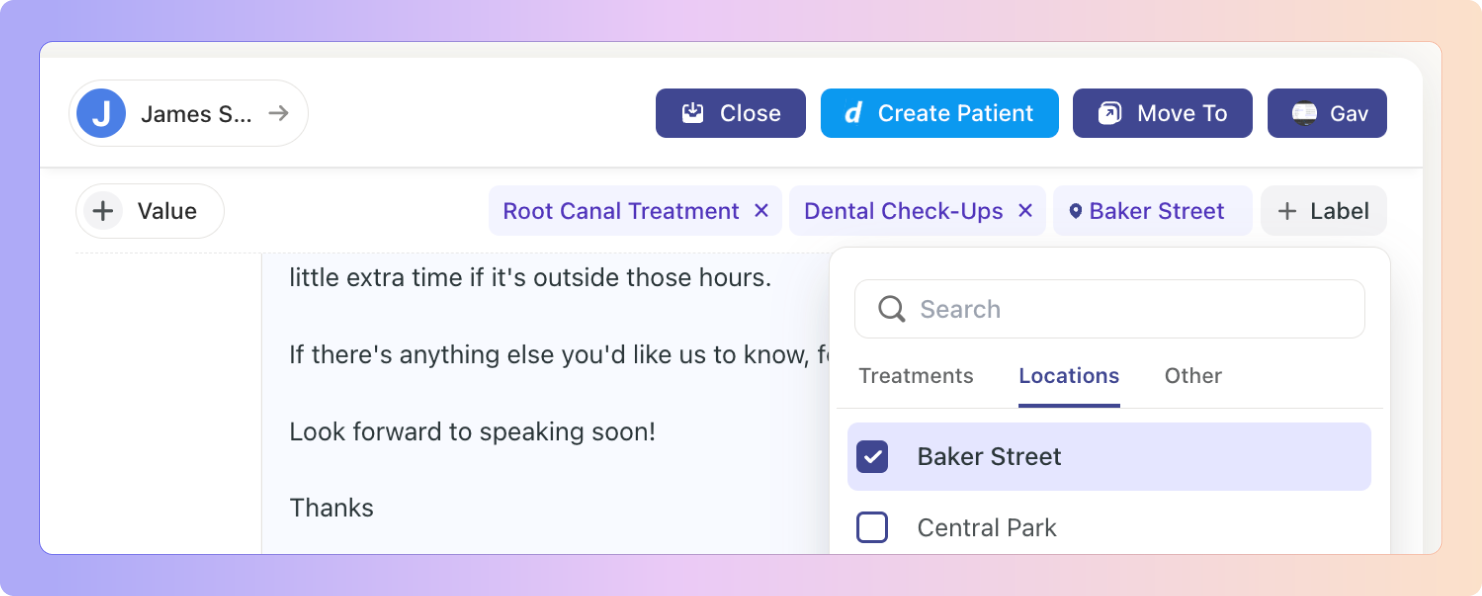
✅ Click the blue “Create Patient” button that appears - if you don’t have your Dentally locations toggled on and mapped to your Boxly locations, then this button will not appear.

✅ It will open the Create Patient form, fill in all areas. (If you leave out any information, the new patient won’t be added)
Select the type of Payment plan:
NHS
Private
✅ Click “Create”
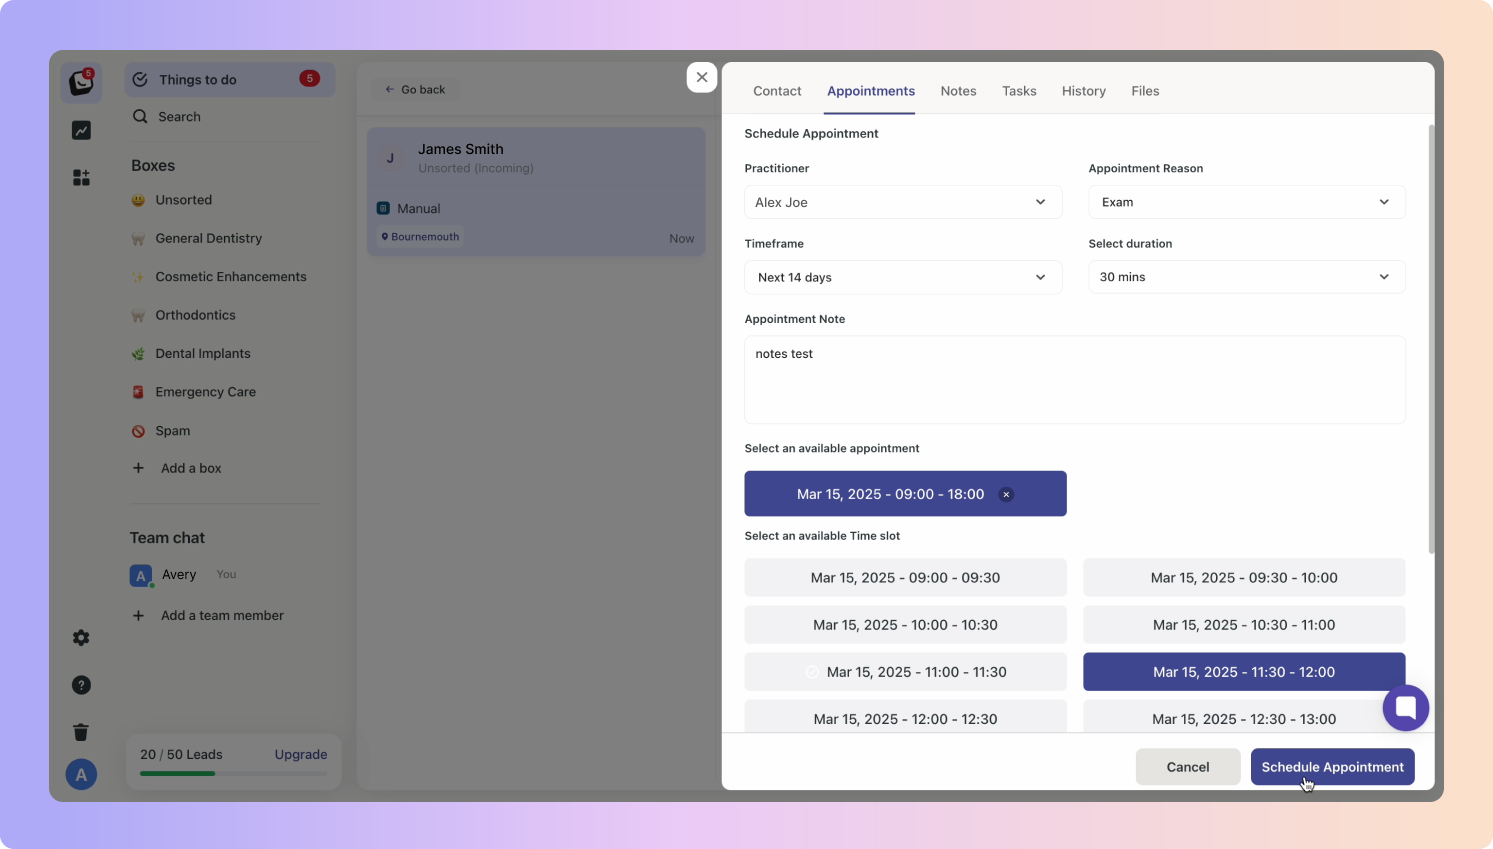
Once your patient is created the below Appointment tab will open up.
First, choose a practitioner for the patient, once you do, all other fields will be editable.
Choose an Appointment Reason, Timeframe, and select a “Duration of Appointment”—choose a time frame for how long the appointment will take, this will depend on the appointment reason.
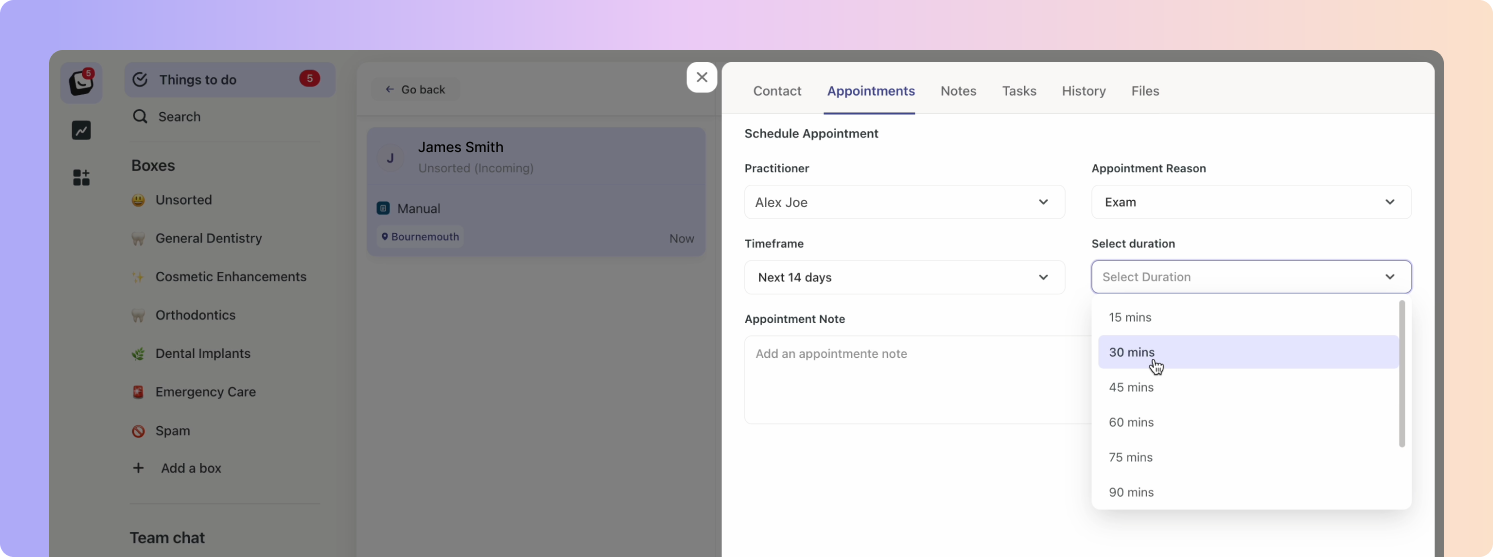
Once you’ve selected the duration, choose an available time slot from the options given.
Time slots that don’t appear are because the practitioner already has an appointment in that time slot, likewise, once you’ve selected your time slot, the option is eliminated from everyones else’s visible options.
✅ Add any “Appointment Notes” that would be beneficial.
✅ Click “Schedule Appointment”
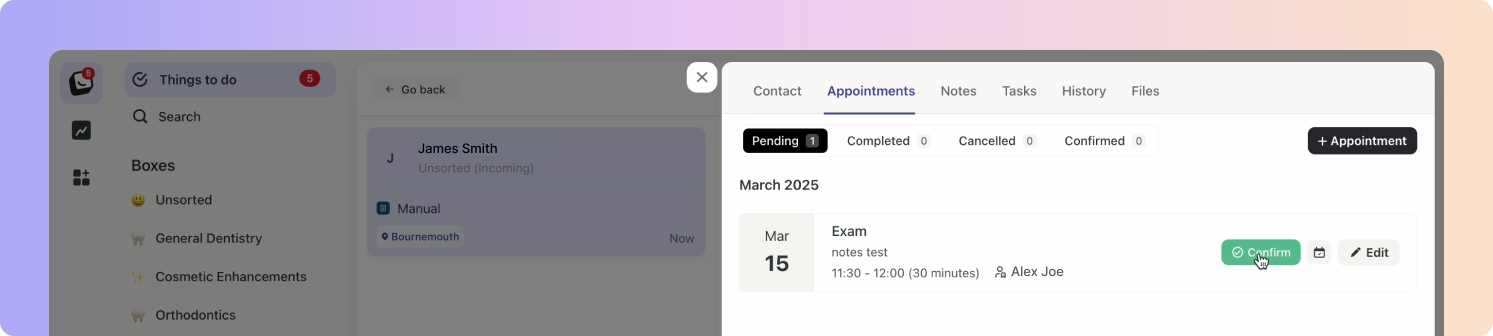
✅ The appointment will now appear in the “Pending” tab under Appointments.
You must click the green “Confirm” button to move the appointments to the Confirmed tab.
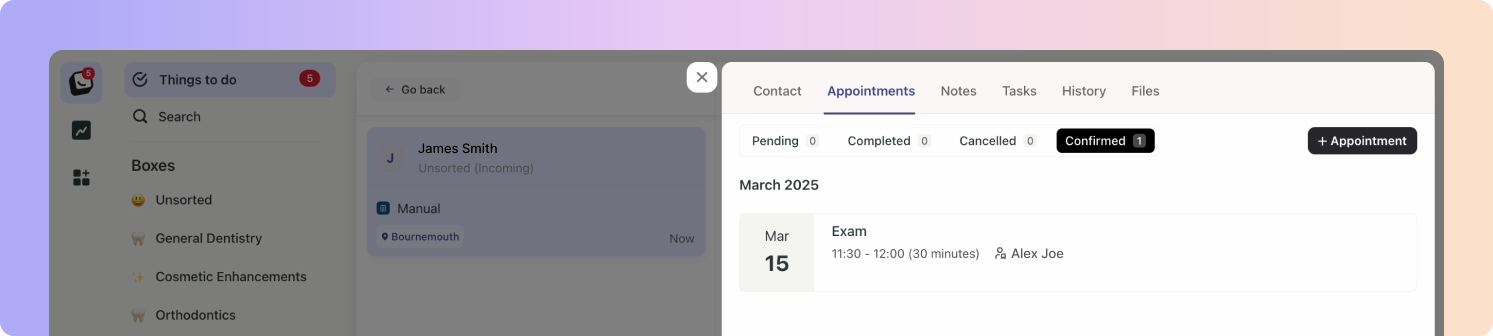
✅ Once the appointment has been confirmed it will appear in the “Confirmed” tab.
✅ To add more appointments to a lead, click the “+ Appointment” button on the top right.
We’ve added a tab to your Dentally leads that pulls all the financial information of your Dentally clients/leads directly from Dentally .
✅ After you “Created a Patent”, click “View Contact”
✅ Click into the new “Financials” tab between the History and Fields tabs.
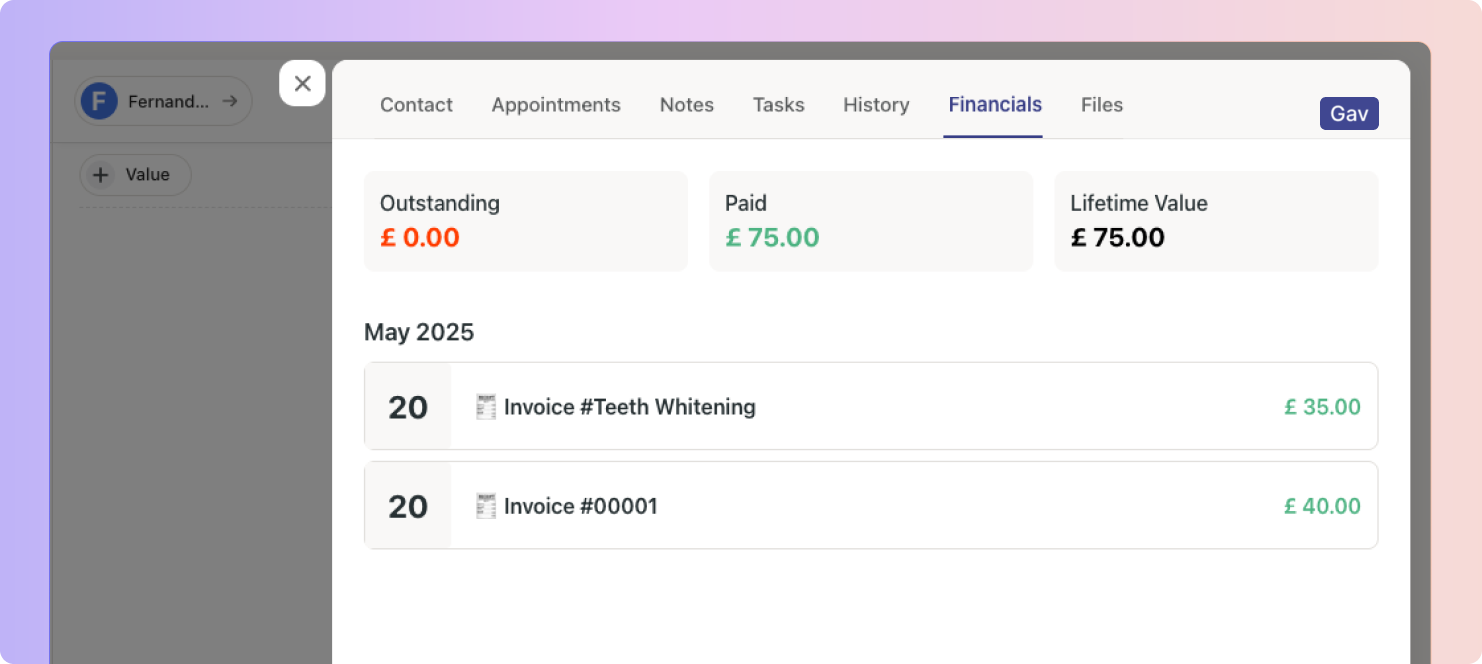
Your vales for Outstanding payments, Paid payments, and Lifetime Value will be displayed, as well as your invoices.
Once you’ve successfully added a new Dentally patient, you will have a blue “View Patient” button on the leads options.

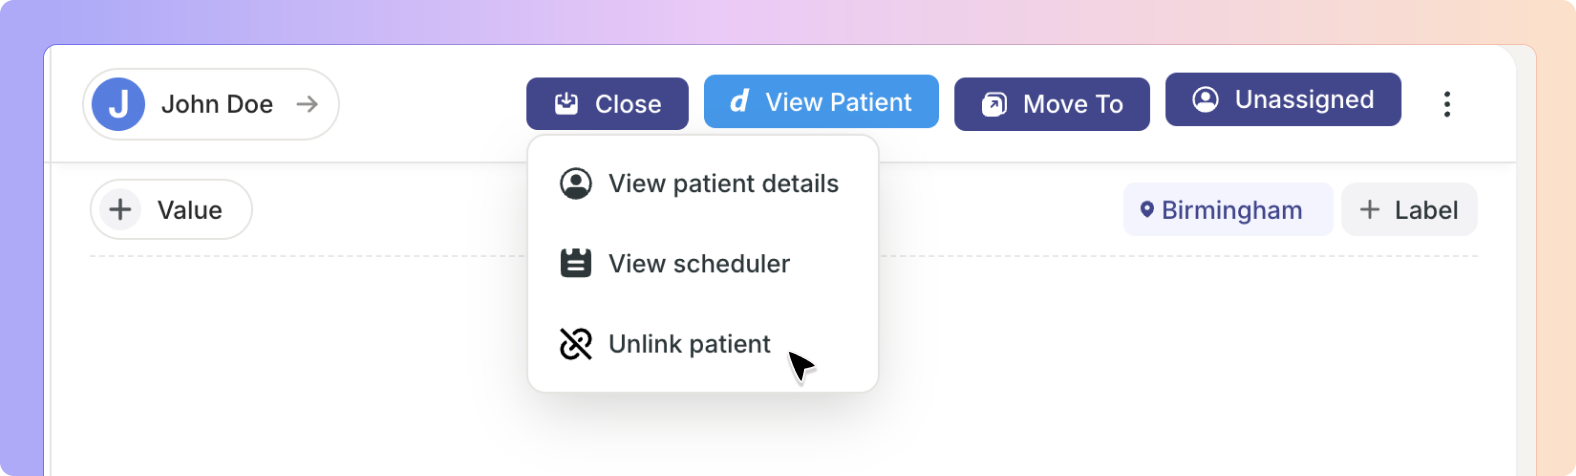
Once the Dentally channel is connected and you've mapped practitioners and locations, your clients will gain access to the Dentally integration. In a lead’s profile, the “View Patient” option will appear, allowing you to navigate directly to their Dentally record.
✅ “View Patient details” takes you to the patients profile/record on Dentally.
✅ When you click on “View scheduler” you are taken to Dentally’s Scheduler, where you can create appointments for your clients/patients.
✅ Click the “Unlink patient” option unlink them.
You can link Dental Statuses to a Boxly Stages.
This means when you link Dentally patient statuses to a stage, leads will automatically move when their status changes.
✅ Go to your treatment box
✅ Click the three-dot menu on the stage you want to link.
✅ Your Stage Settings will appear.
✅ Toggle ON “Link Dentally PMS status.”
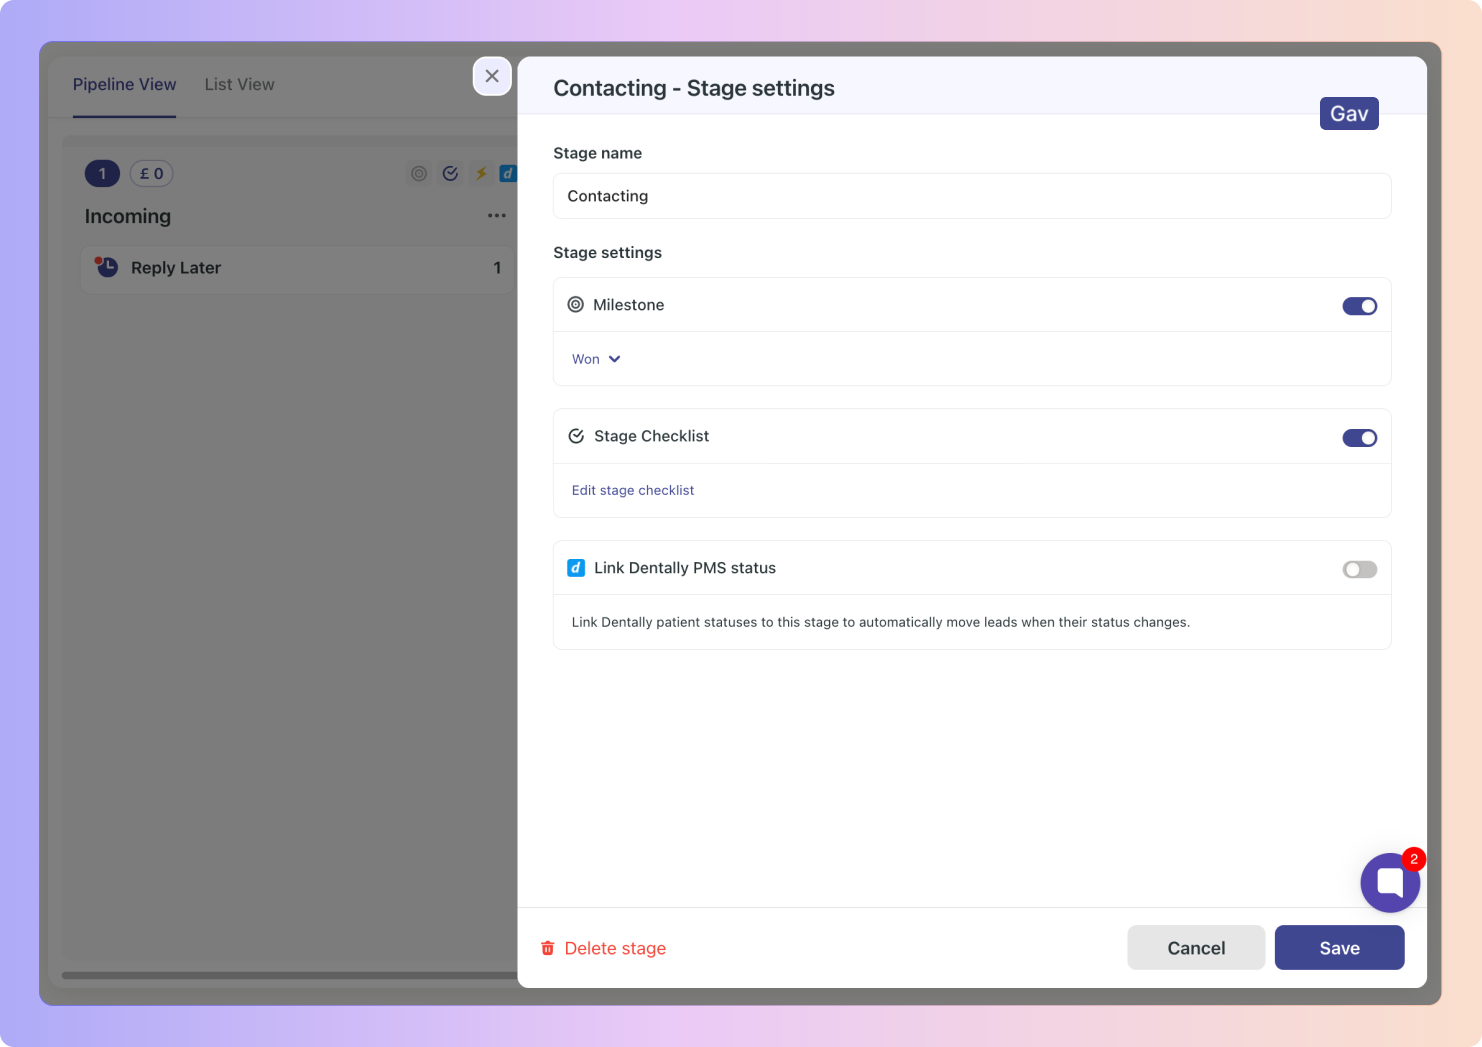
✅ From the drop-down menu, select the status of your Dentally that you would like to link to the Boxly stage.
Patient statuses within Dentally can be mirrored in Boxly lead stages. For example, if a Patient status changes, the patient’s lead card in Boxly will update to reflect this, enabling smooth and efficient patient management.
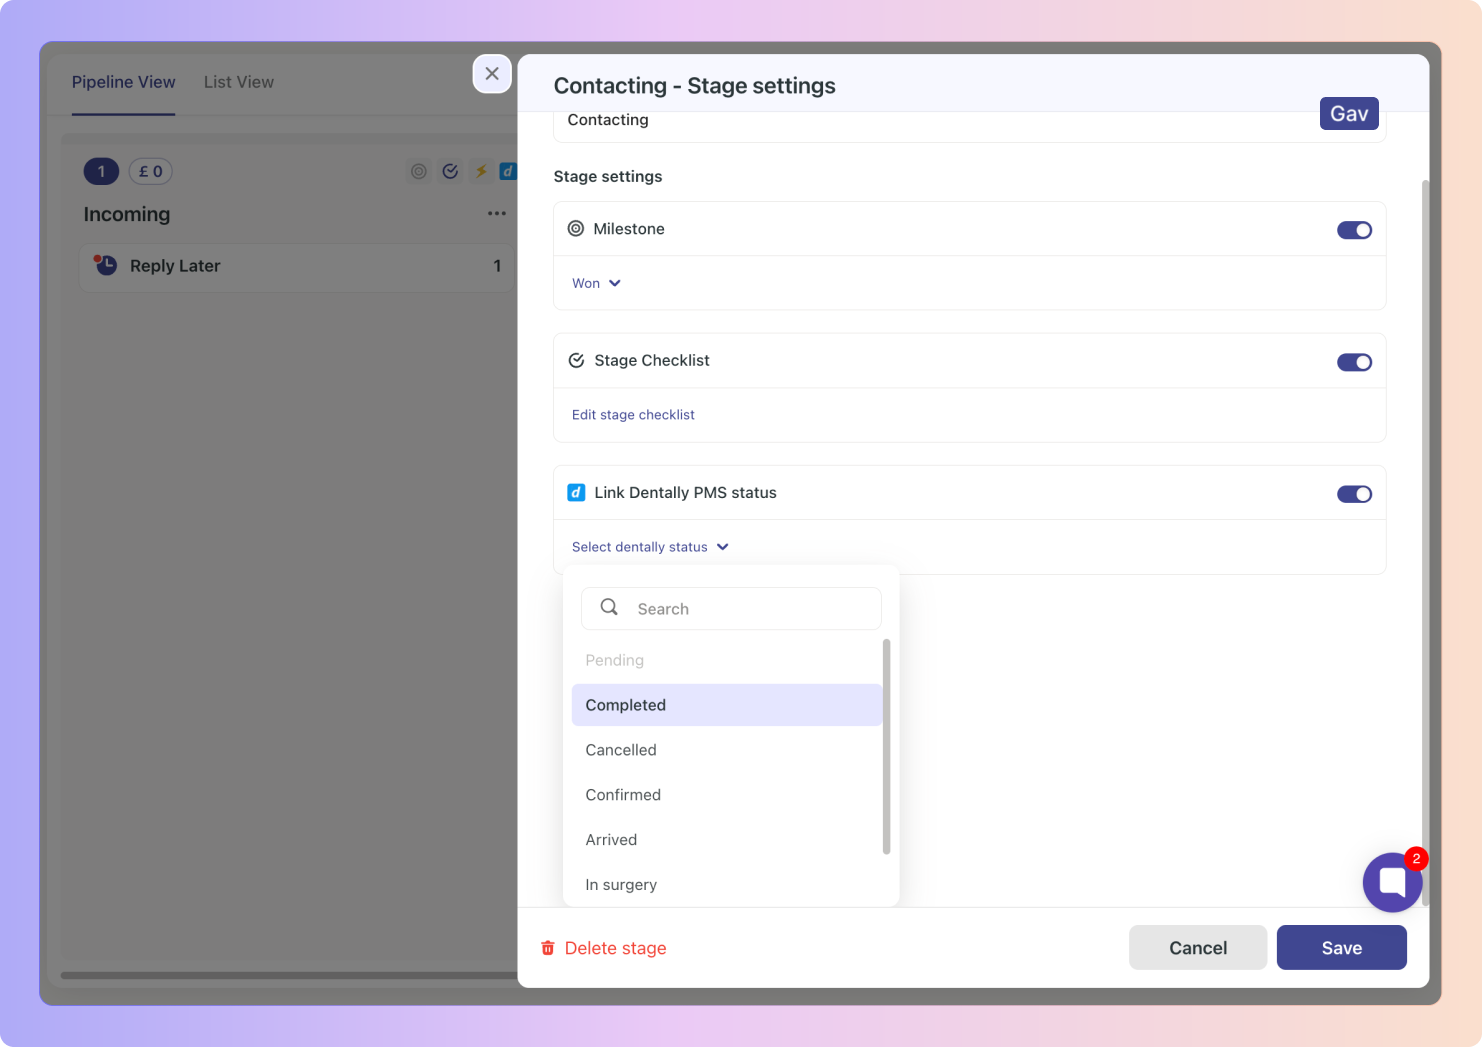
When a Stage has been connected to a Dentally PMS status, the blue Dentally icon will appear on the stage
🦷 Dentally Appointment Status Linking in Boxly
Guide to Dentally Appointment Status Linking in Boxly
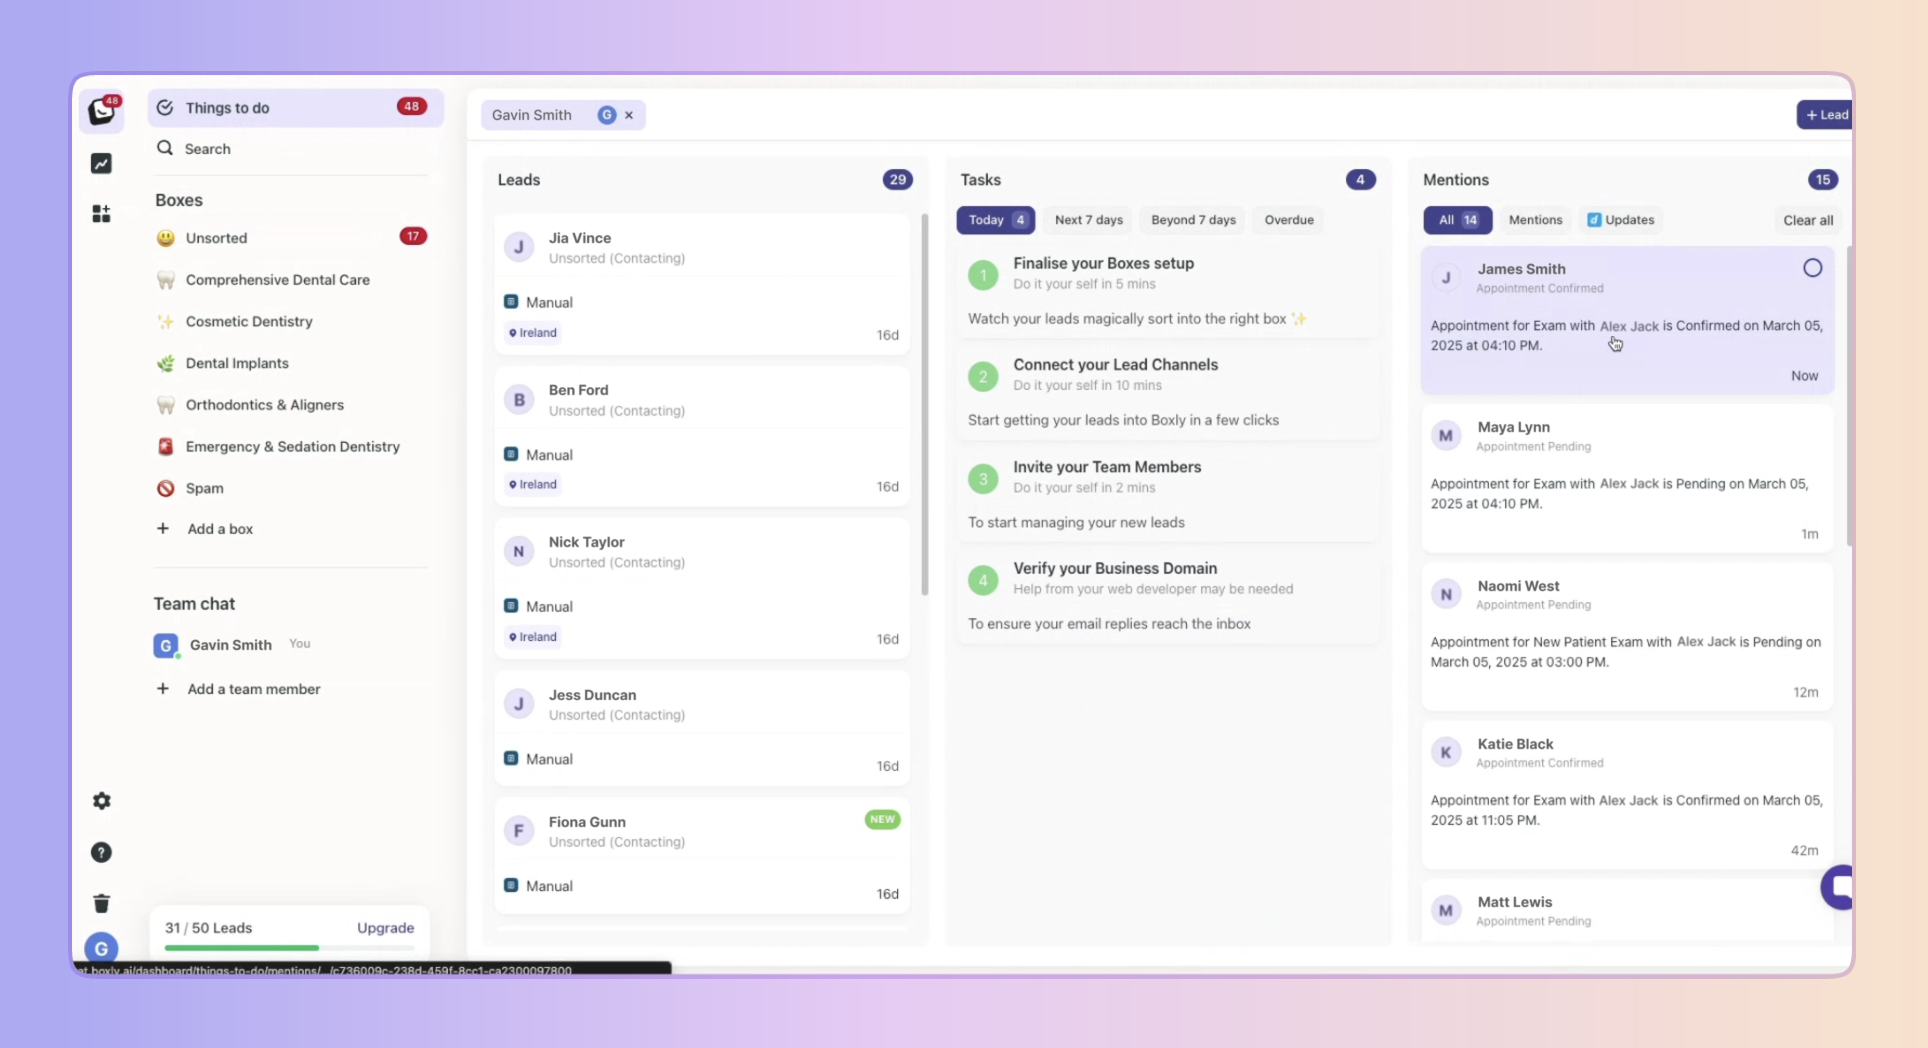
When Dentally is connected and you create appointments, your “Mentions” in Things to do will keep track of every time the appointment status changes.
You have a section in Mentions dedicated to Dentally mentions (the tab with the blue Dentally icon that says “Updates”.
Dentally Appointment Reasons in Boxly
Automatically update stages and create new leads based on Dentally appointments
How do I Add Practitioners in Boxly?
Head over to the Practitioners article.
Need more help? Visit our Help Centre or contact support for assistance! 🚀