If you use IONOS to manage your website (like yourclinicname.com), here’s a quick guide to verifying your domain so Boxly can send emails on your behalf securely and reliably.
When Boxly sends emails on your behalf (like confirmations, reminders, or replies), verifying your domain proves to email providers (like Gmail or Outlook) that Boxly has permission to do so. This improves email deliverability, helps reduce the chances of your emails going to spam, and keeps your communication professional and secure.

IONOS is a domain provider; think of it as an online landlord for your web address.

Why that matters:
It helps email systems trust your messages, improving the chances they land in the inbox instead of spam.
It allows you to safely and securely send emails from [email protected].
It protects your domain from being spoofed or used by spammers pretending to be you.
DKIM – Adds a digital signature to your emails to prove they’re authentic.
Custom Return-Path – Helps identify bouncebacks from failed emails.
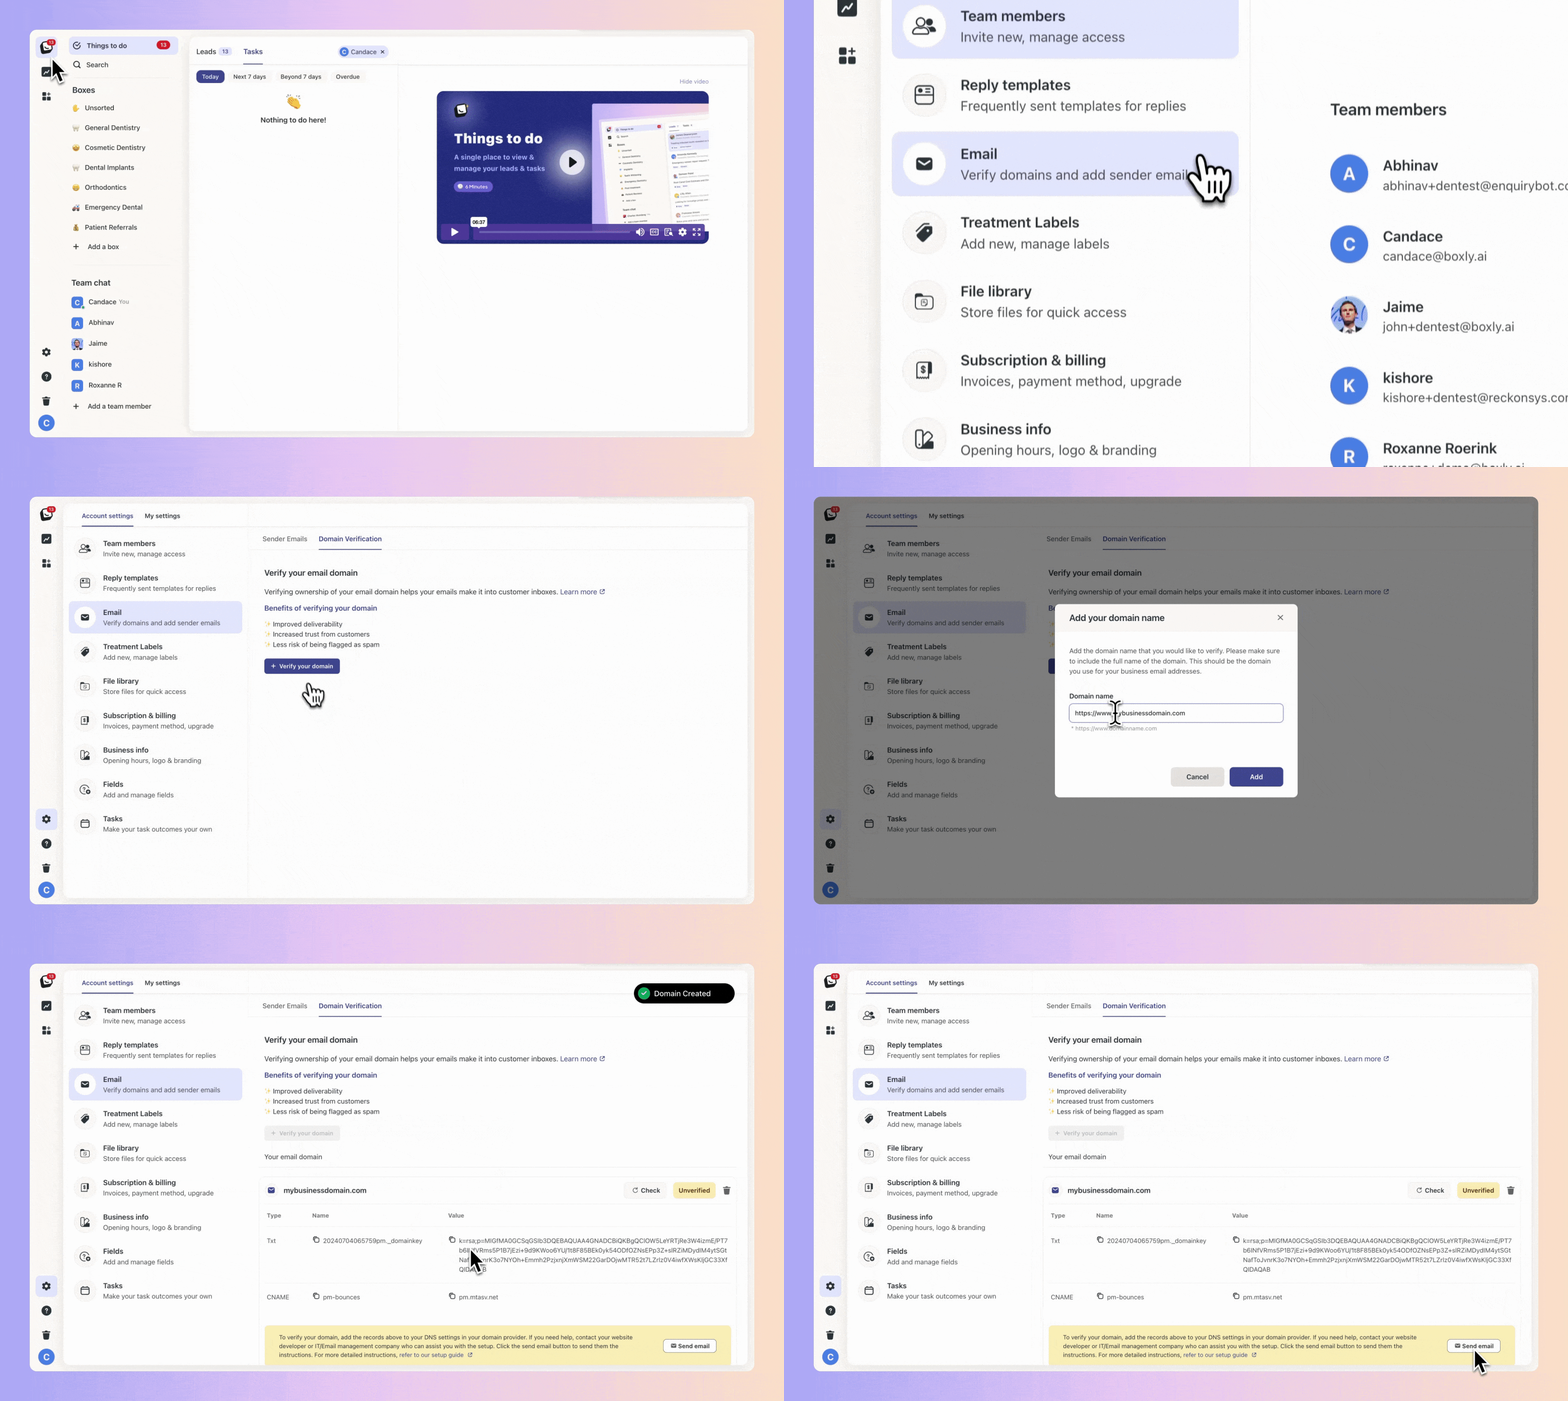
Log into Boxly and go to Account Settings > Email Settings > Domain Verification.
Copy the DKIM & Return-Path values provided.
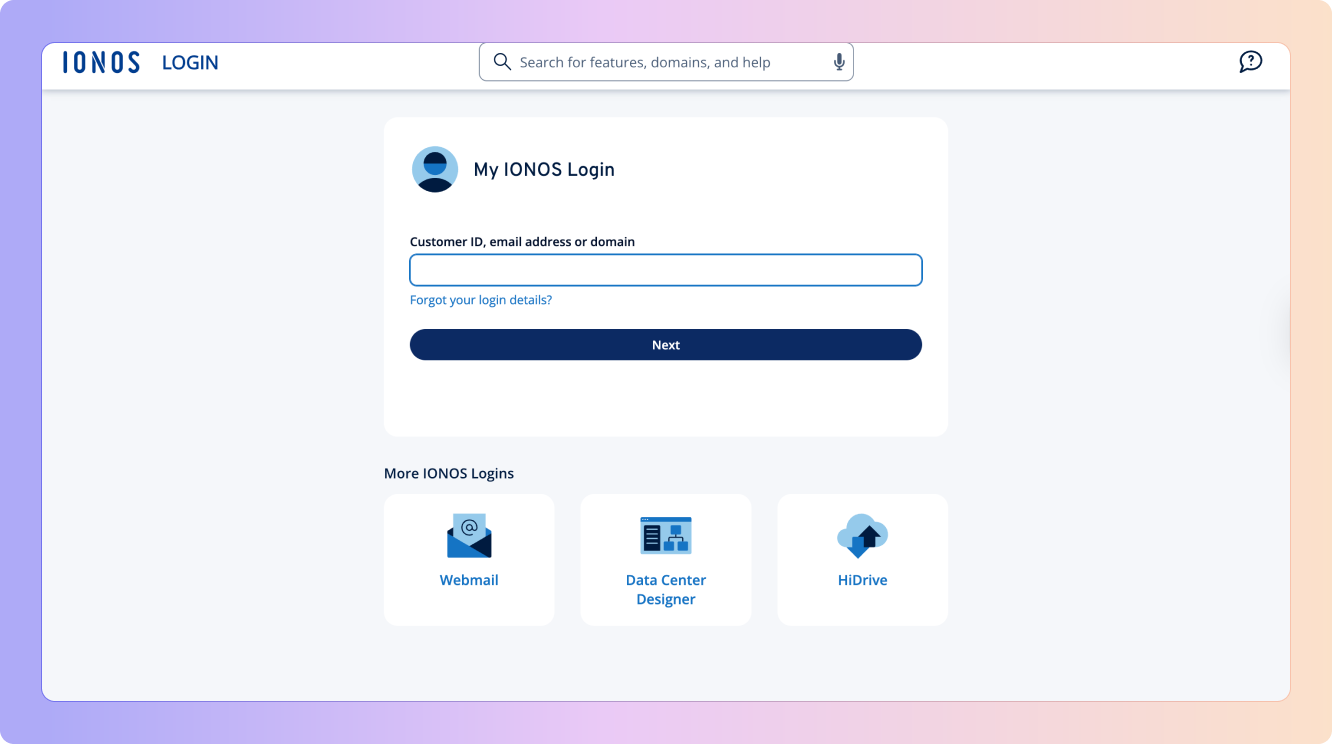
✅ Go to the place where you bought your domain: Log in to IONOS.
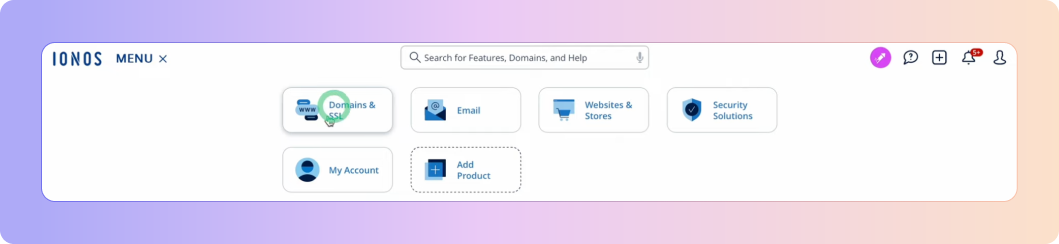
In the dashboard, click Menu then click on Domains & SSL
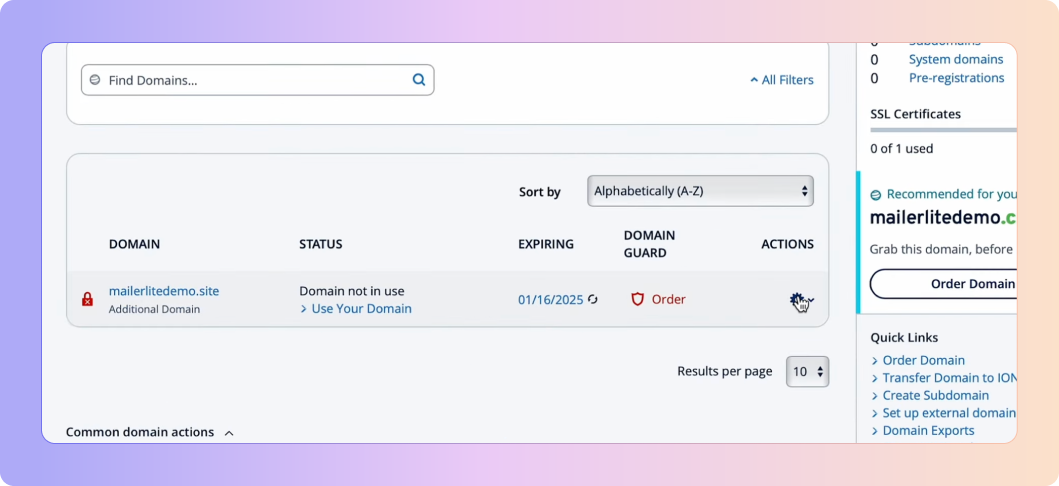
Find the domain you want to verify and click on the gear symbol under Actions and select DNS.
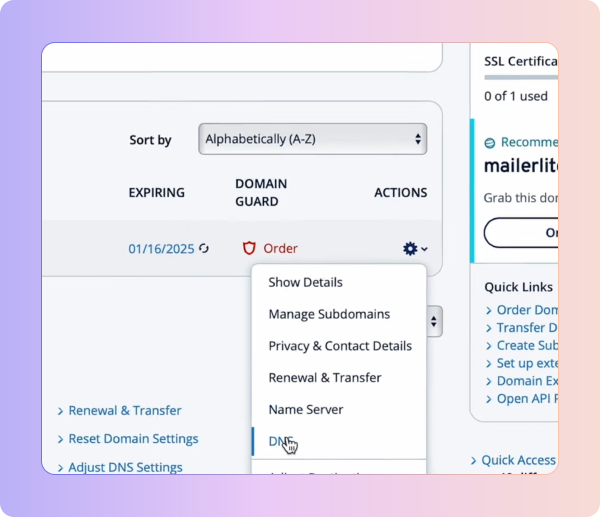
Click DNS Settings in the menu.
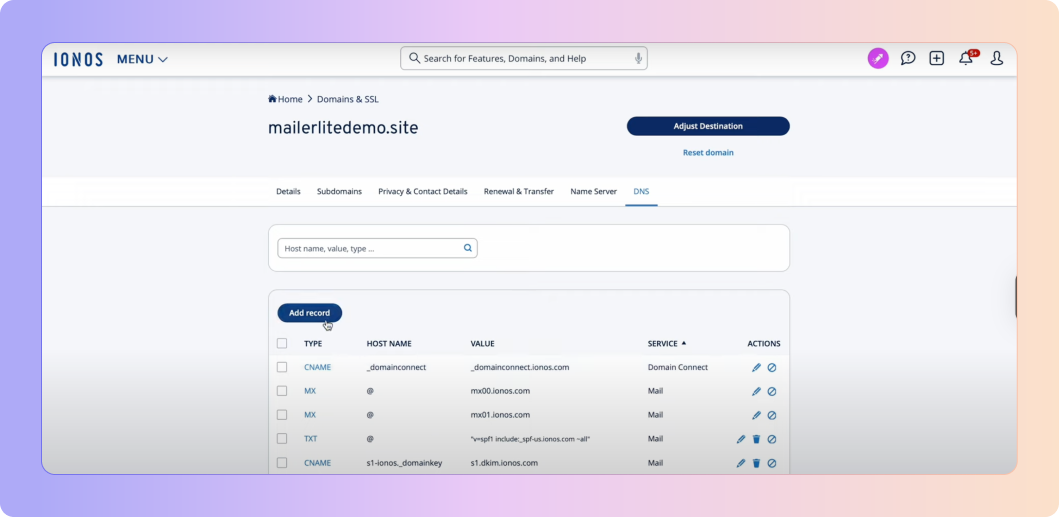
Click “Add Record” and select TXT under Type.
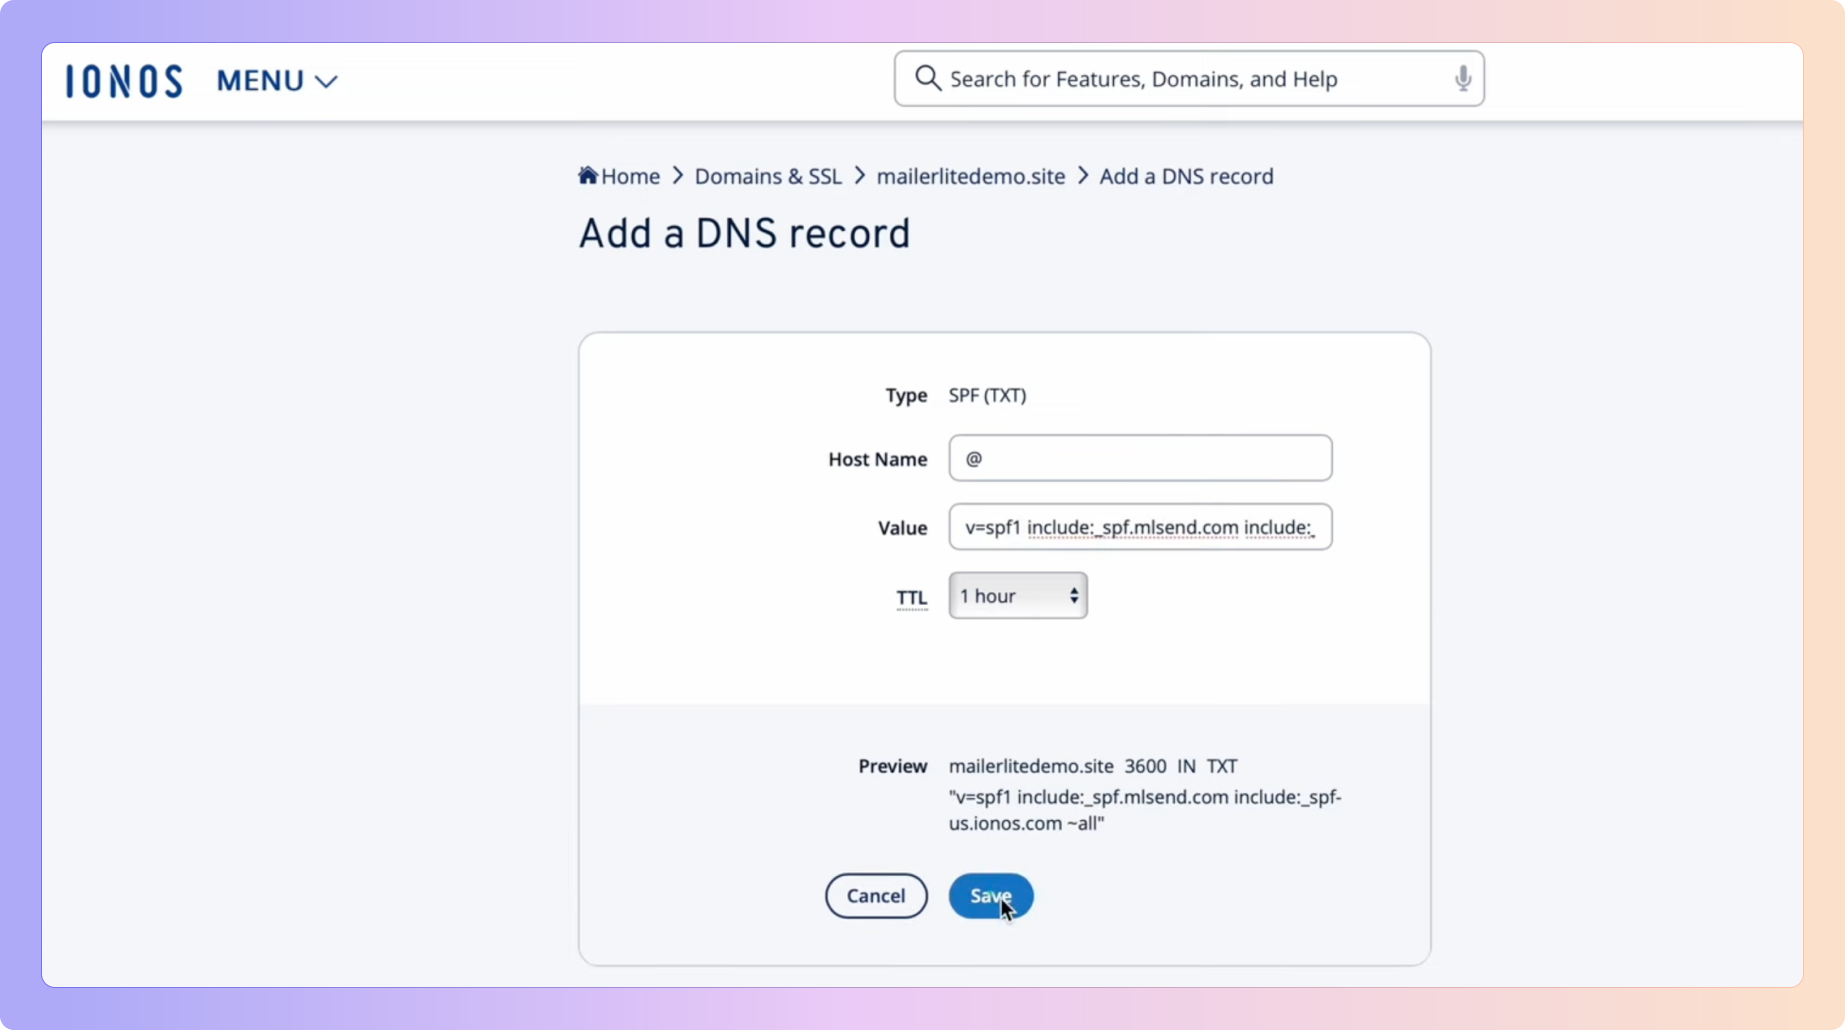
Type = TXT
Host Name: (Copy the name from Boxly, usually something like numberpm._domainkey)
- In the Host name field, specify the desired host, such as www or @. The @ character is used as a wildcard in this case and ensures that the domain is called with www and all subdomains.
Value: (Paste the long DKIM key from Boxly)
TTL: Leave as default or set to 1 hour
Click Save
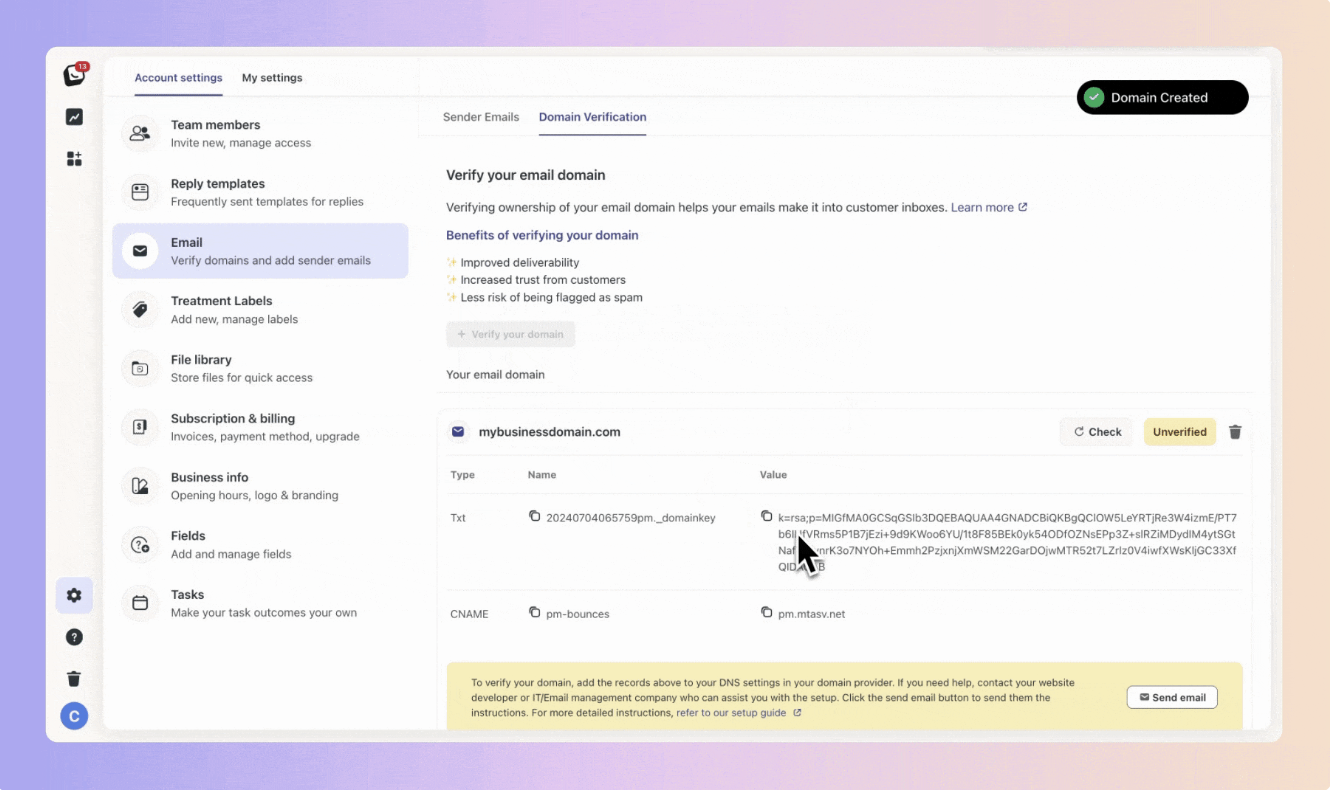
Think of the Return-Path as the "return address" on an envelope. It tells email providers where to send error messages, like when an email bounces because the address doesn’t exist or the inbox is full.
When Boxly sends an email on your behalf and it fails to deliver, the Return-Path is where that "bounce" information gets sent. This helps Boxly track failed deliveries and keep your email reporting accurate.
✅ Go to back to Boxly to find the details to enter into IONOS - the details are in the CNAME row for Return-Path verification.

✅ Add the Return-Path Record Details (CNAME) in IONOS
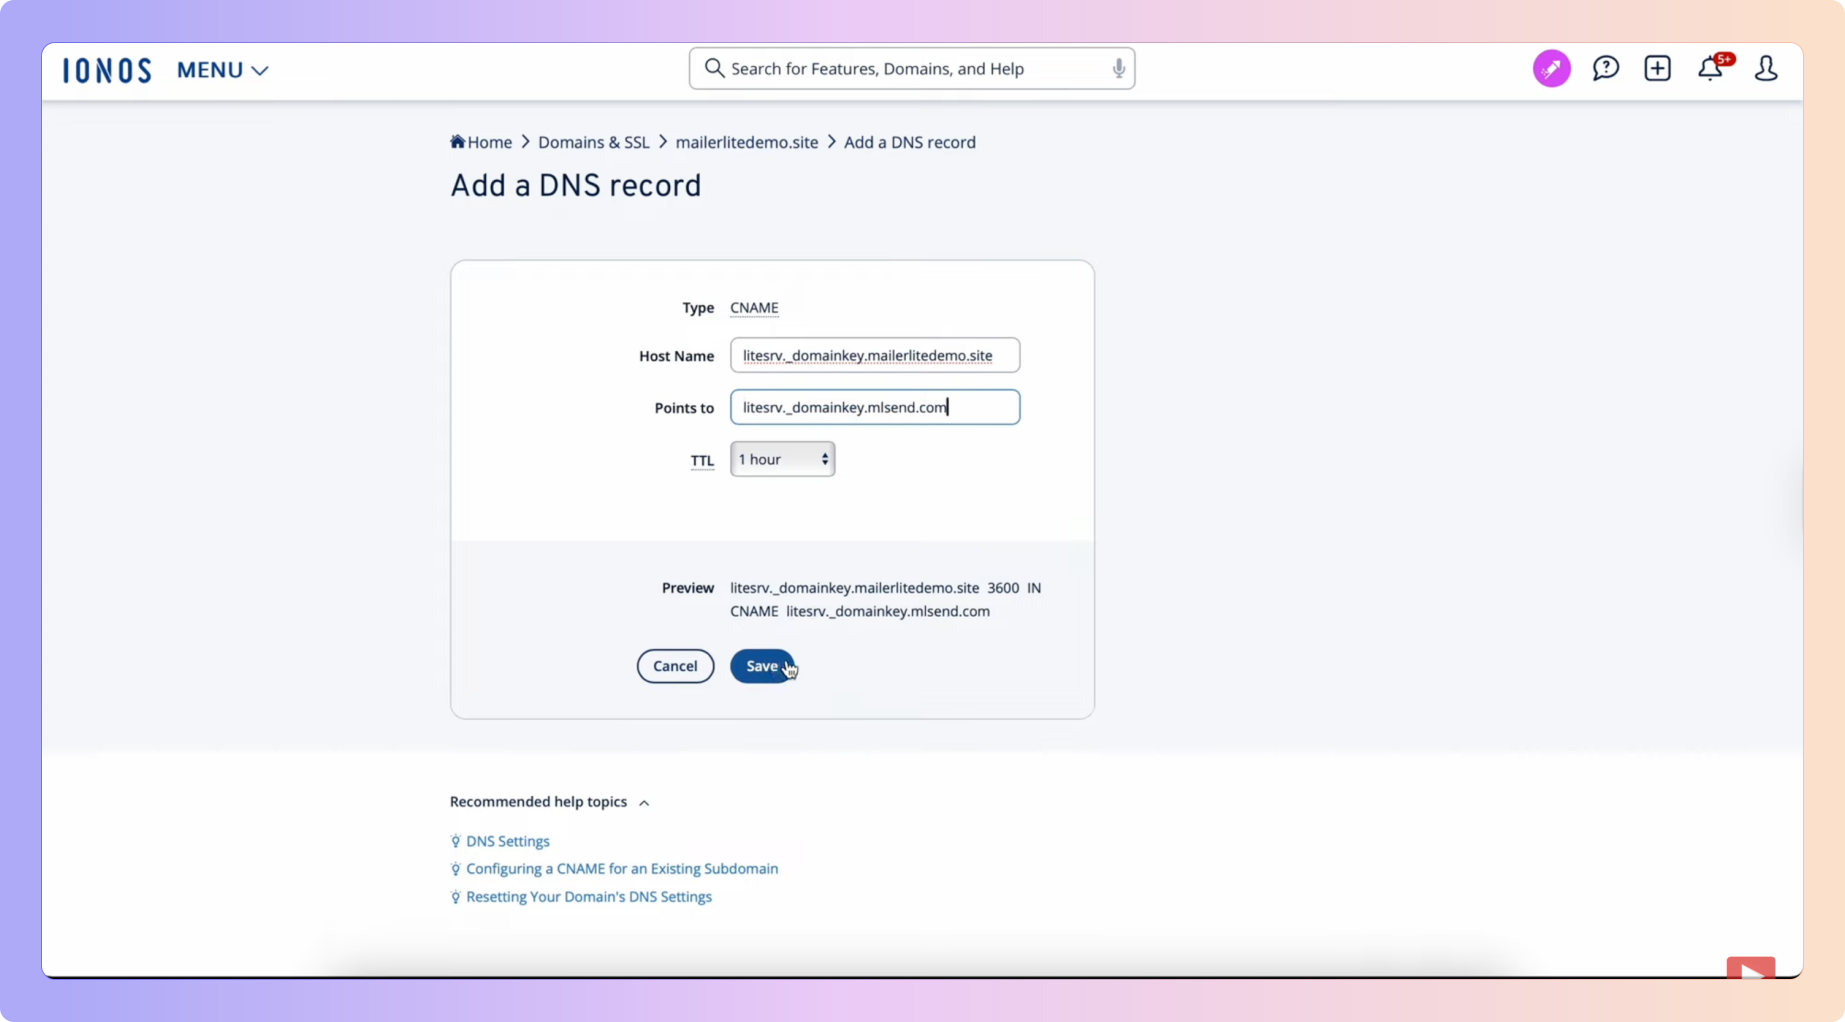
✅ Click “Add” in IONOS again
Type: CNAME
Name: Usually pm-bounces or similar, get this from Boxly
Points to: Enter in the CNAME value from Boxly
TTL: Leave as is
Click Save
Some extra information:
In your domain's settings (the DNS), you’ll need to create a CNAME record to set up the Return-Path.
A CNAME (Canonical Name) is a type of record that tells the internet:
"If you’re looking for pm-bounces.yourclinic.com, go check pm.mtasv.net for the real info."This connects your domain to Boxly’s email provider in a way that says:
“Hey, Boxly is allowed to handle email bounces for this domain.”
🎉 You’re Done!
Once verified, your emails will be authenticated and trusted by inboxes, improving deliverability and keeping communication professional.
💡 Still not sure? - View the Ionos website setup guide
Just ask Boxly’s support team at [email protected], or your domain provider’s support. They can often walk you through it or do it for you.
Make Sure Your Emails Land Where They Should: Verify Your Domain!
Ever wonder why some emails land straight in the inbox, while others end up lost in the spam folder?