The automation feature allows you to set up automatic actions within your Boxes to streamline repetitive tasks. This frees up your team's time to focus on more important work.
Creative Ways to Use Automation
Instantly greet new leads with a personalised message
Automatically escalate urgent leads to your A-Team
Create staggered reminder tasks/emails to team members at preset intervals
Go to Box Setup and click "Automations" or click the automation button in a stage to go directly to Automations, then click "+ Automation".
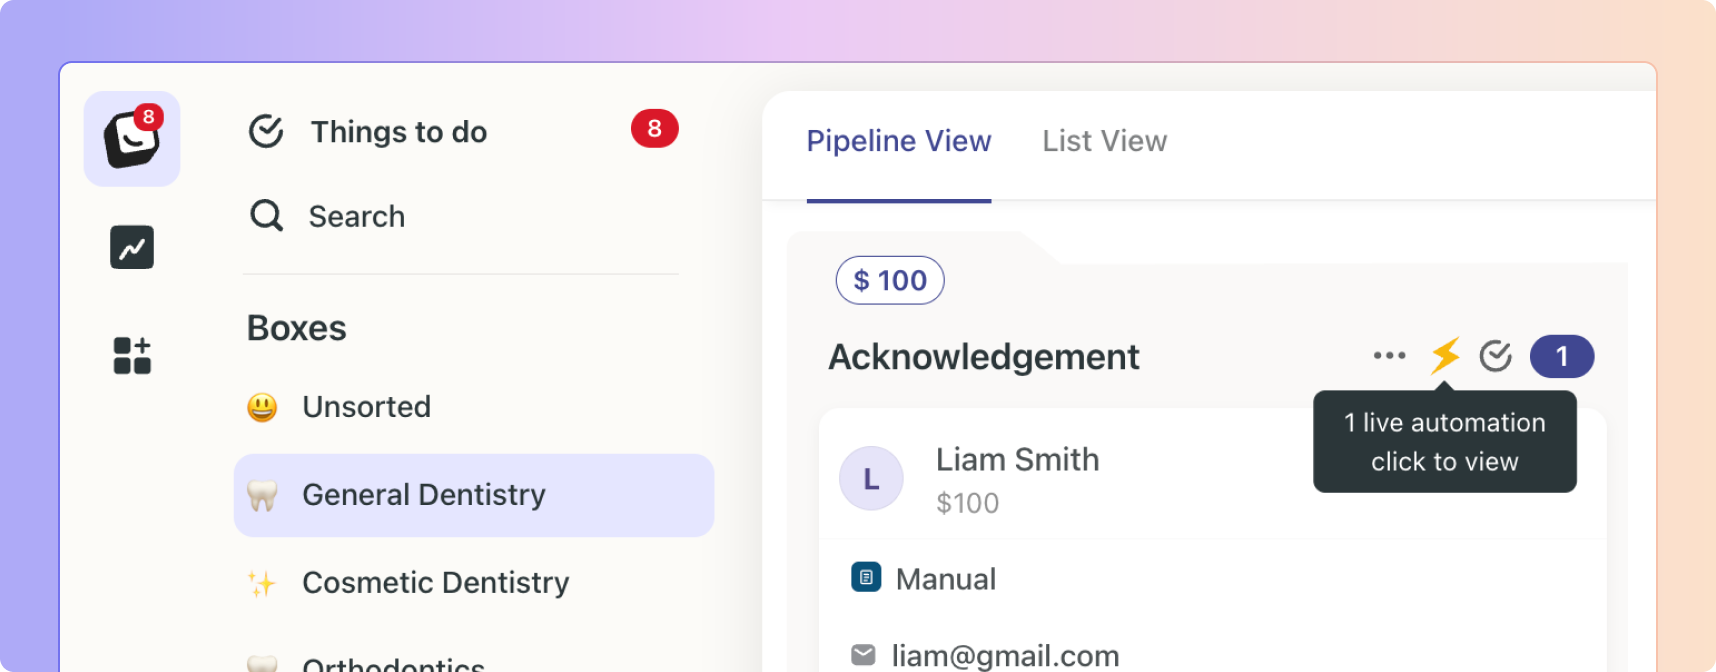
There are two options for creating a new automation
✅ Use a Template (only available for Dental customers at the moment)
✅ Create From Scratch
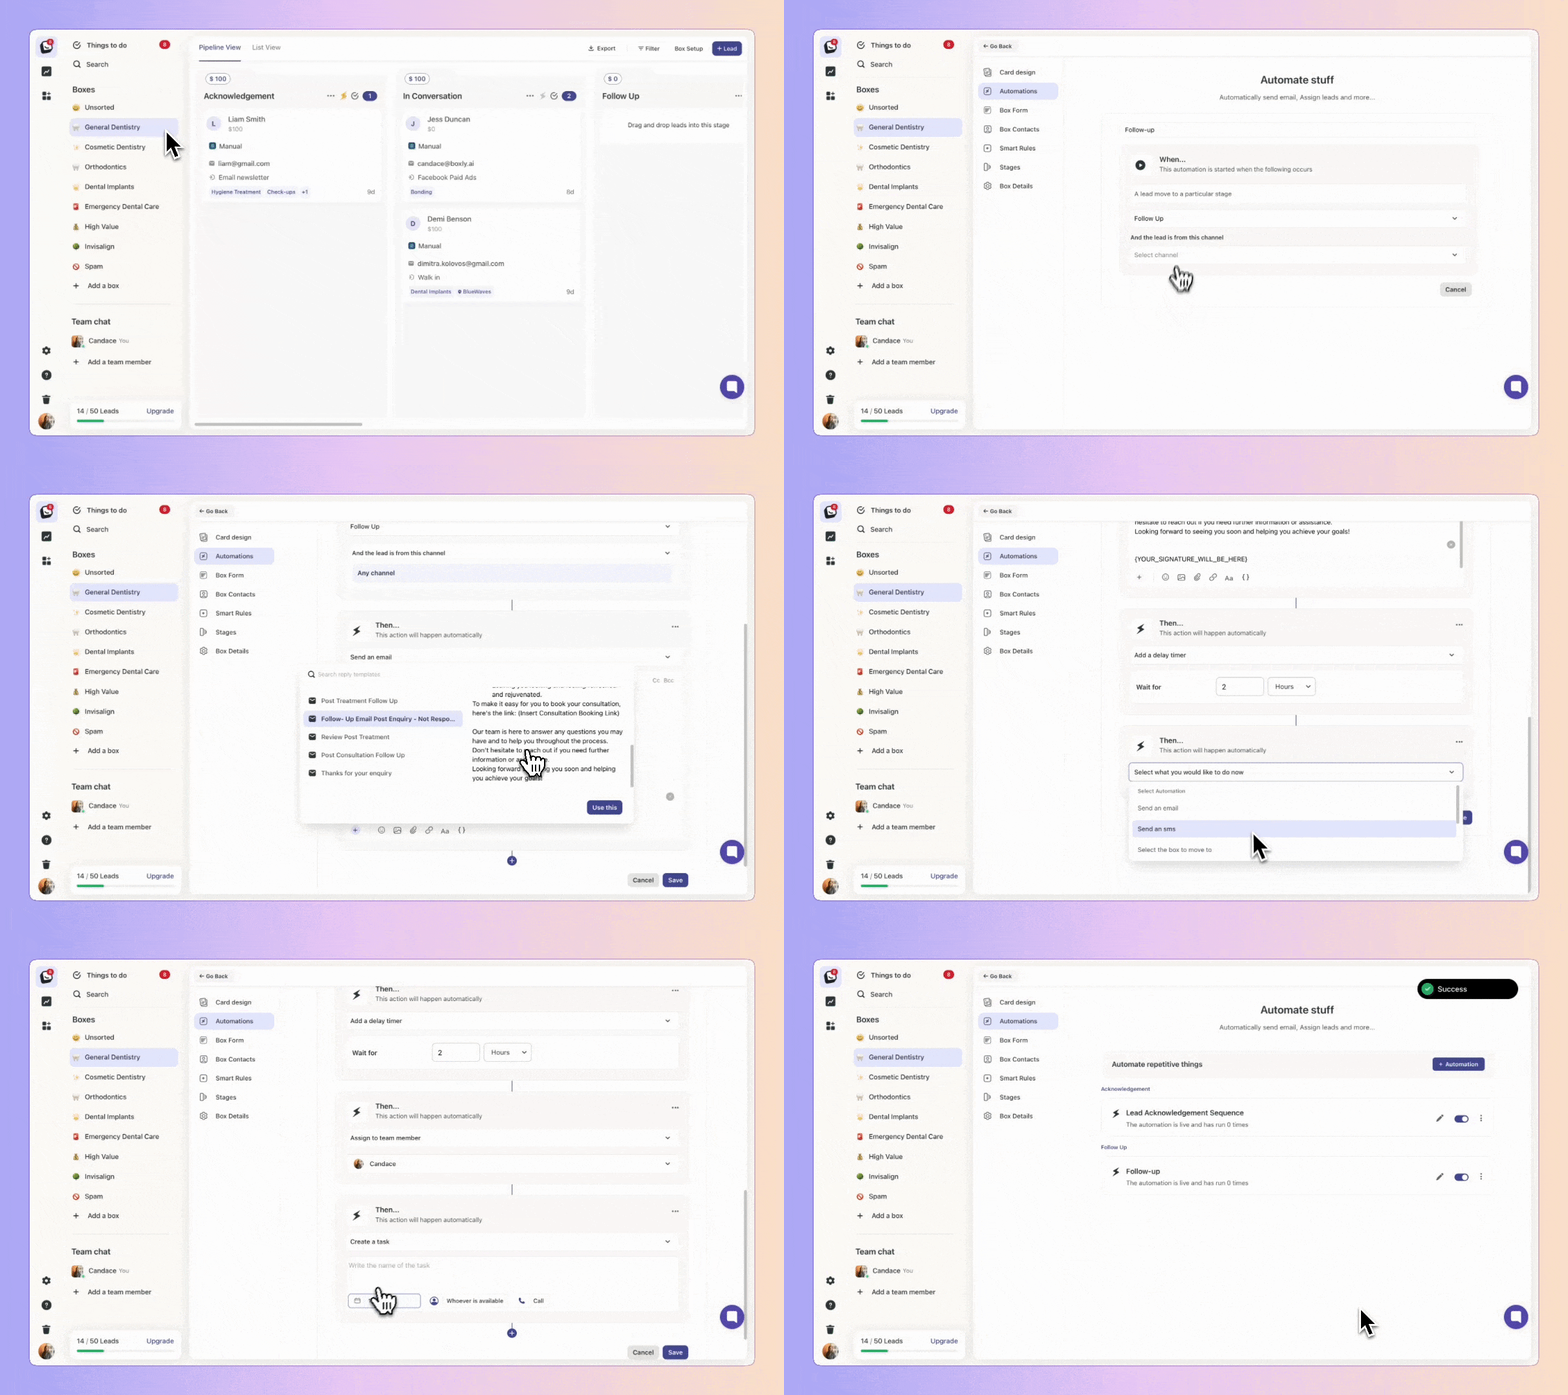
Click "+ Automation" and then "Create From Scratch".
Give it a descriptive name for easy reference.
Choose which Stage you want the automation to start on. When a customer lead reaches that Stage, the automated steps you configure will trigger.
Select which Channels the automation should apply to, or "Any Channel" to run it for leads from all channels.
Use the "+" button to add sequenced steps to your automation, such as:
When Leads Reaches Stage 1
Send Welcome Email Template
Delay 2 Hours (toggle on Business hours settings)
Assign to [Team Member]
Schedule Follow-up Call Task
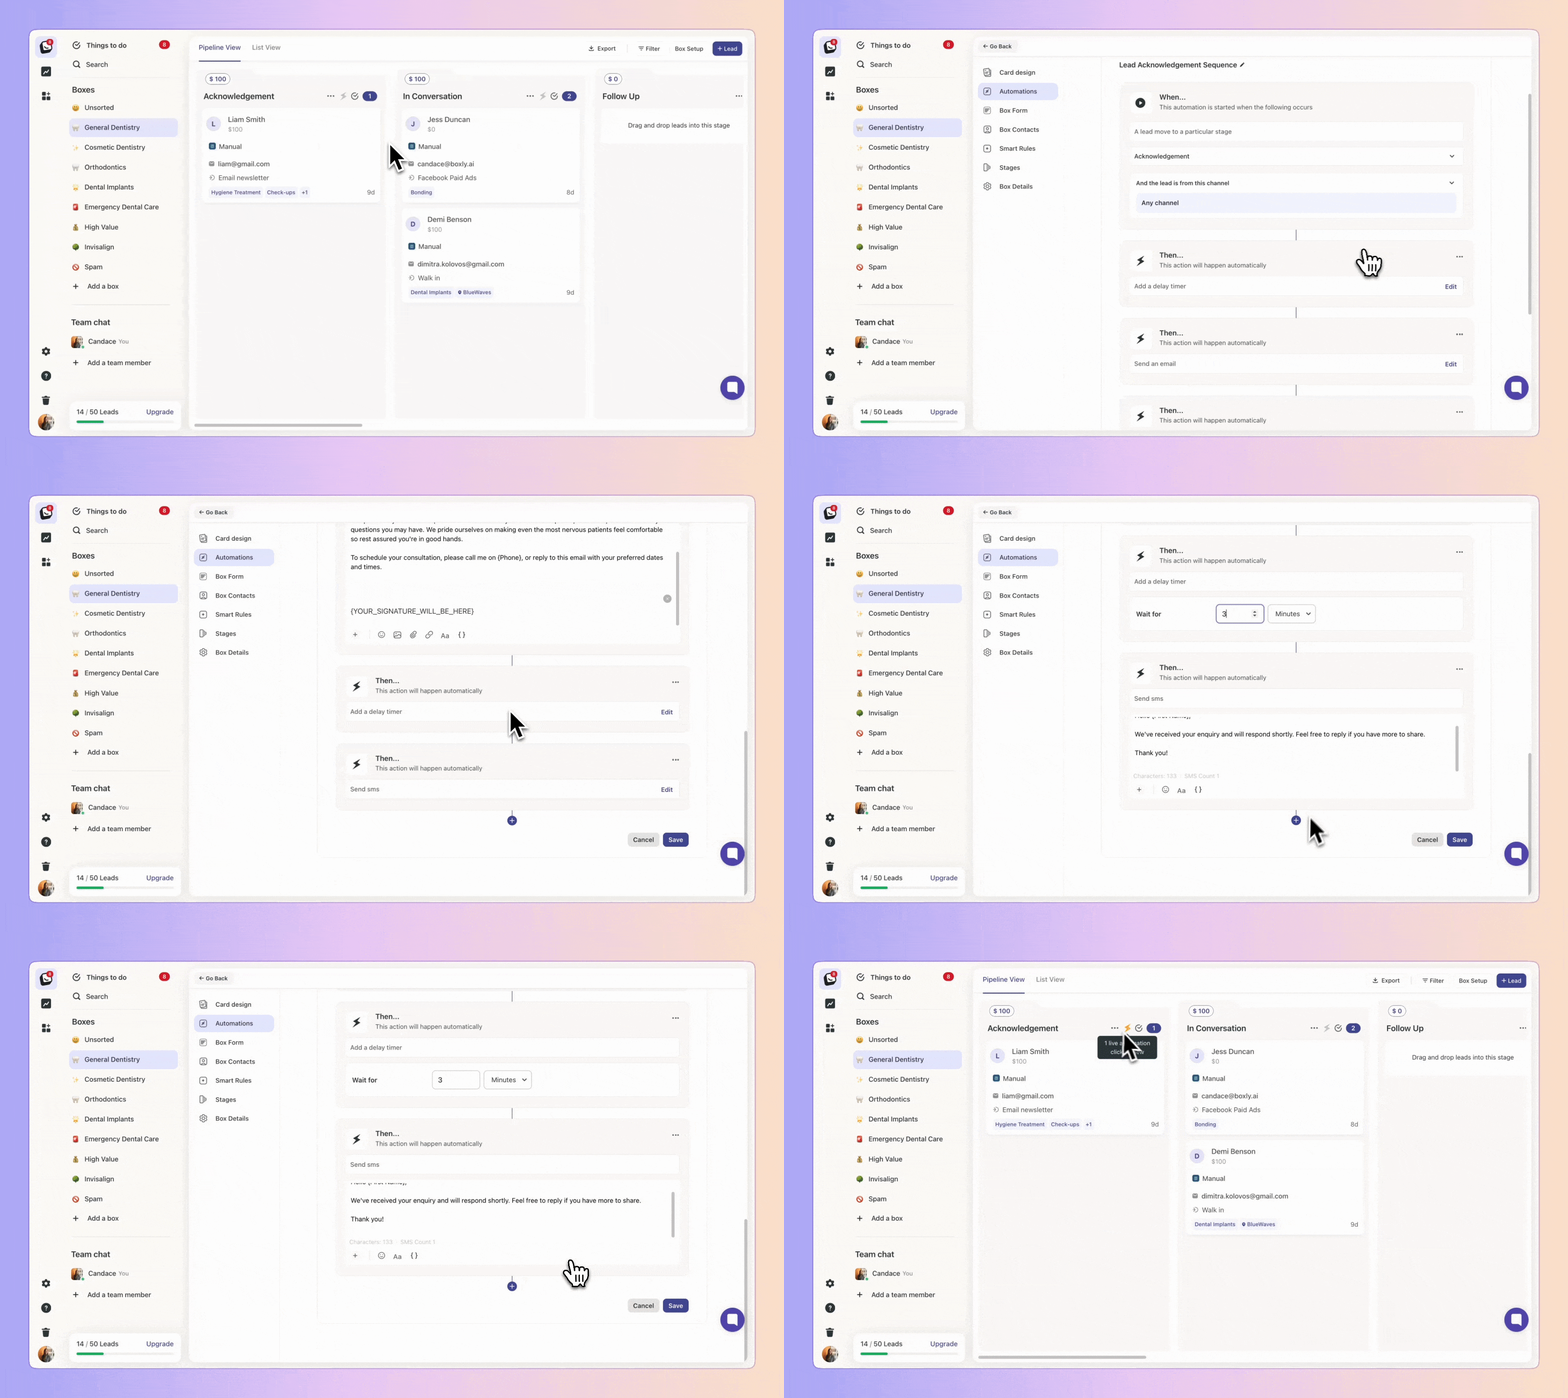
Click "+ Automation" and then "Use a Template".
We've included 3 templates to choose from:
Lead Acknowledgment Sequence
No response follow-up sequence
90 Days re-engagement sequence
You can edit a template and click "Save" or just click "Save" if you want to leave it as is.
Remember to switch the automation on once it's been created!
We’ve added two powerful upgrades to Boxly Automations that give you more control and faster responses.
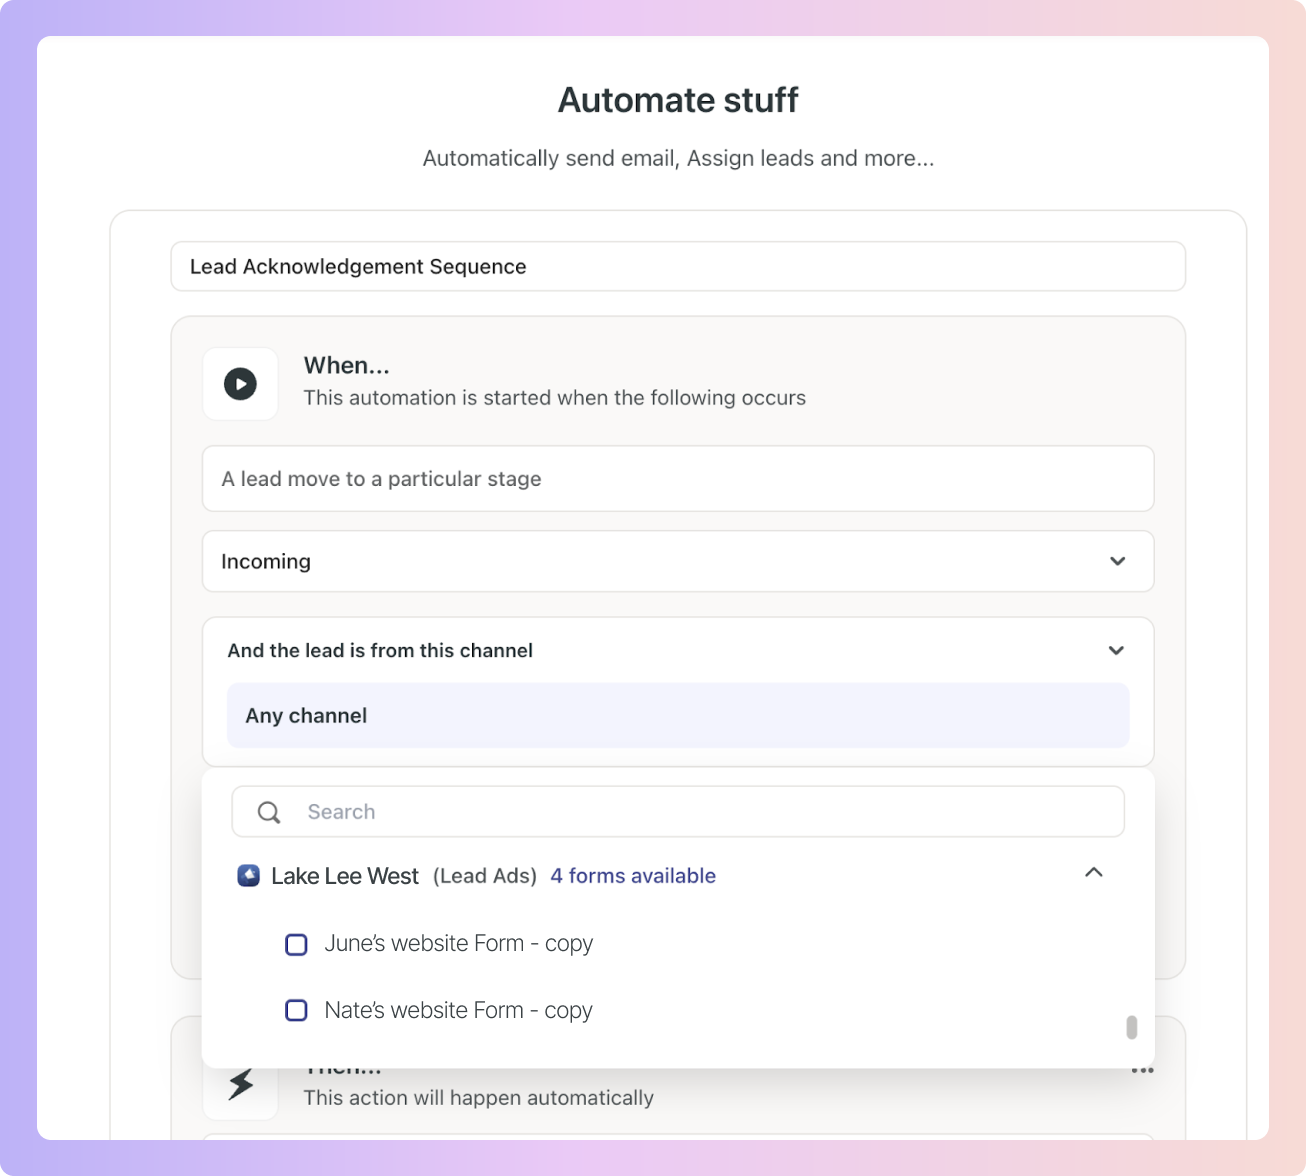
Sub-Channel Routing: Choose specific lead sources (like forms, email addresses, or Facebook ad sets) when building automations, get super targeted with how leads flow.
Facebook & Instagram Auto Replies: Instantly respond to leads messaging you via social DMs with automated replies. No lead left waiting.
This gives you better control, faster responses, and more flexibility.
❌ You couldn’t send auto-replies to Facebook or Instagram leads.
❌ All forms, ads, or emails under a single channel were treated the same. No way to personalise flows.
This slowed response times and reduced conversions.
✅ Sub-Channel Targeting
You can now set automations for specific sources inside a channel, for example:
Automate flows for different Webform → “Homepage Form” vs. “Landing Page Form”
Target specific Facebook Ads → “Summer Campaign Ad Set”
Target specific Emails → “[email protected]”
✅ Automated Social Replies
Send auto-replies to Facebook and Instagram messages.
Add a delay (e.g. reply after 2 minutes if no one responds manually).
Keep leads engaged even when your team is busy.
Go to Automations.
In the Channel dropdown, you’ll see:
“Any Channel”
Each main channel (Webform, Facebook, Email, etc.)
Expandable lists of sub-channels for each.
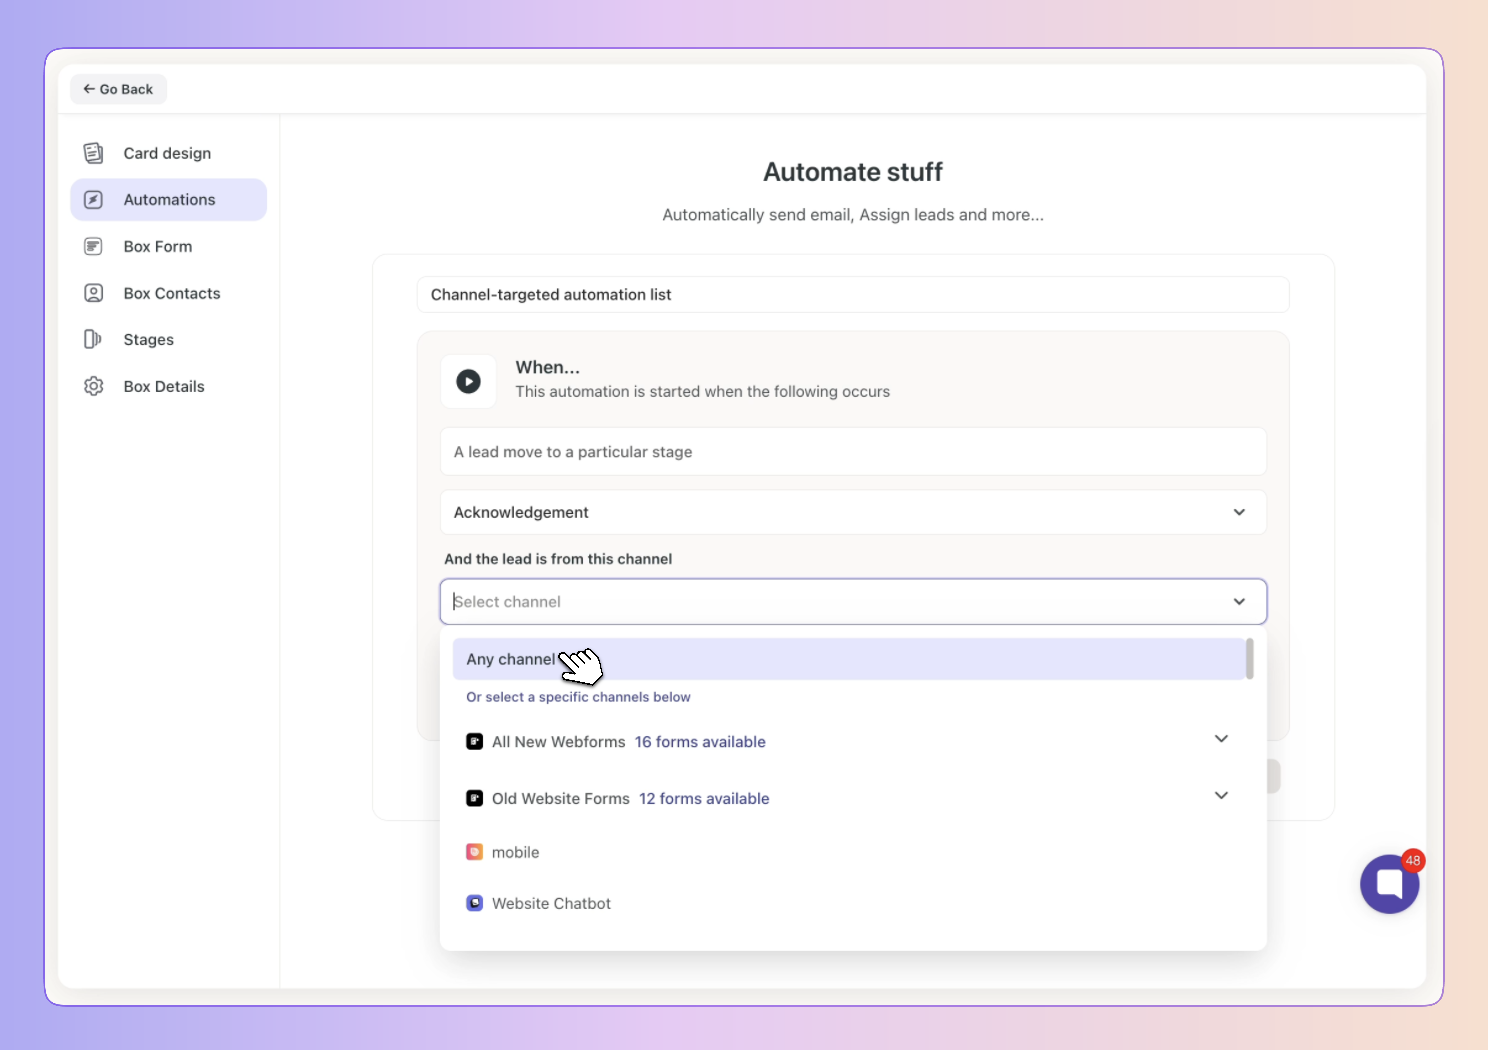
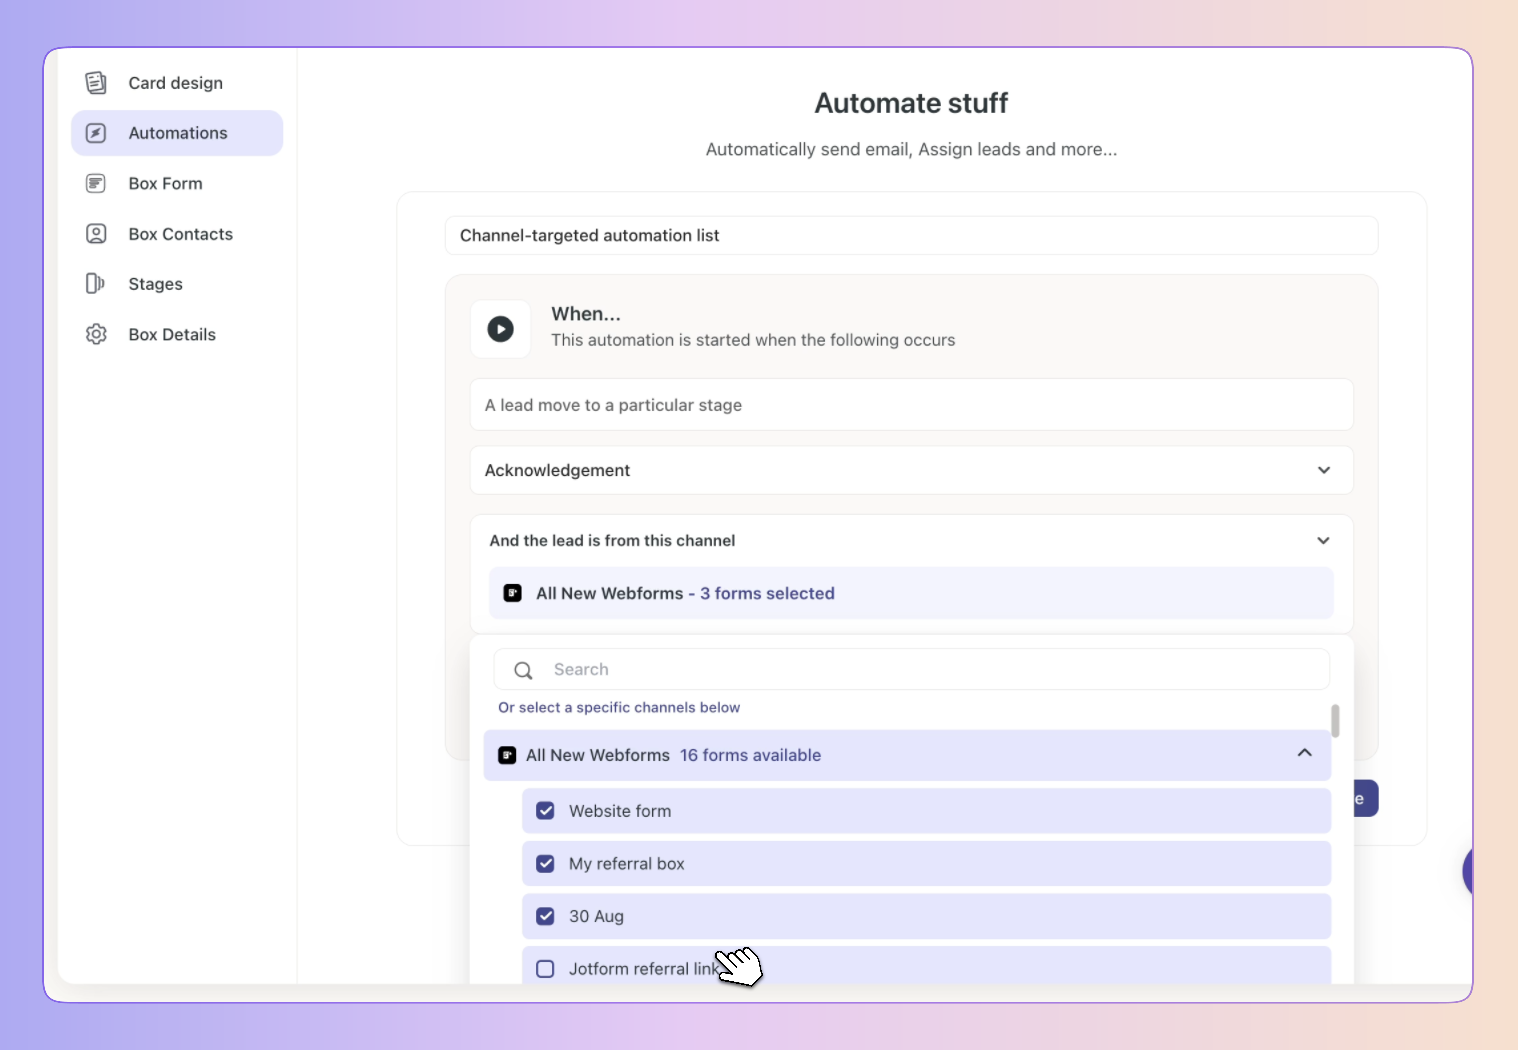
Select a main channel to include all sub-channels.
Or unselect and choose individual sub-channels.
You can also search by name and see how many options are available (e.g. “20 forms available”).
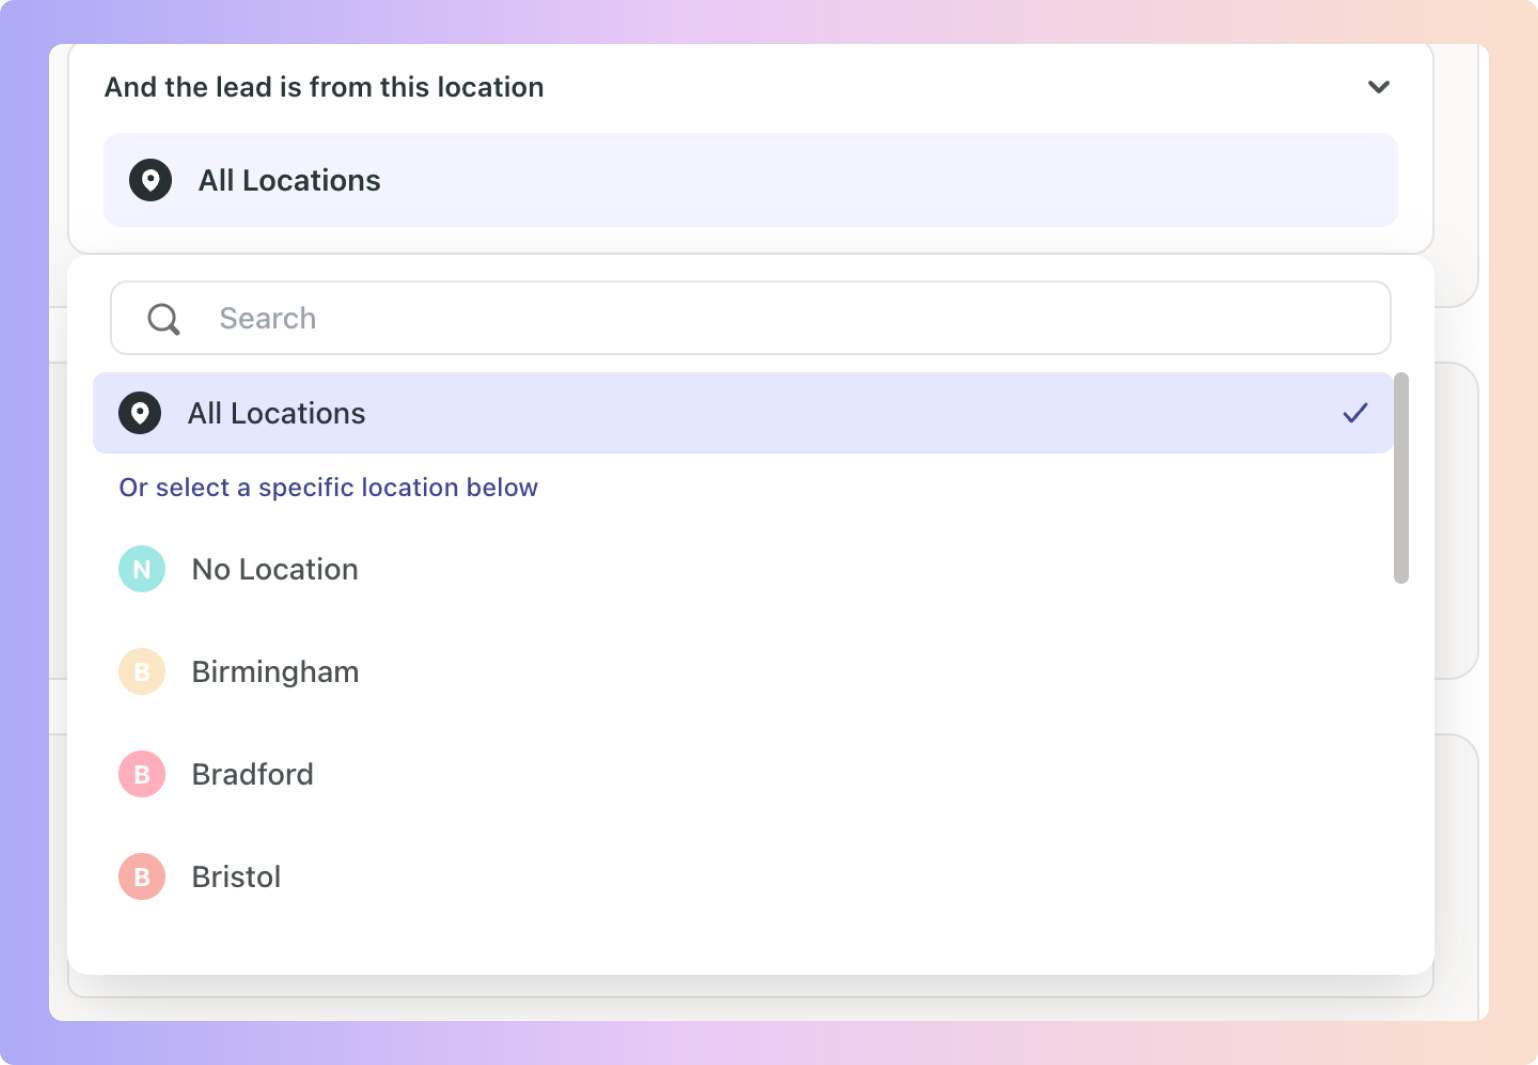
Location Targeting Update
You can now select “No location” or Multiple locations.
Simply click on the locations you want included in the automation.
While building an automation, choose Facebook or Instagram as the channel.
Write your reply message.
Set a delay (e.g. 2 minutes).
Save your automation.

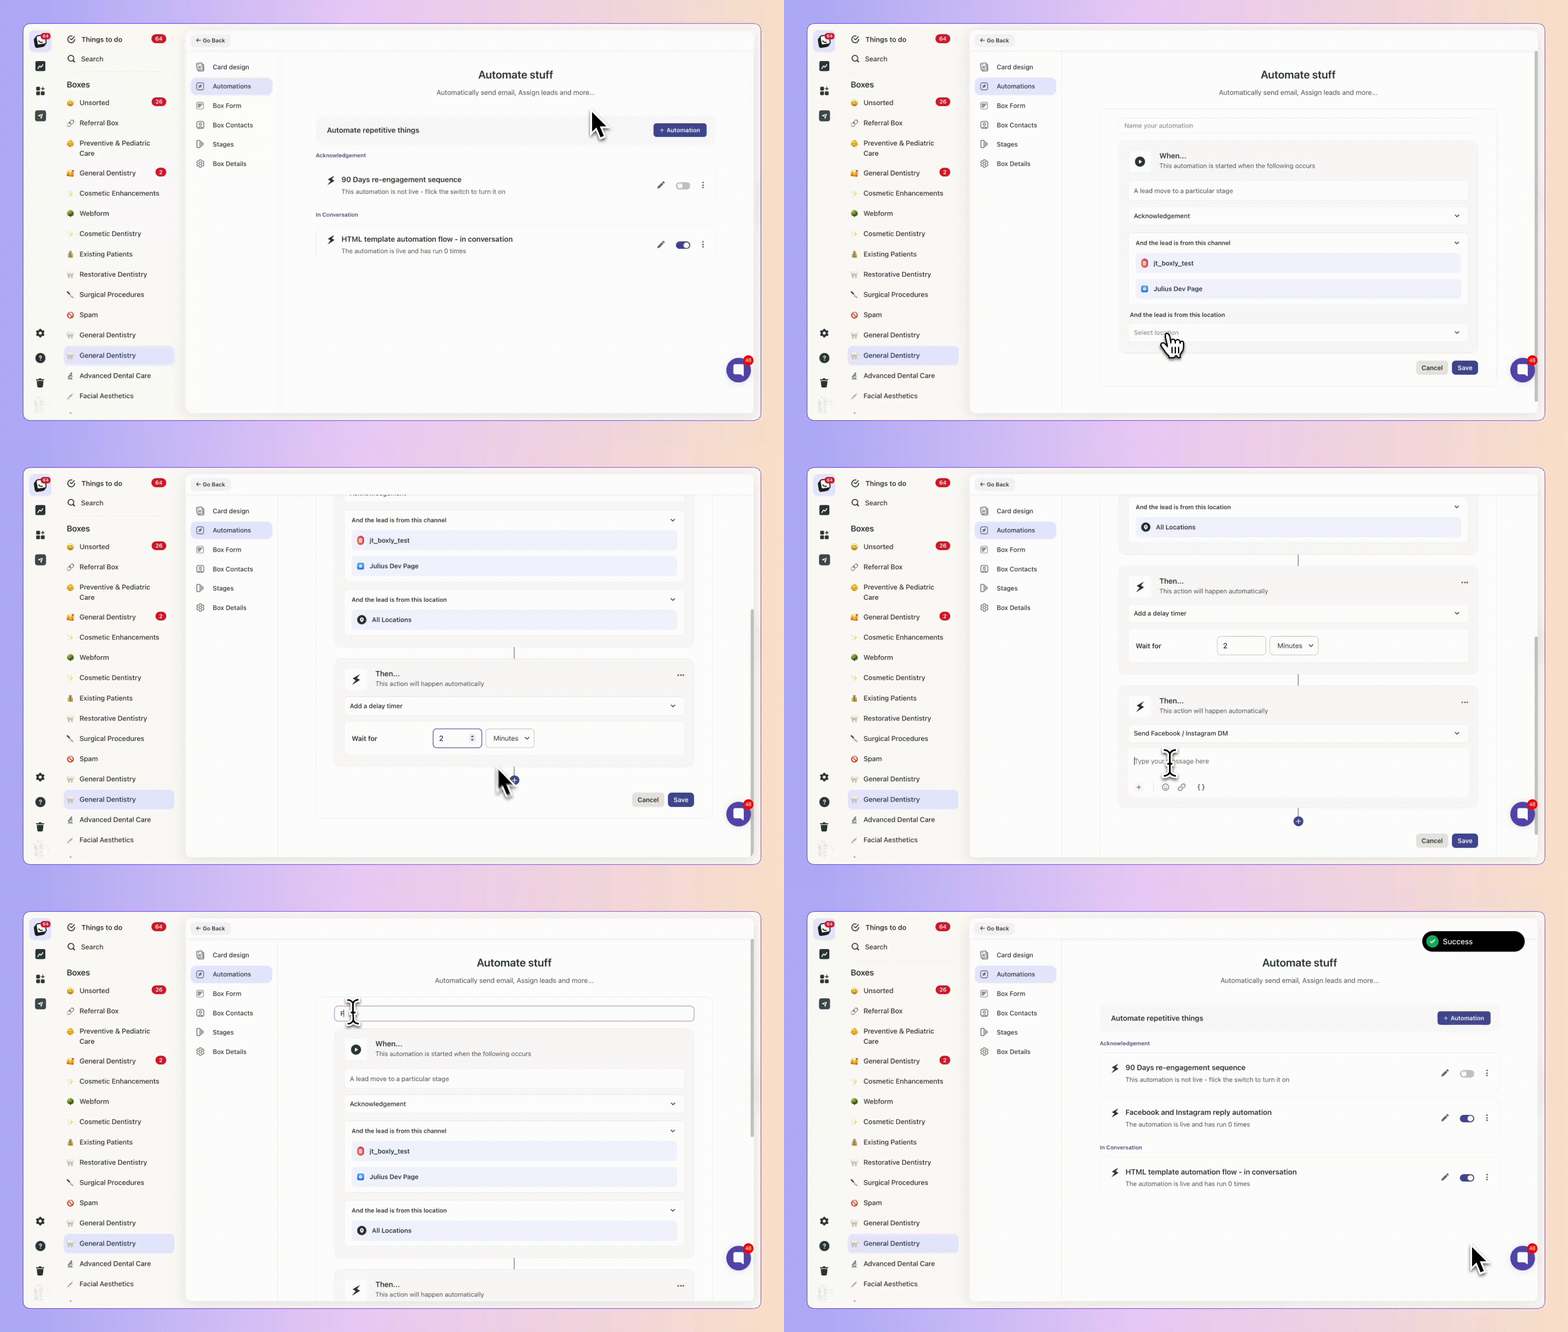

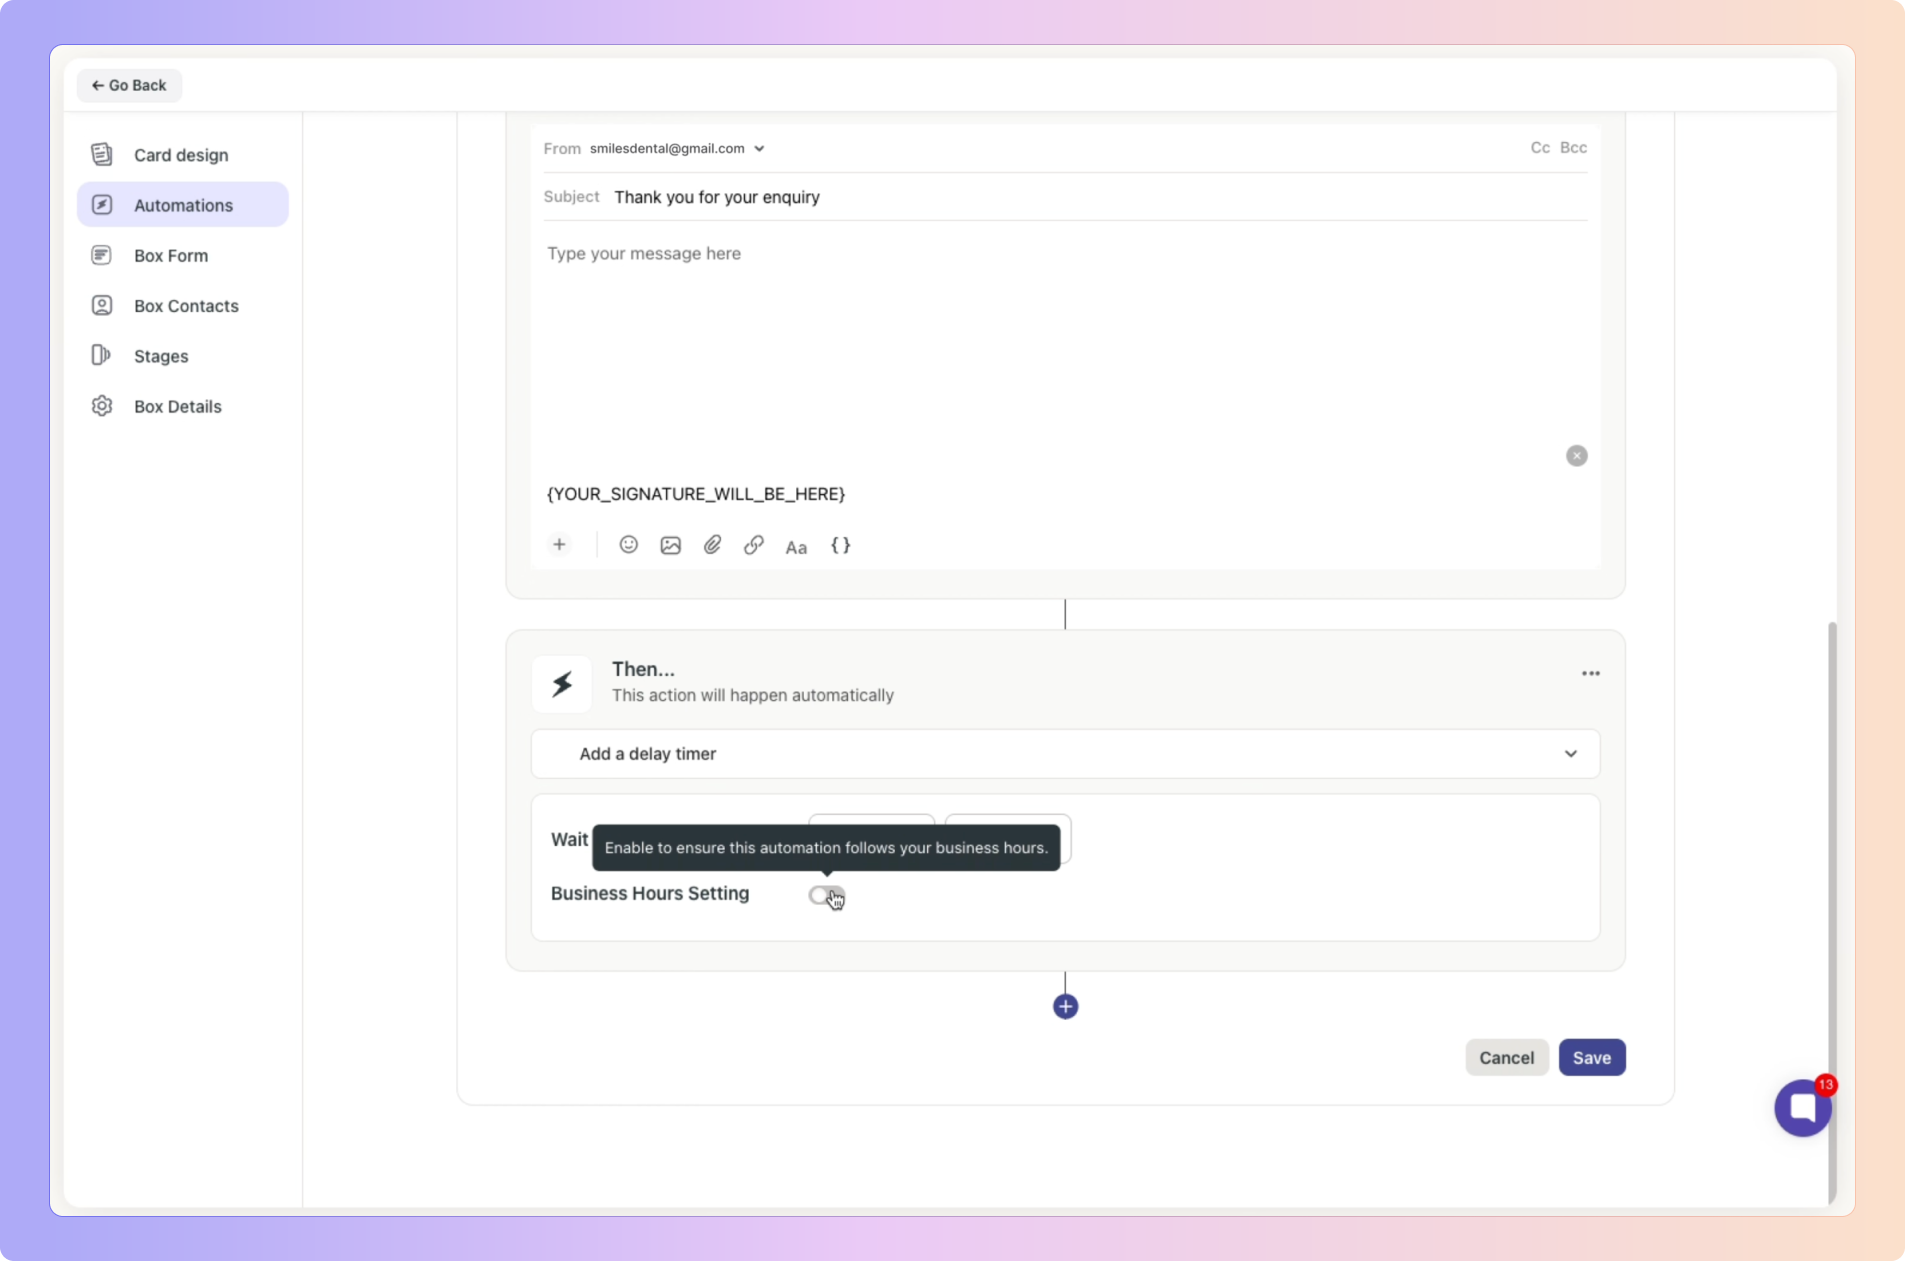
The new Business Hours toggle within the delay timer allows you to create automations which respects practice opening hours, so messages only go out when your team is available.
Real-Life Use Cases
✨ Have 5 different Facebook ads? → Trigger different flows for each ad set.
✨ Two email addresses? → Assign leads from each to different team members.
✨ Busy hours? → Auto-reply to Instagram leads with a friendly wait message.
You can’t select a main channel and only some of its sub-channels at the same time.
If a Facebook/Instagram connection expires, auto-replies will pause until reconnected.
If a team member replies before the delay ends, the auto-message won’t send.
Deleted sub-channels will disappear from your automation list, and that automation will be flagged for review.
Instantly sending emails or text messages to customers when they reach specific stages in your process. For example, sending a welcome message when they first submit an lead.
Automatically moving customers to the next appropriate stage once they meet defined criteria. For instance, moving them from "New Lead" to "In Progress" once a team member has been assigned.
Assigning leads to specific team members automatically based on rules and criteria you configure.
Building in timed delays between process stages to create staggered, sequenced actions. You could set a 1 hour delay before sending a follow-up email to make it feel less “automatey”.
Remember to toggle on your Business Hours toggle to avoid tasks sequences when you aren’t at work.
Automatically adding internal notes to customer leads for easier reference later.
Creating scheduled reminder tasks and follow-ups for your team at set intervals, such as scheduling a call back 3 days after initial lead.
Key Benefits:
Saves time spent on repetitive tasks
Ensures consistency in multi-step processes
Enables your team to focus on high-value activities
Customises each Box's processes
✨ Click below for automation examples
Automation Examples