✅ Click on the Reporting icon in your left toolbar
✅ In the dropdown list of reports you’ll see on the left, click on the Dashboard Report to explore.
The updated dashboard gives you a clear snapshot of how your business is performing. It uses the same date filters as in the list view, so everything stays consistent.
Your dashboard gives a quick view of how things are going. Apply a date filter, and everything updates to show all relevant info.
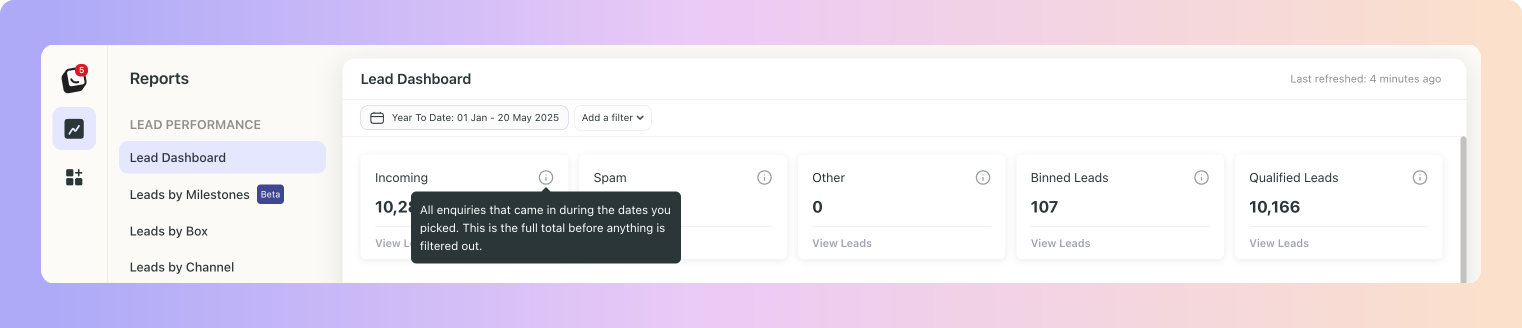
Clickable Items: If an item has a subcategory, it will be displayed in a list format, you can simply click on it to explore further. For example, if you click on “Other” or “Spam”, you will see all the subcategories underneath and drill down into the actual leads in that category.
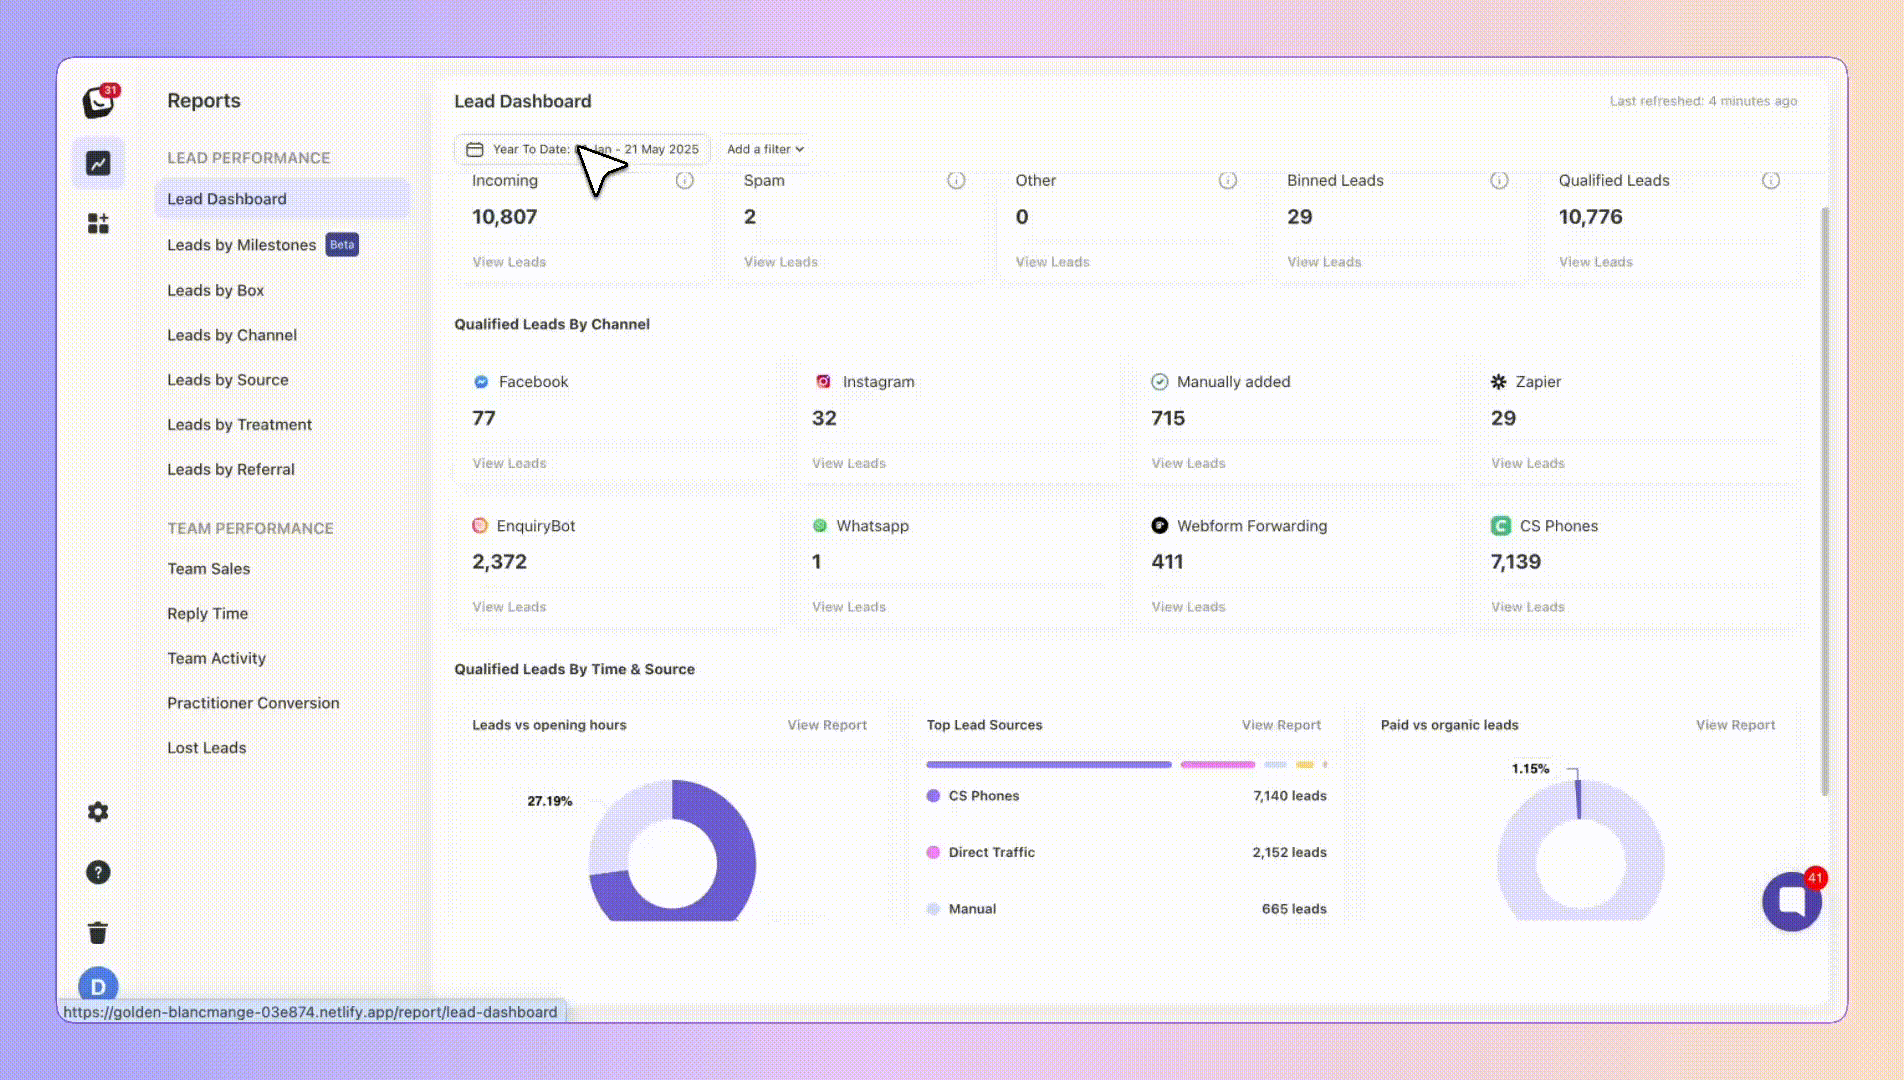
All of the data below will update according to the date filters applied:
Incoming: Displays all leads that entered the platform.
Spam: Shows all leads moved to spam, either automatically or manually.
Other: Leads marked by AI as not actual new customers, AI labels them as “Other”.
Bin: Leads that were binned.
Qualified Leads: All leads left after removing Spam, “Other”, and Binned from Incoming.
✅ Click on “Add Filter”
✅ Select the filter you want applied, like Sources
✅ The Filter’s options will appear next to “Add Filter”, select the specific filter within the category you chose. You can choose as many as you want.
✅ Click “Apply Filter” button on the right and your filter will apply to your report, when you’re done simply click on the red “Clear Filter” button that appears once you’re in a filtered view.
Location Filter: Only applicable if you’re on the Multi-Location Plan
You can also filter your Dashboard by your locations.
New and Improved Date Filter/picker
A new and improved date filter makes it easier to select and reset date ranges, giving you quicker access to the data you need.
With Predefined Date Ranges you can easily choose from preset options like "Last 7 Days," "Month to Date," or "Year to Date" to instantly filter reports.
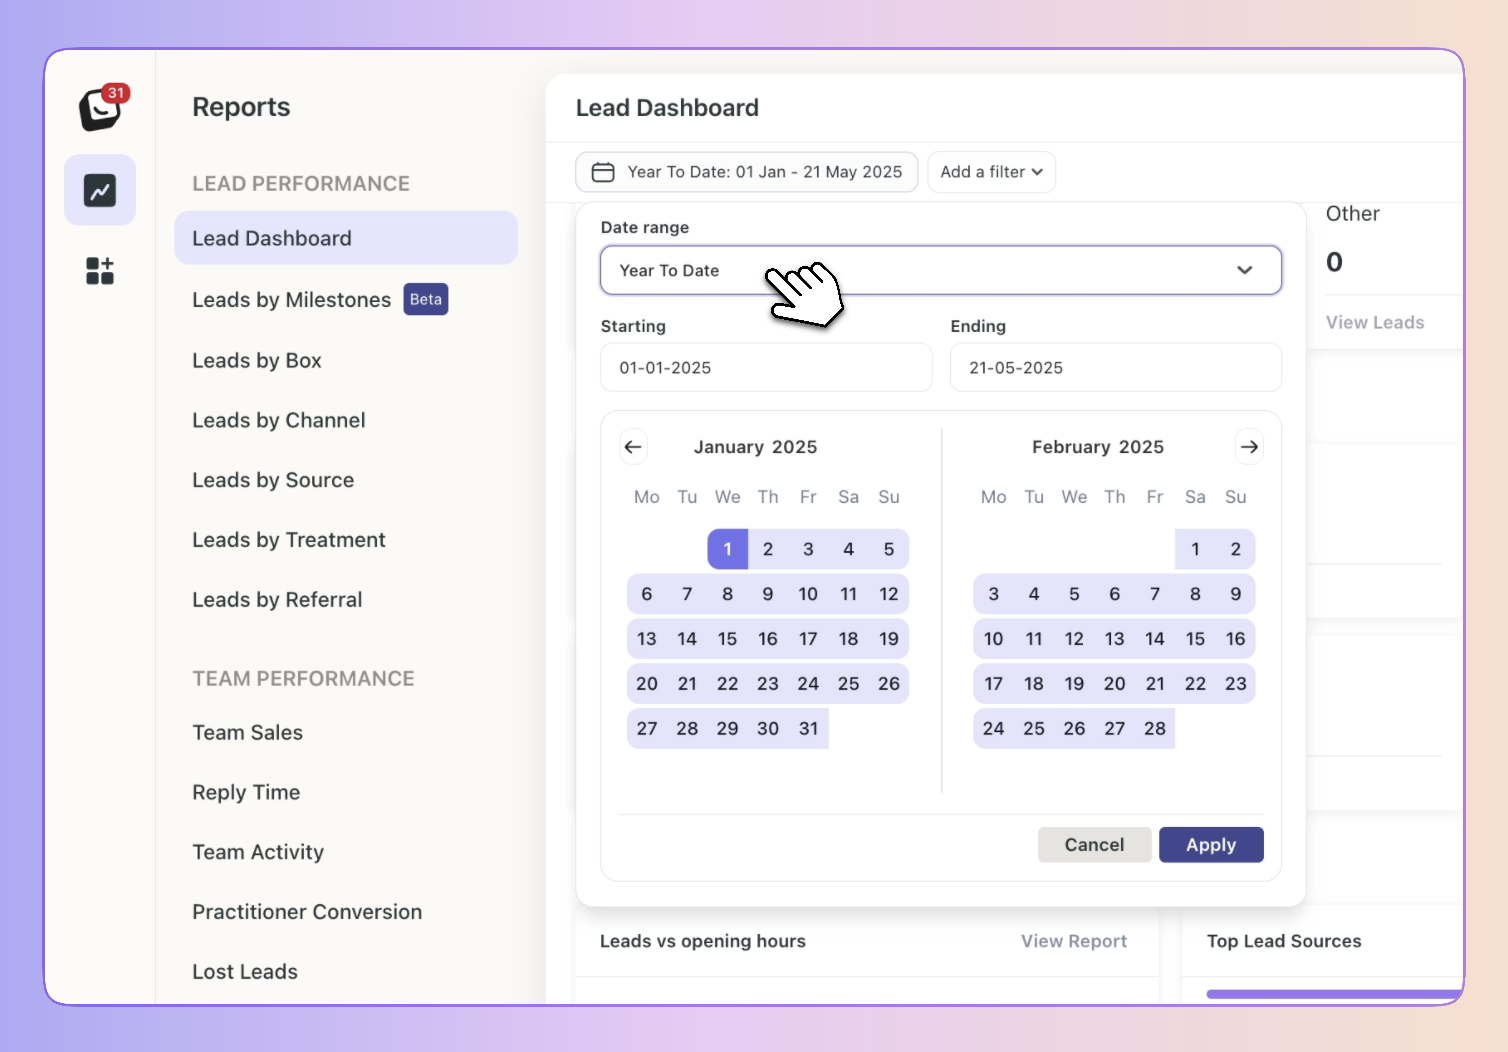
✅ Click on “Date: Last 3 months”, the default time is Year To Date
✅ Select the date you want applied as follows:
1. Date range -
Options include: Today, Yesterday, Last 7 Days, Last 30 Days, Last 90 Days, Month To Date, Week To Date, Quarter To Date, Year To Date, Last Week, Last Month, Last 3 Months, Last 6 Months, and All Time
2. Starting - Choose a date
3. Ending - Choose a date
✅ Click the “Apply” button
Head over to the Improved Reporting Filters & Share Functionality article for more info!
Improved Reporting Filters & Share Functionality
Reporting that provides you with a better view of what’s going on in your business
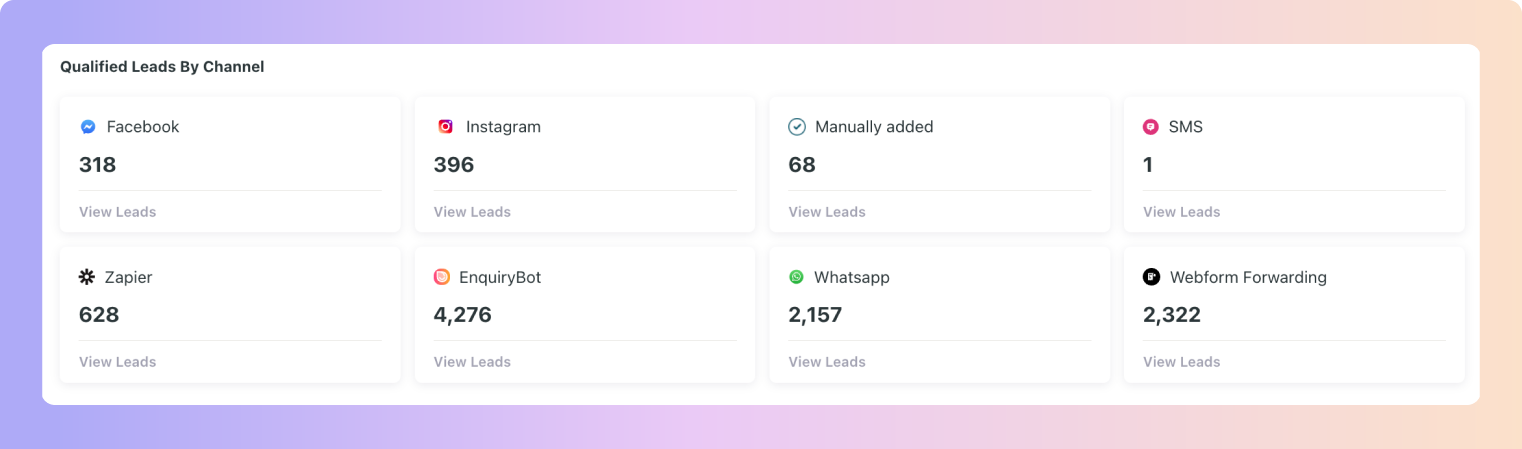
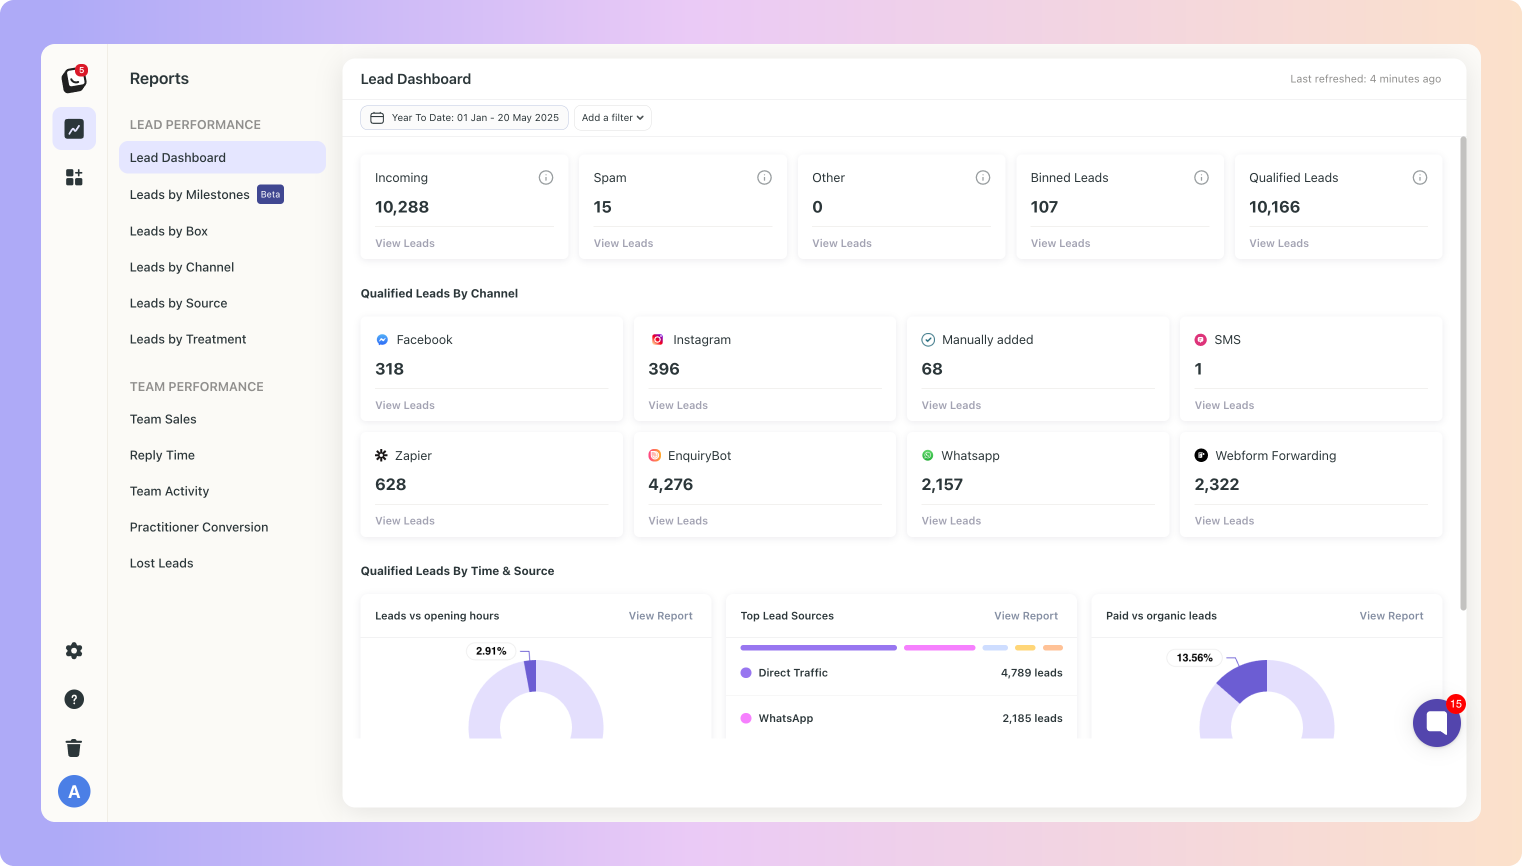
The “Qualified Leads by Channel” section of your reports show the number of leads remaining after removing spam, bin, and other leads.
✅ The leads are split into the channels they came through.
✅ You can click on each channel to see the actual leads.
✅ If a channel has sub-channels (e.g., Webform, Zapier, Email), these will be listed first. You can click on a sub-channel to see the leads in each channel.
For example: If you have 27 Webform leads and 25 Facebook leads in total, these numbers will reflect in the Qualified Leads by Channel report as shown above.
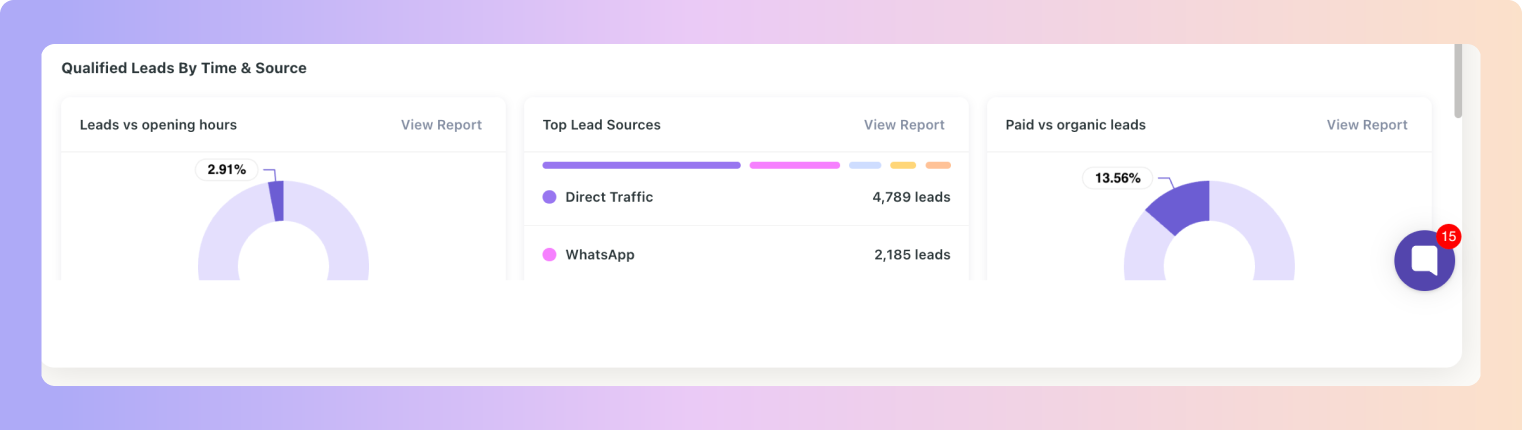
The “Qualified Leads by Time and Source” section of your reports display three key components:
✅ Leads vs opening hours: This report shows you how many leads come in during business hours versus outside business hours. If you have a vast amount of leads coming in outside of your opening hours your report will reflect this.
Click "View Report," to see the details of the leads that came in during business hours and those that came in outside of business hours.
✅ Top Leads Sorted by Sources: Leads will be grouped by their sources, shown in order from highest to lowest - View which sources (Google, Facebook, etc.) bring in the most leads!
Click on "View Report" to see all lead sources first and then by clicking, they can view individual leads.
✅ Paid vs Organic: This section will display paid and organic leads - this helps you understand how many leads come from paid versus unpaid channels.
Click to see the breakdown into paid and unpaid leads.
Then click on either option to explore the types of paid or unpaid leads.
Afterward, you can view the individual leads to explore further.